Entra Authentication
Microsoft Entra authentication enables the DW application to be connected with the Microsoft Entra ID app. Users configured in the Microsoft Entra ID app can then be used to access the DW application.
Microsoft Entra authentication supports two standard protocols: OpenID Connect and SAML (Security Assertion Markup Language).
OpenID Connect is the recommended and more modern approach, providing simpler configuration and better compatibility with modern applications.
SAML is supported for compatibility with existing enterprise environments where SAML-based single sign-on is already in use.
OpenID Connect
Create app registration
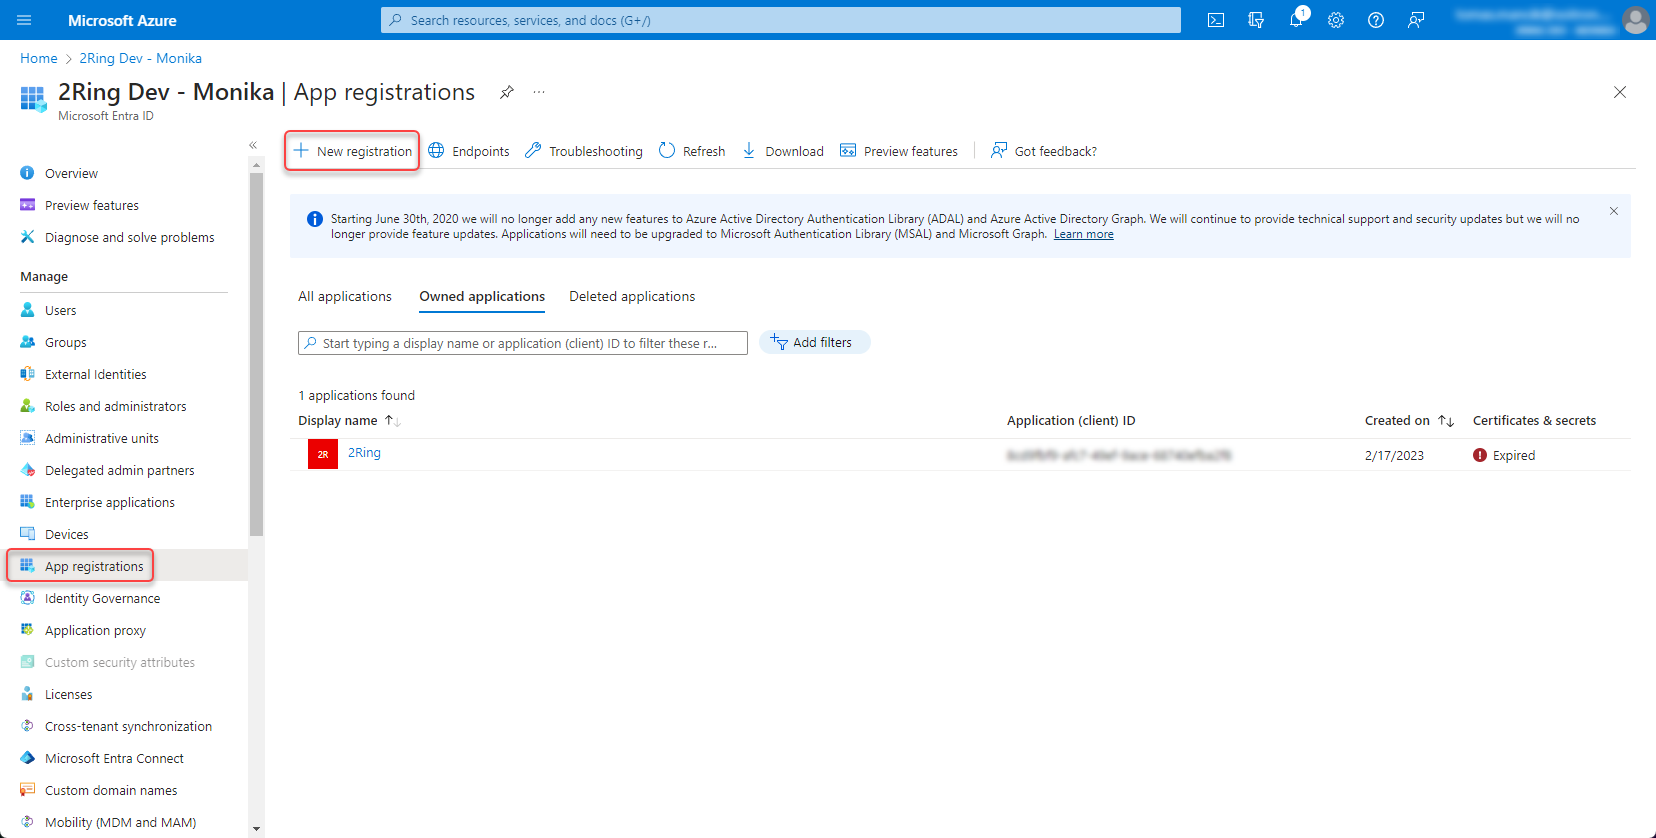
Go to Microsoft Entra ID -> App registrations -> New registration
Figure 1: App registration
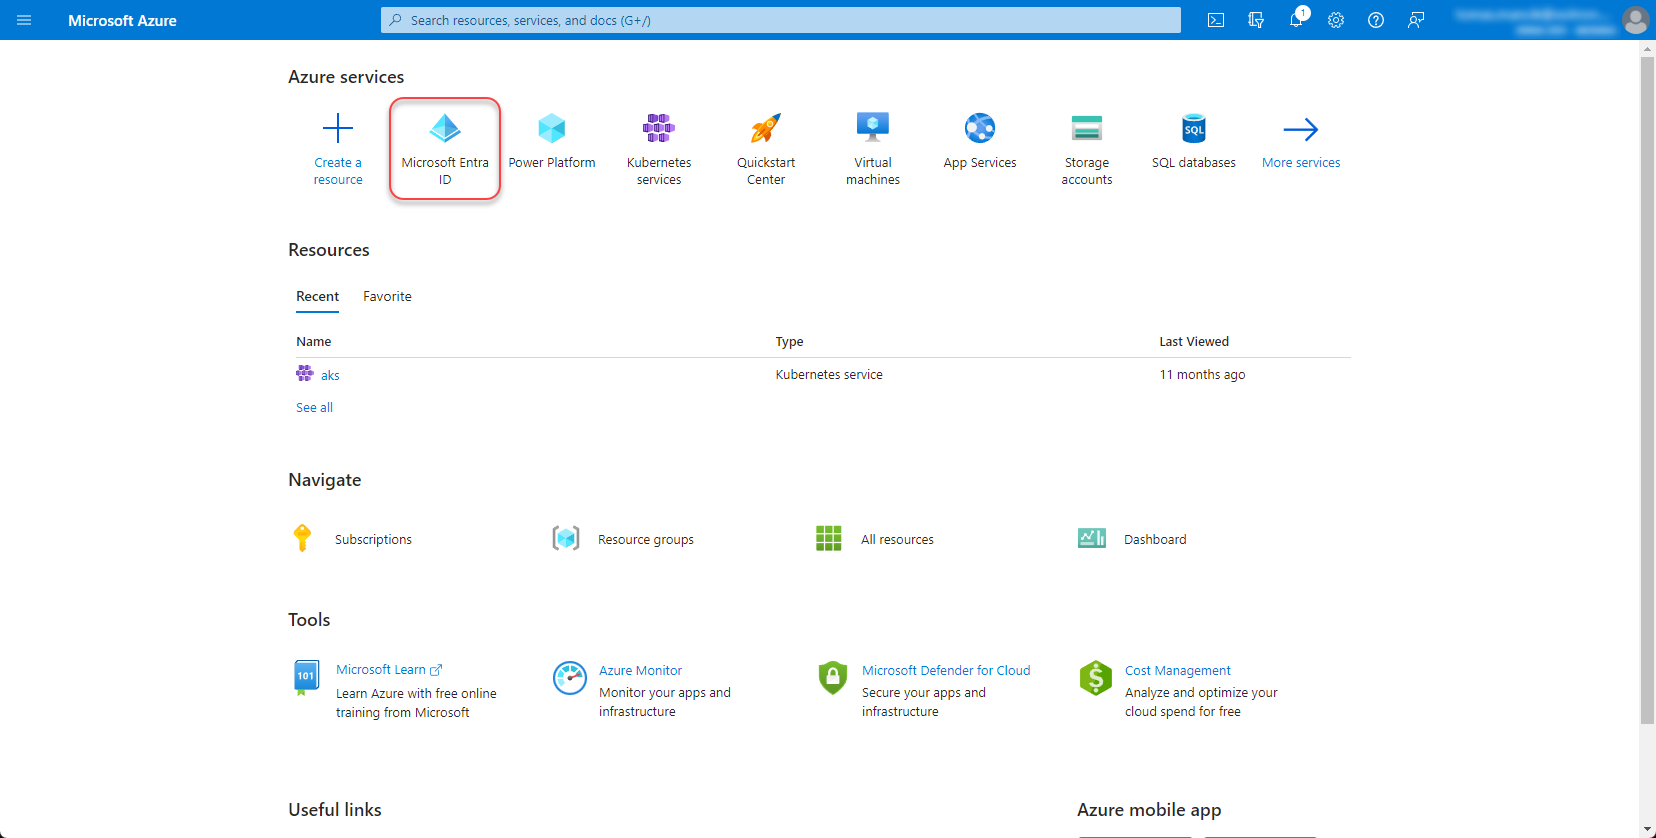
Figure 2: App registration 2
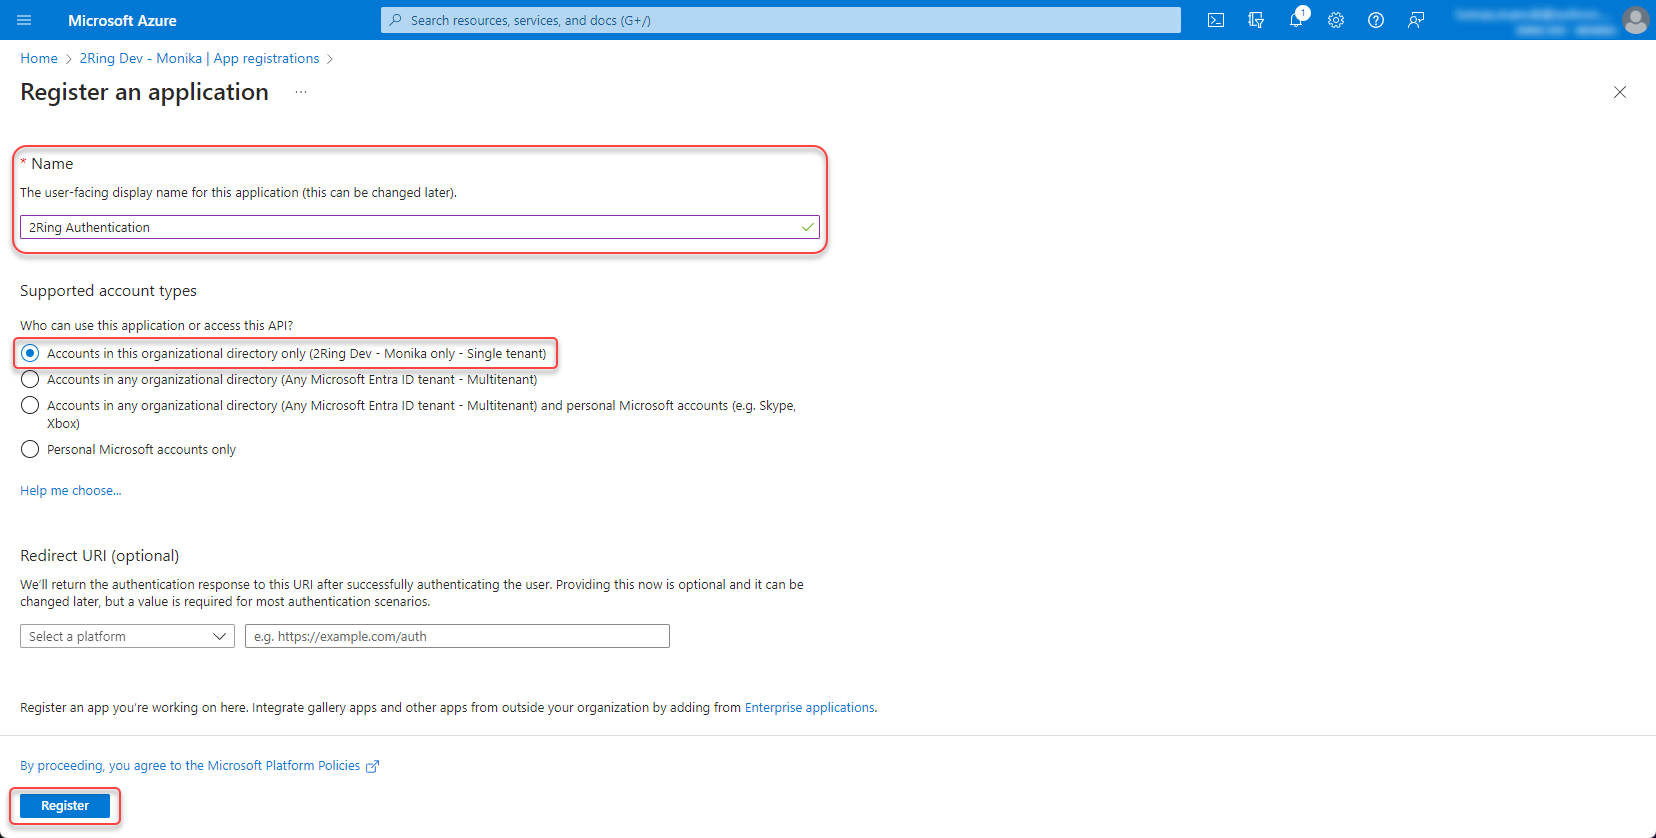
Fill the name of the application, select “Accounts in this organizational directory only (Single tenant)” and click “Register”.
Figure 3: App registration 3
Set permissions
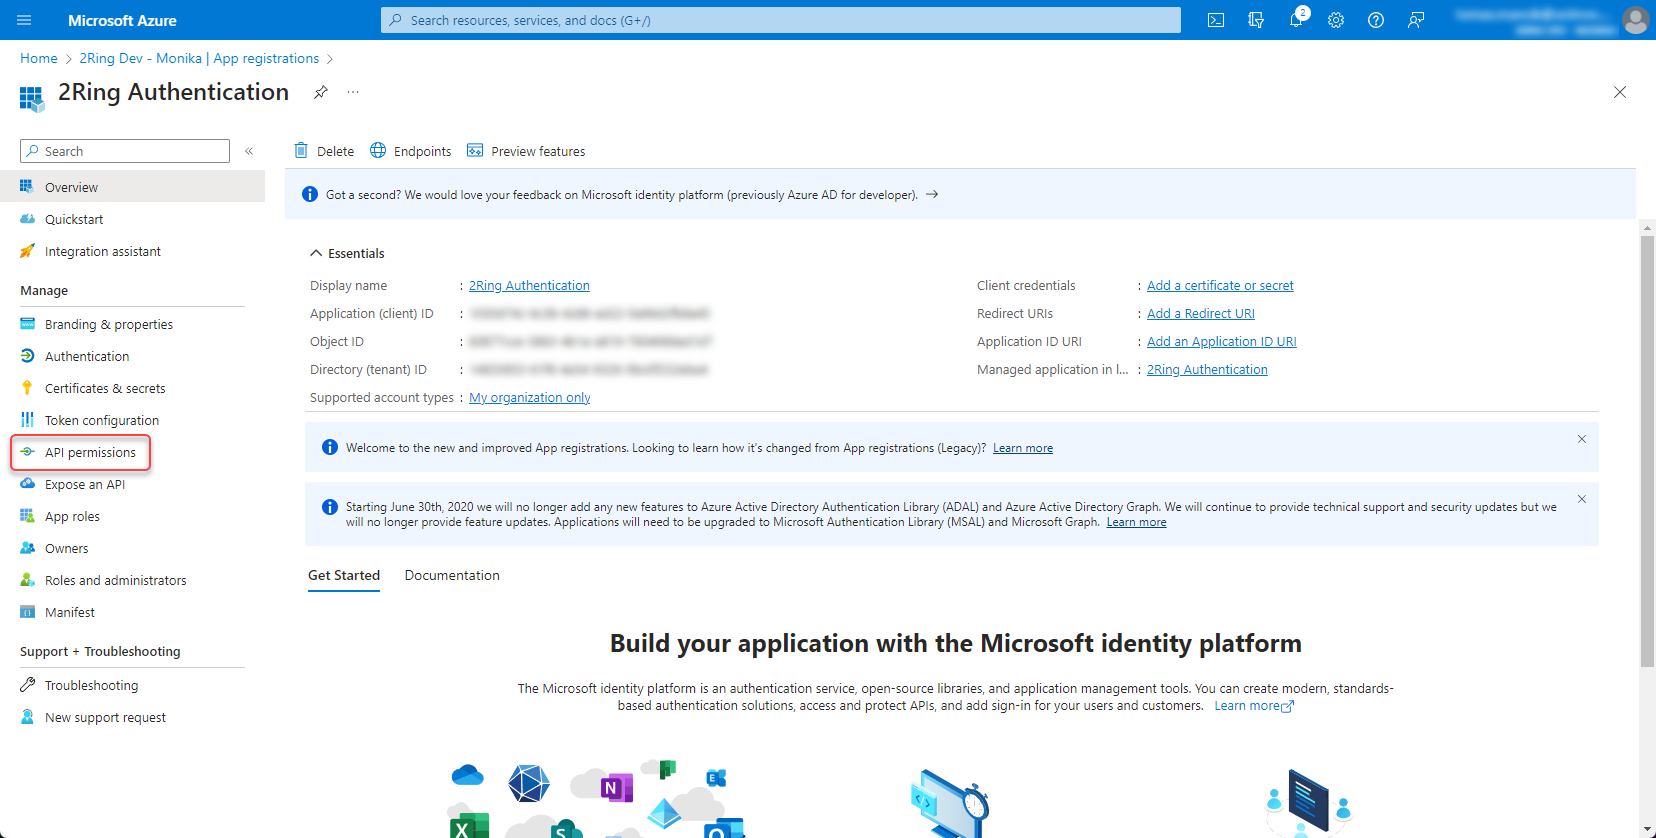
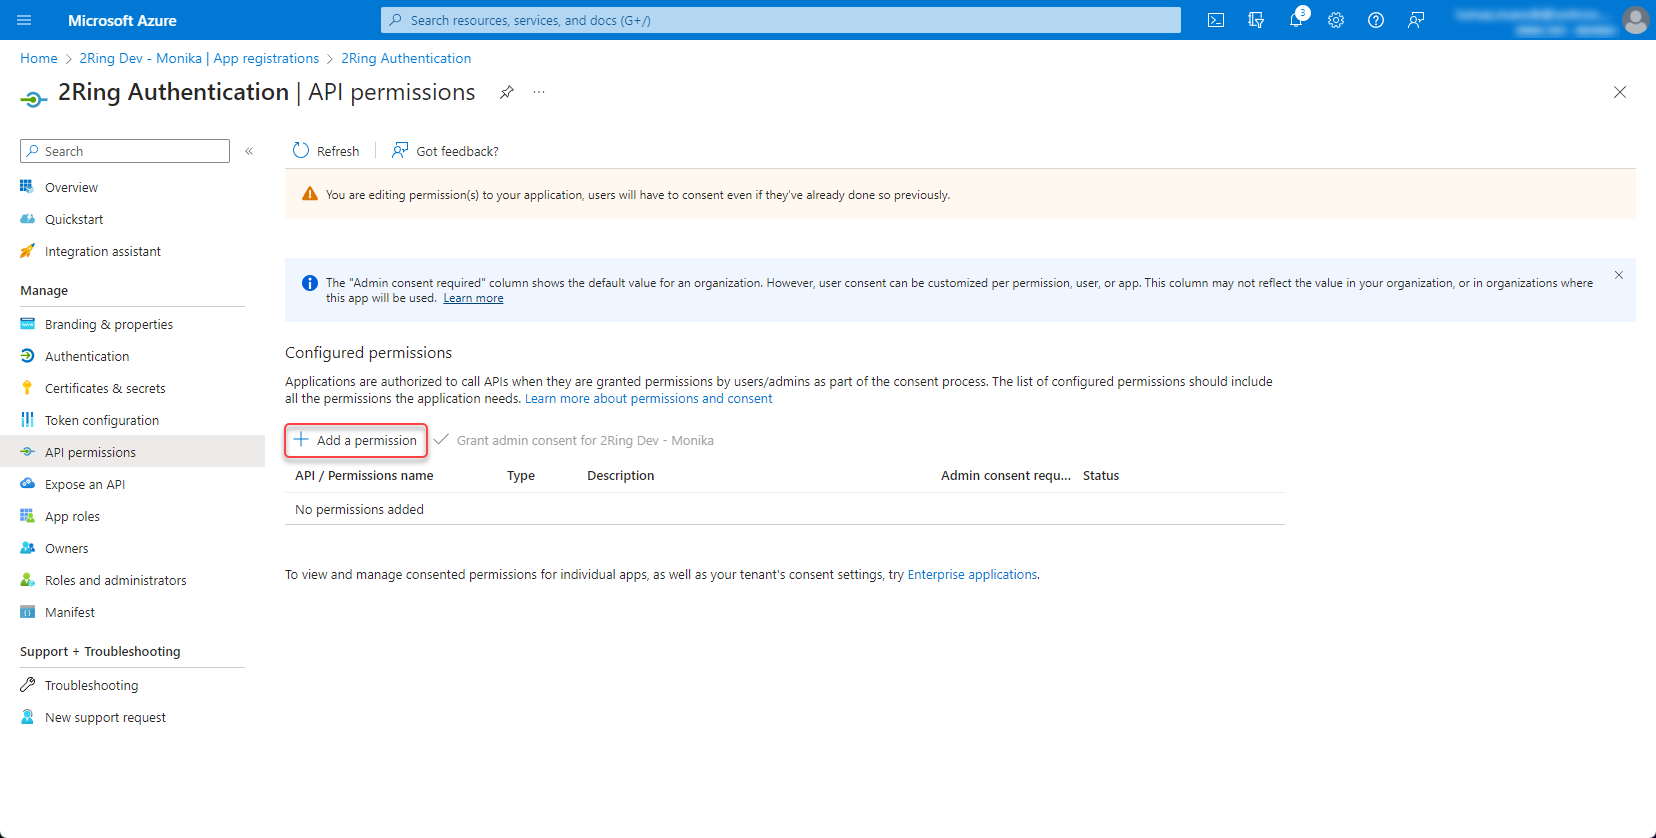
Open the app registration and go to API permissions
Figure 4: Set permission
Remove “User.Read” permission by clicking the three dots on the right side and select “Remove permission”
Figure 5: Set permission 2

Click “Add permission”
Figure 6: Set permission 3
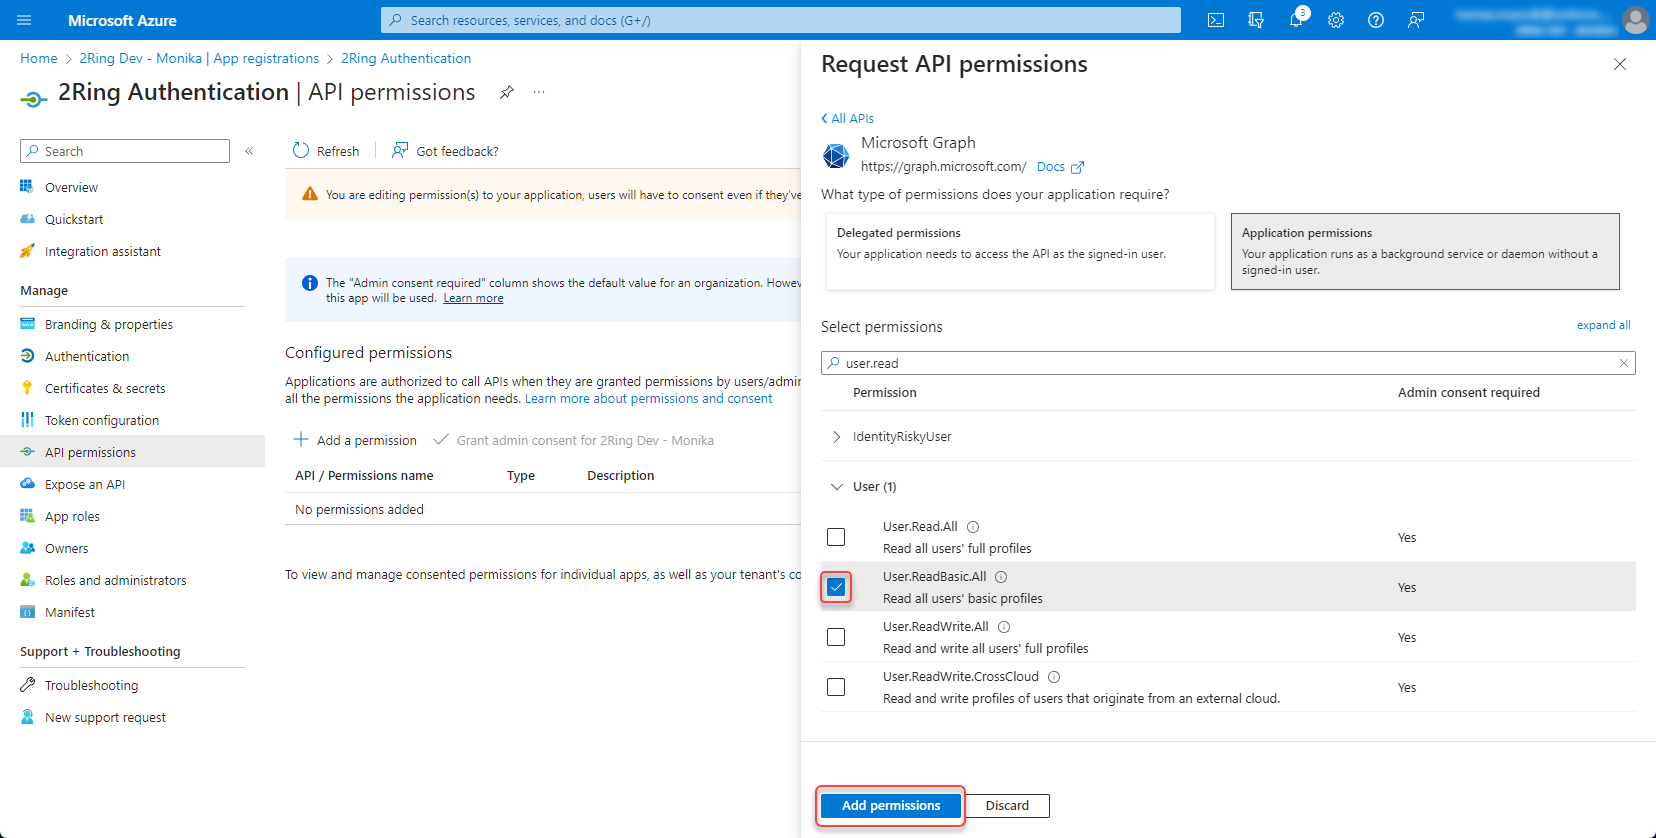
Add a permission -> Microsoft Graph -> Application permissions -> User.ReadBasic.All
With the User.ReadBasic.All permission, you can access basic user profile information. However, if you want to access user Office Location, use “User.Read.All” permission instead. With “User.Read.All” permission, you can also search for users by typing their office location in the search box in the import users dialog. Figure 7: Set permission 4
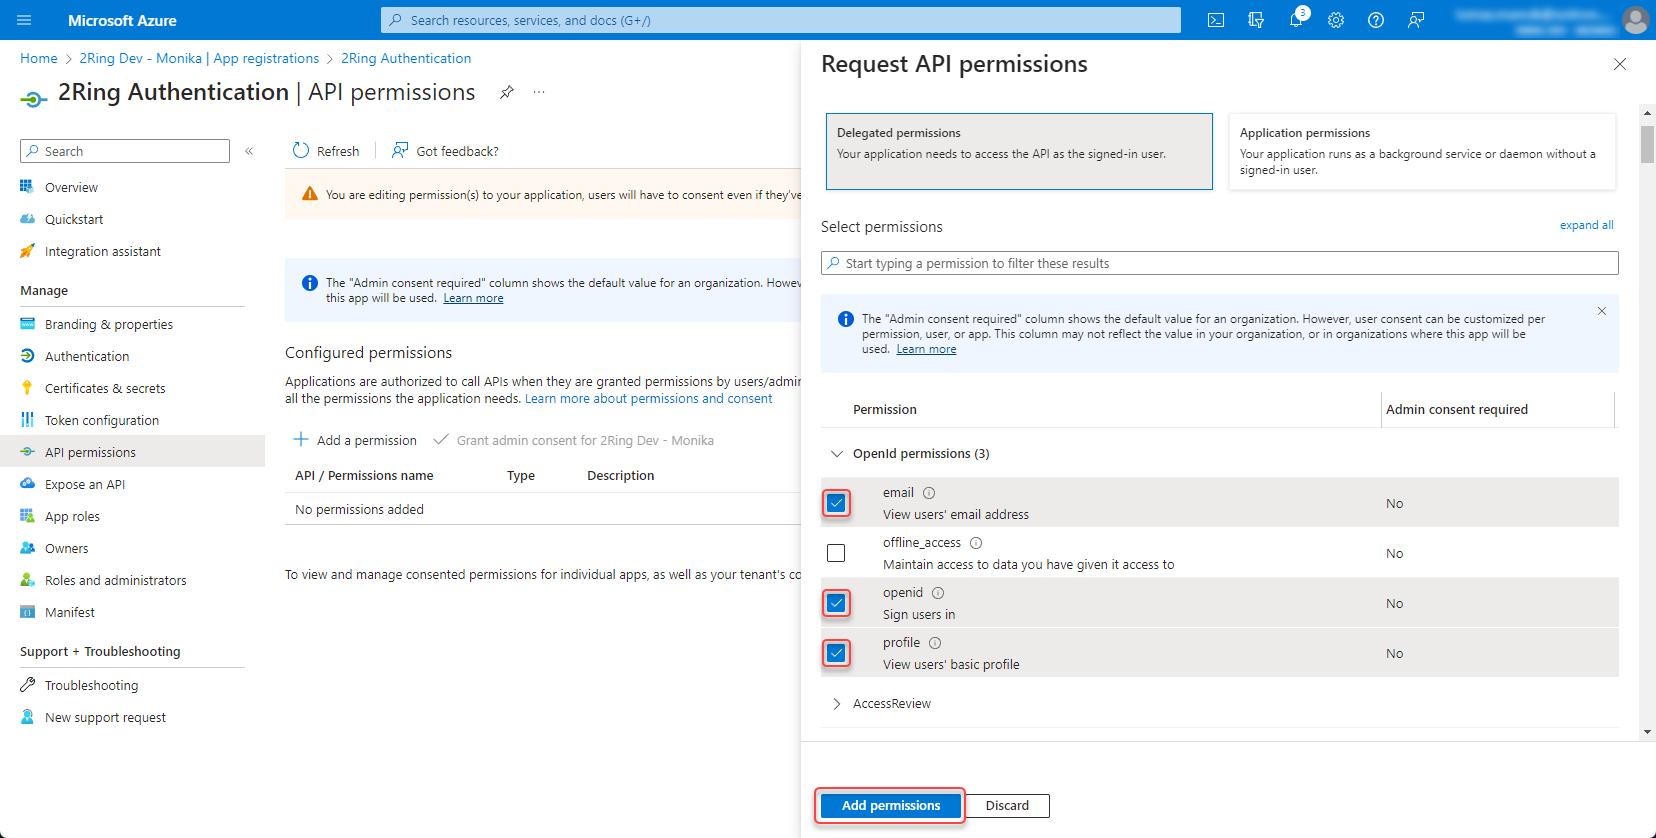
Add following permissions -> Microsoft Graph -> Delegated permissions -> openid, profile and email
Figure 8: Set permission 5
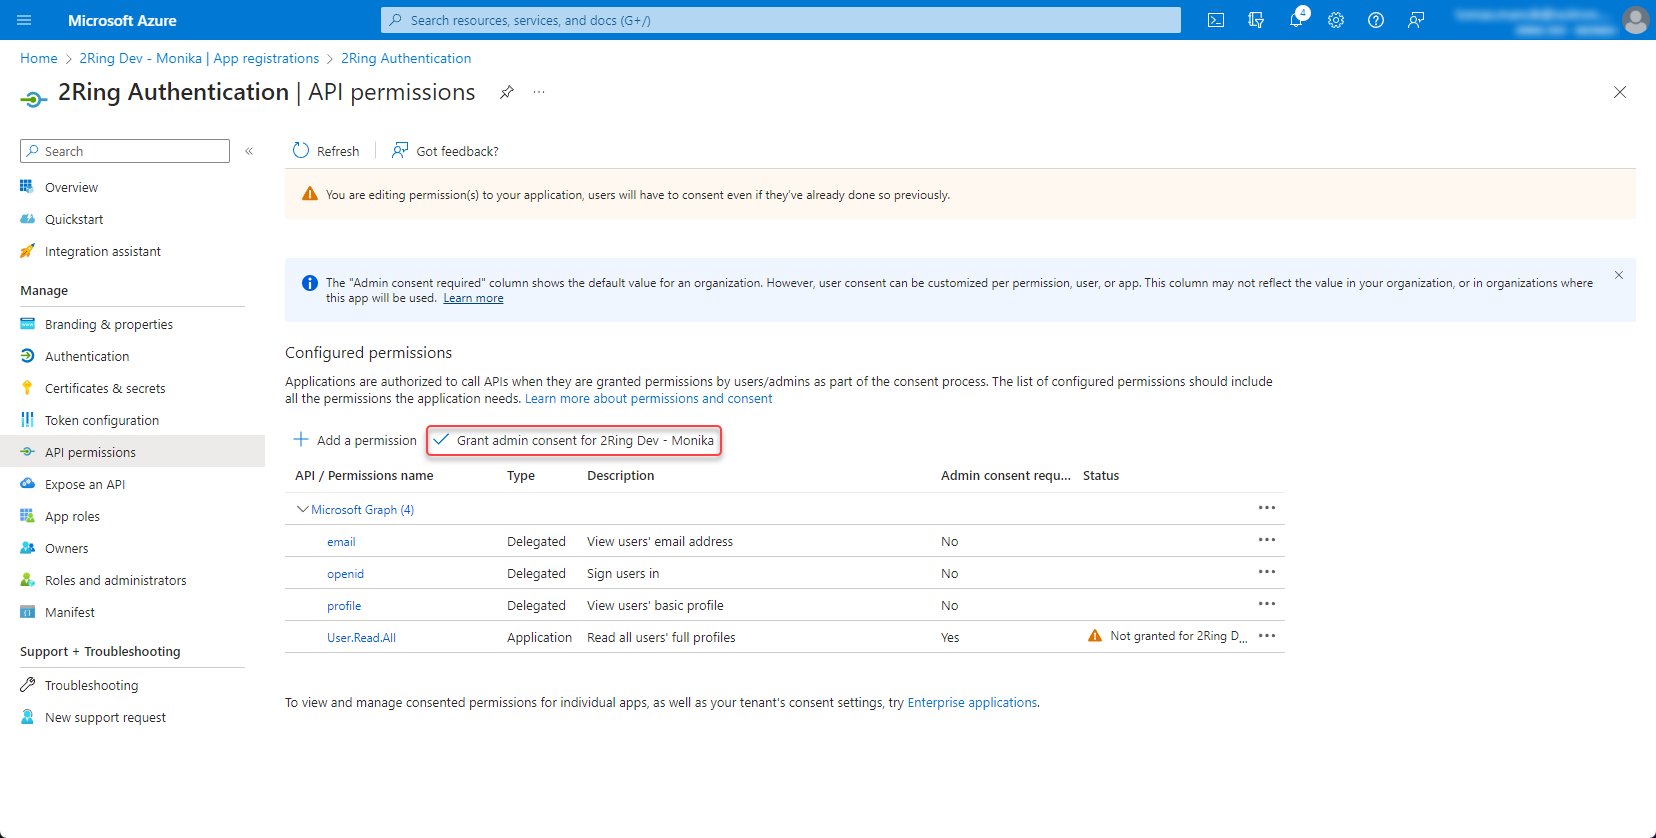
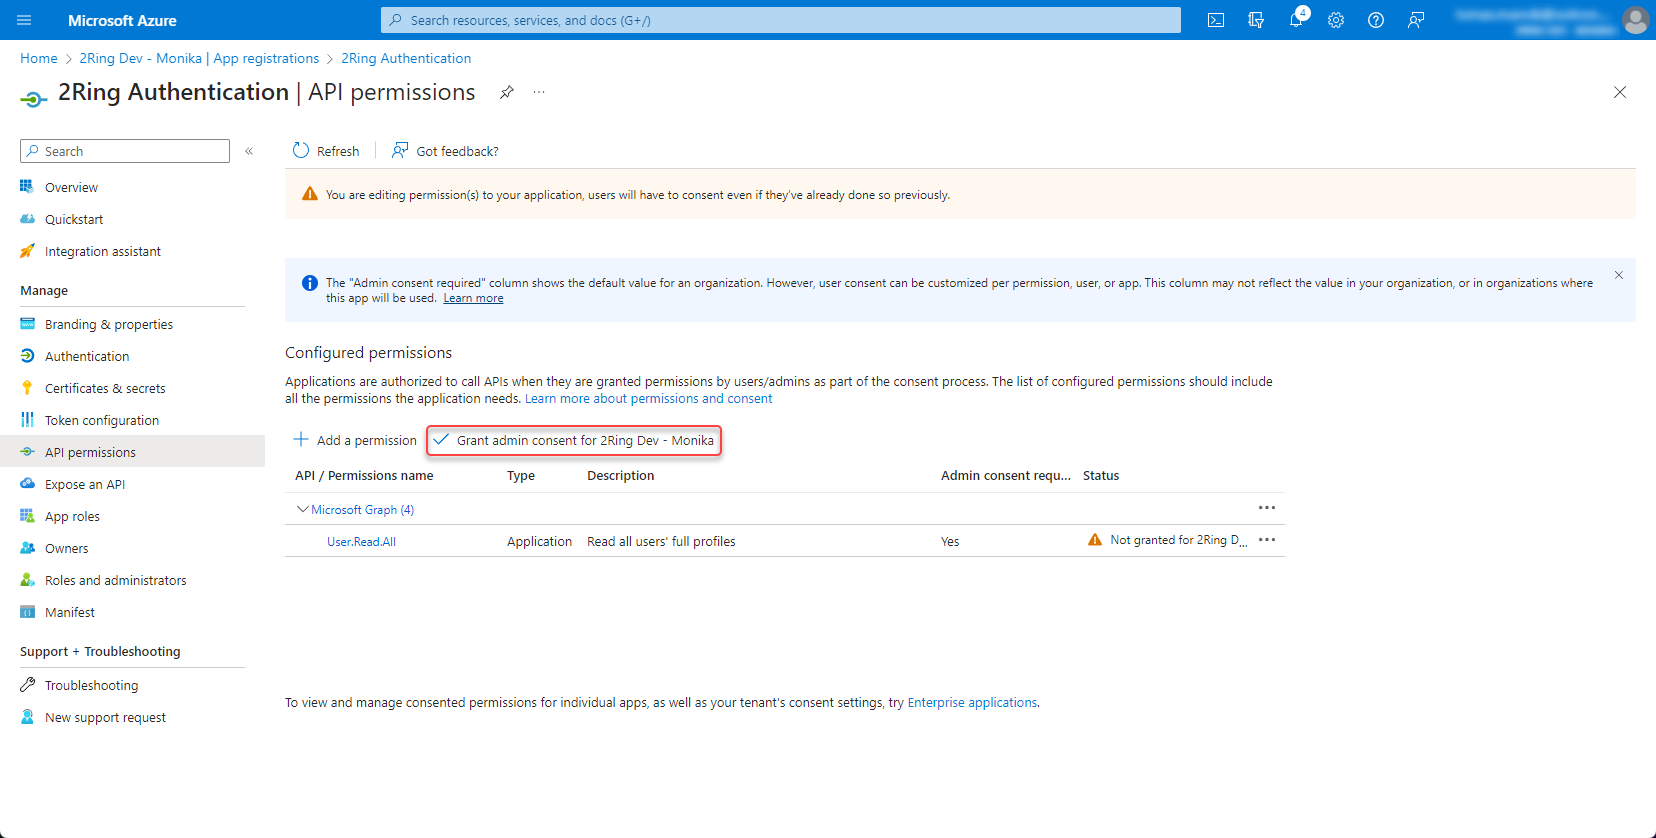
Grant admin consent
Figure 9: Set permission 6
Create client secret
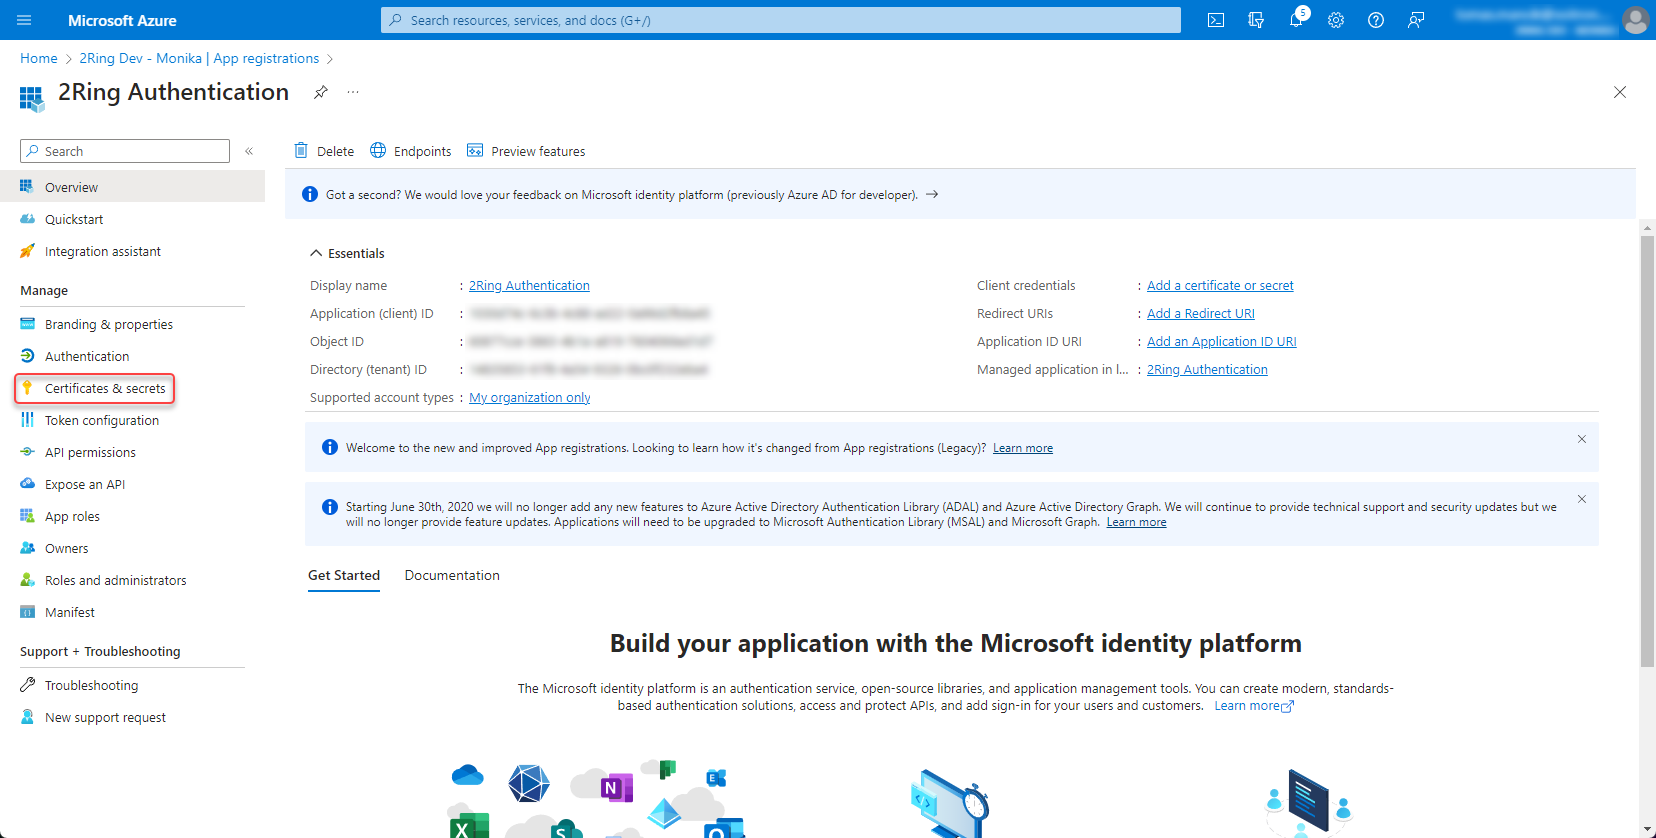
Open the app registration and go to Certificates & secrets
Figure 10: Create client secret
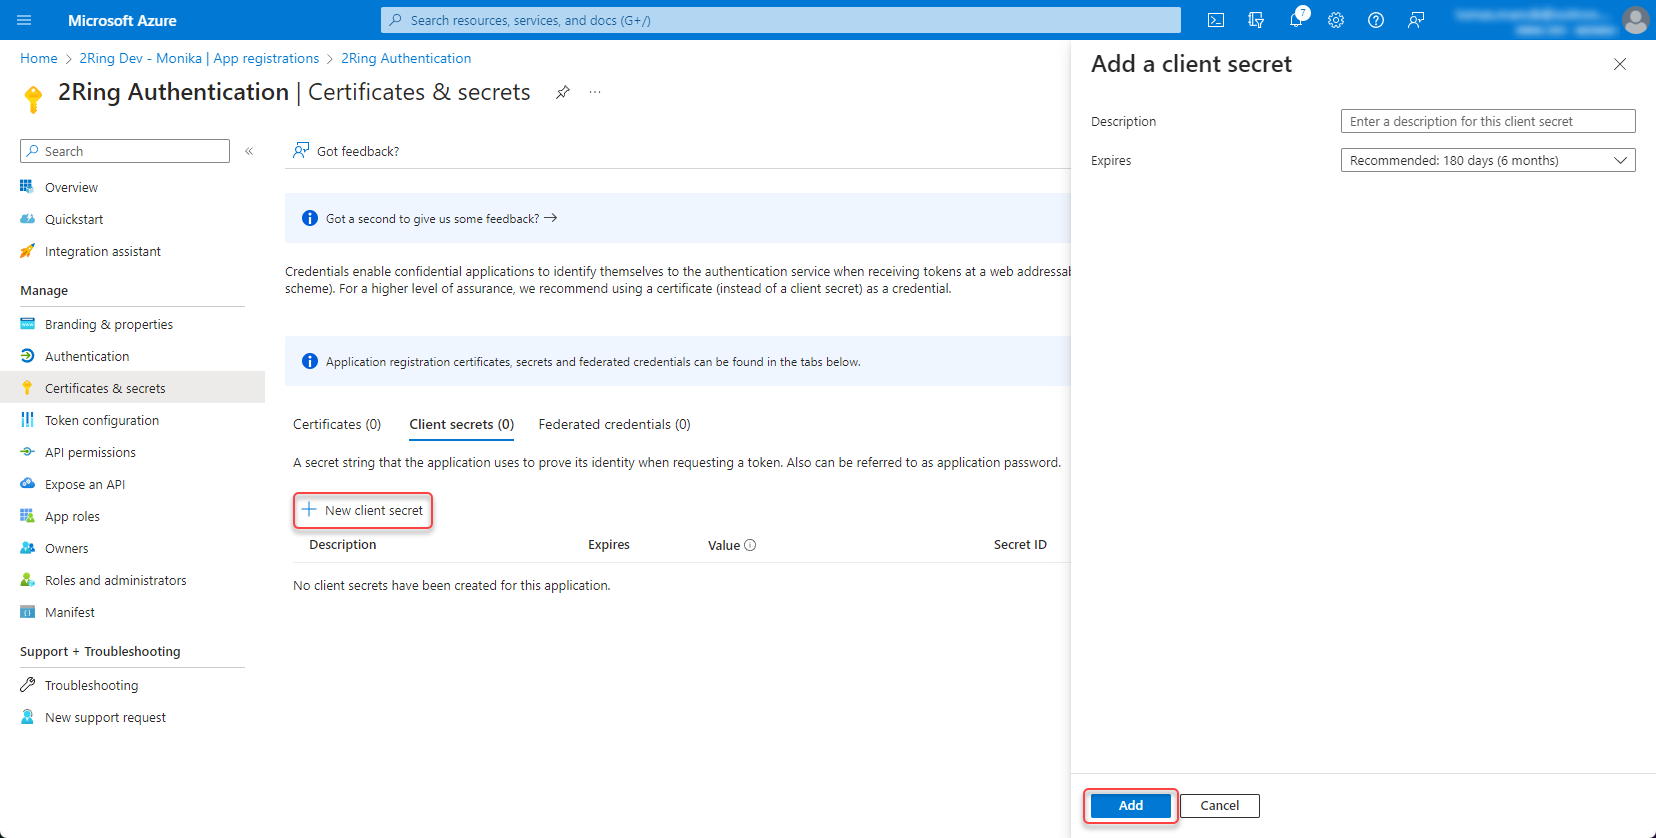
Create new client secret
Figure 11: Create client secret 2
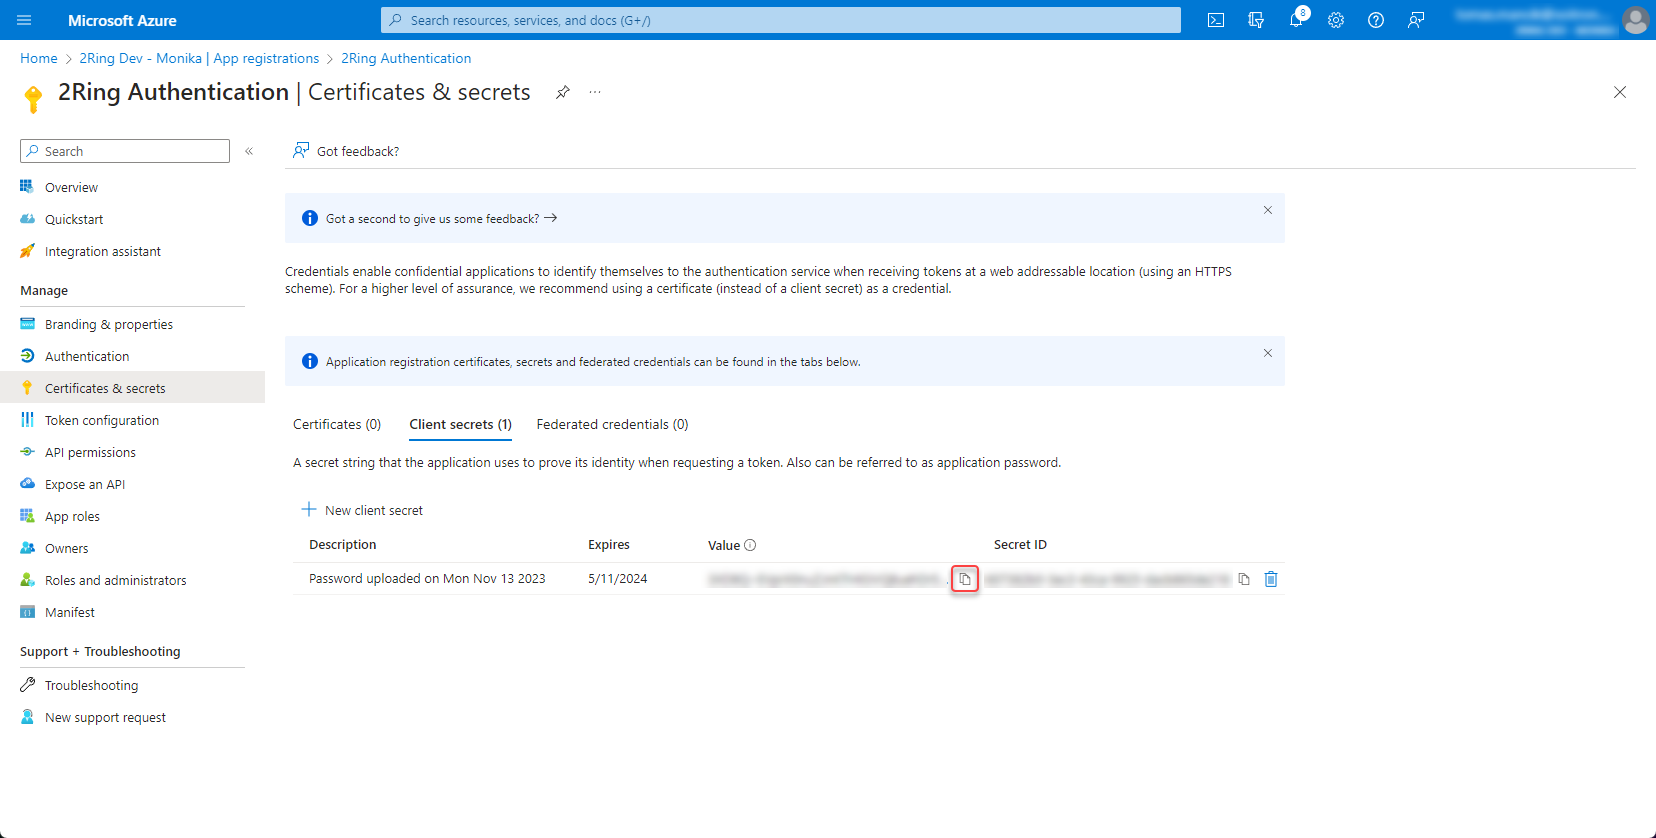
Copy and save the secret value
Figure 12: Create client secret 3
Add redirect URI
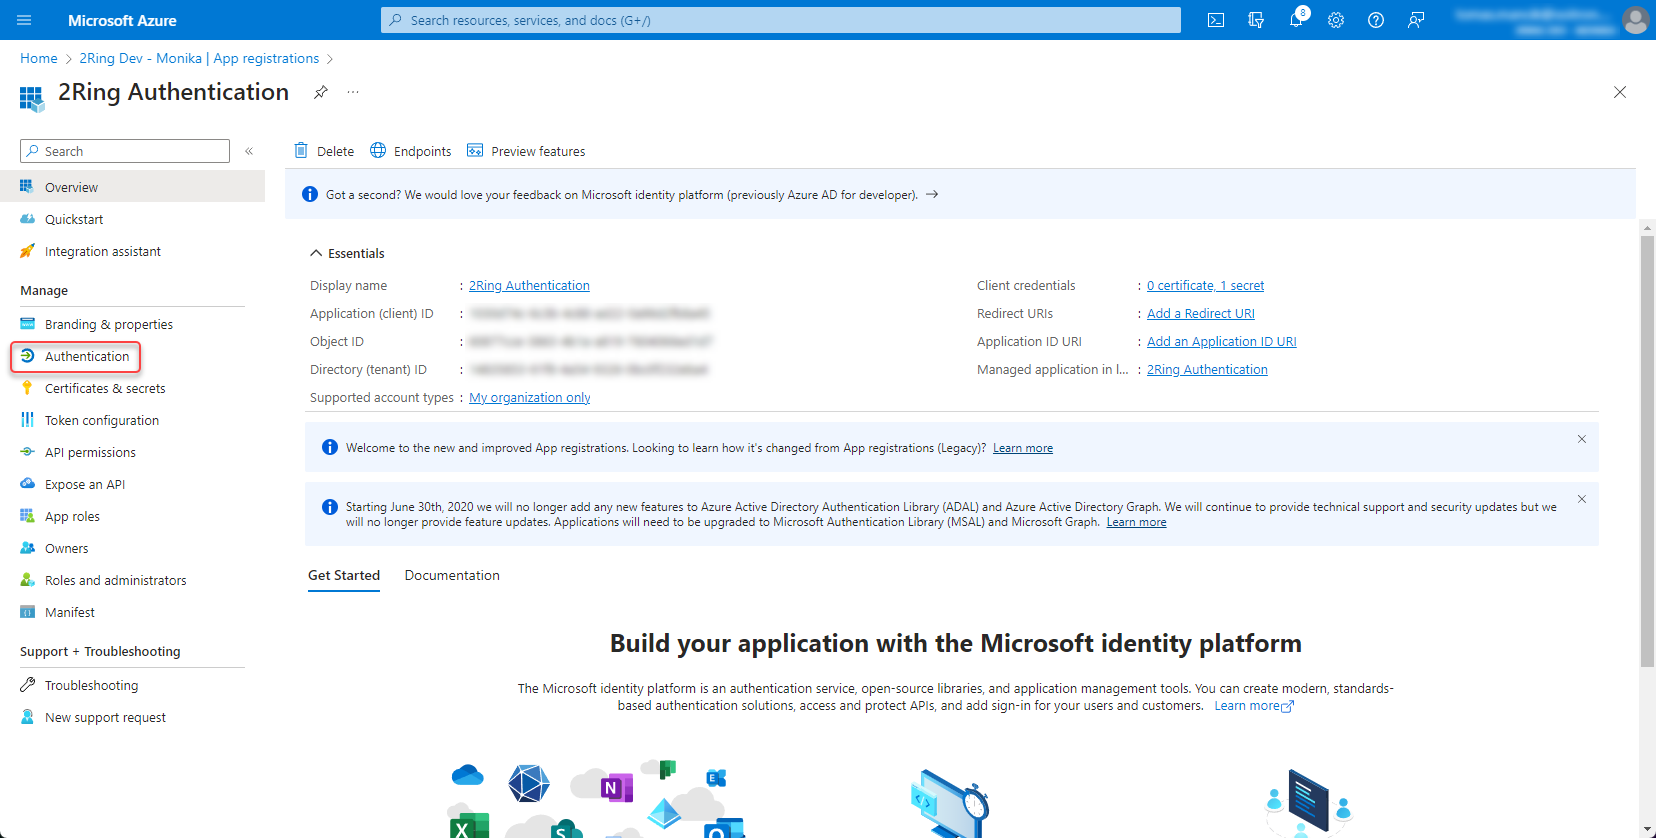
Open the app registration and go to Authentication
Figure 13: Add redirect URI
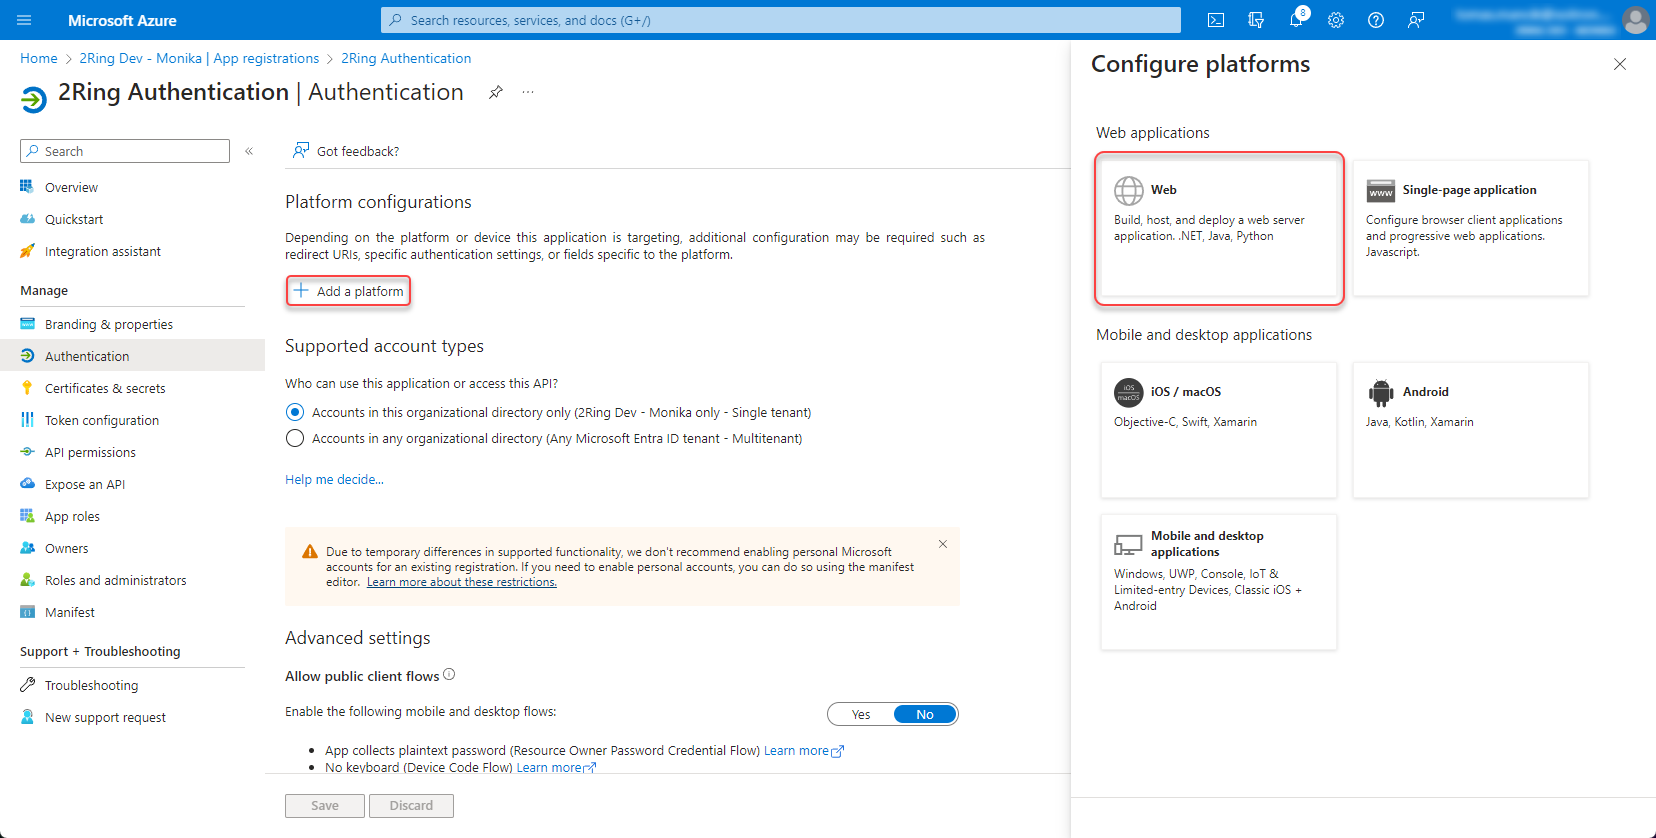
Platform configurations -> Add a platform -> Web
Figure 14: Add redirect URI 2
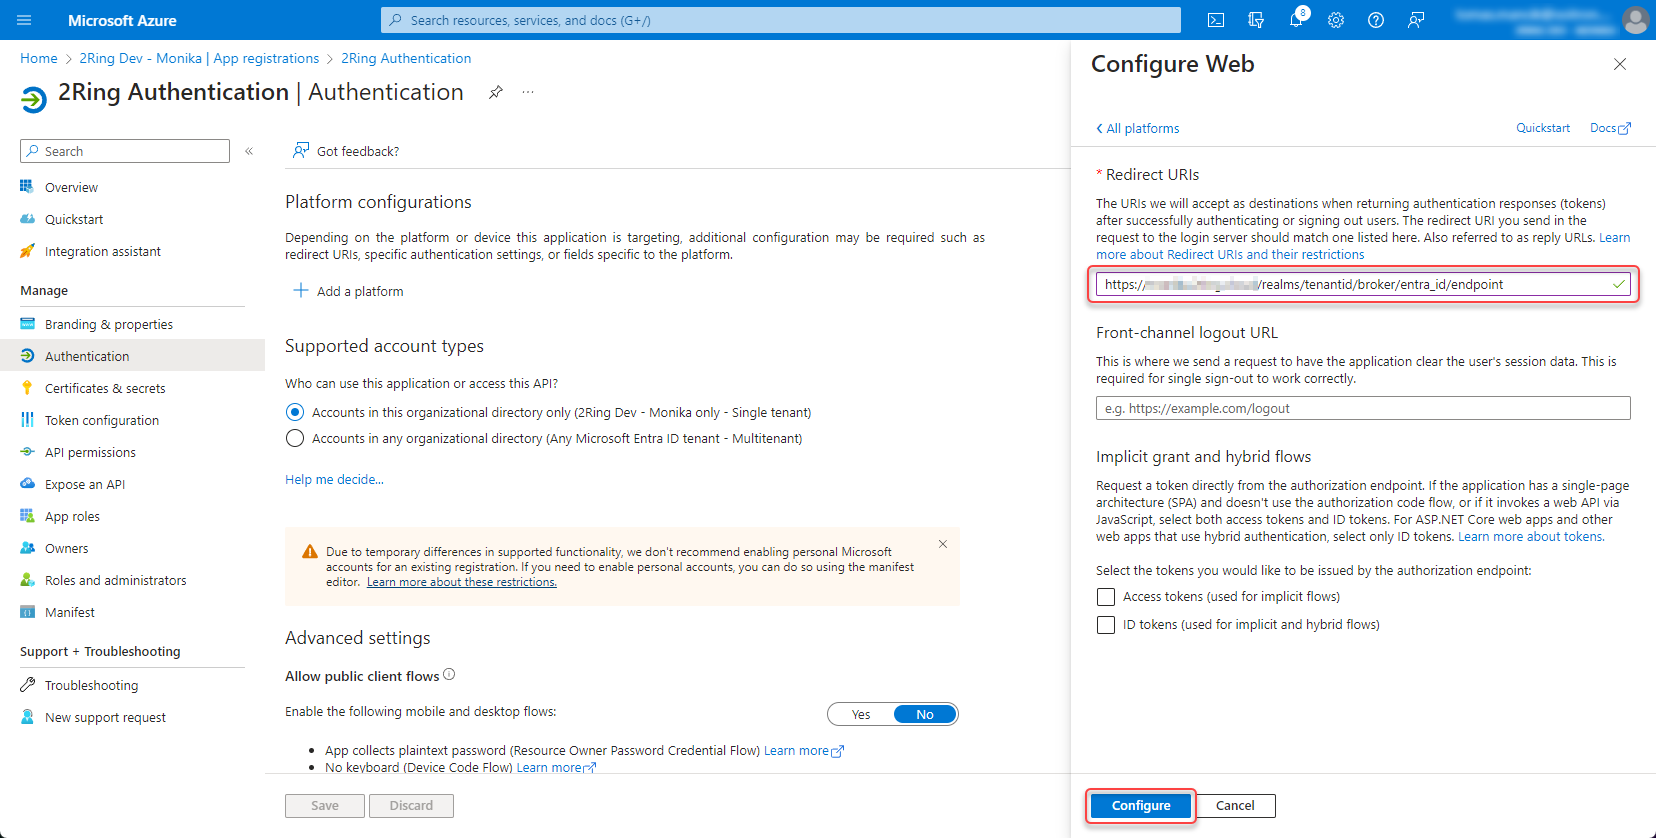
Add Web redirect URI for tenant in following format https://{tenant ID}.2ring.cloud/realms/{tenant ID}/broker/entra_id/endpoint
Figure 15: Add redirect URI 3
Contact 2Ring support and provide tenant id, client id and configured client secret.
SAML
Configure Microsoft Entra ID (Azure Portal)
Step 1: Create an Enterprise Application
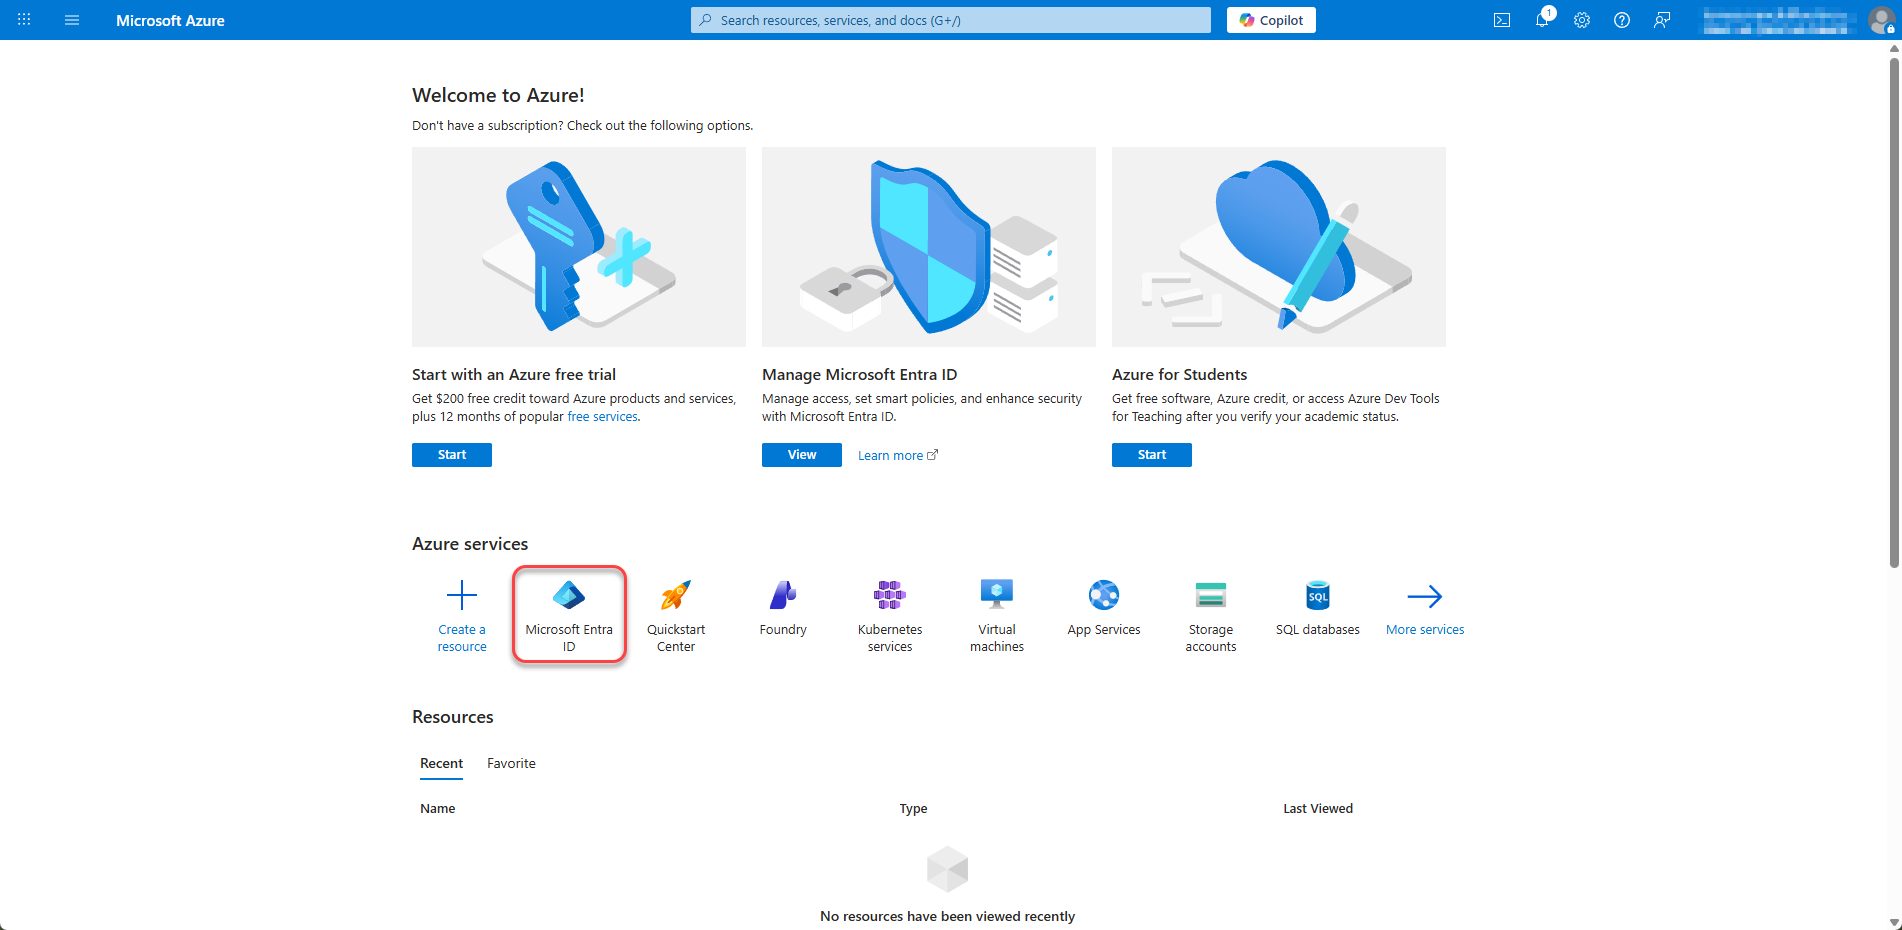
Log in to the Azure Portal
Navigate to Microsoft Entra ID (or Azure Active Directory)
Figure 16: Create an Enterprise Application
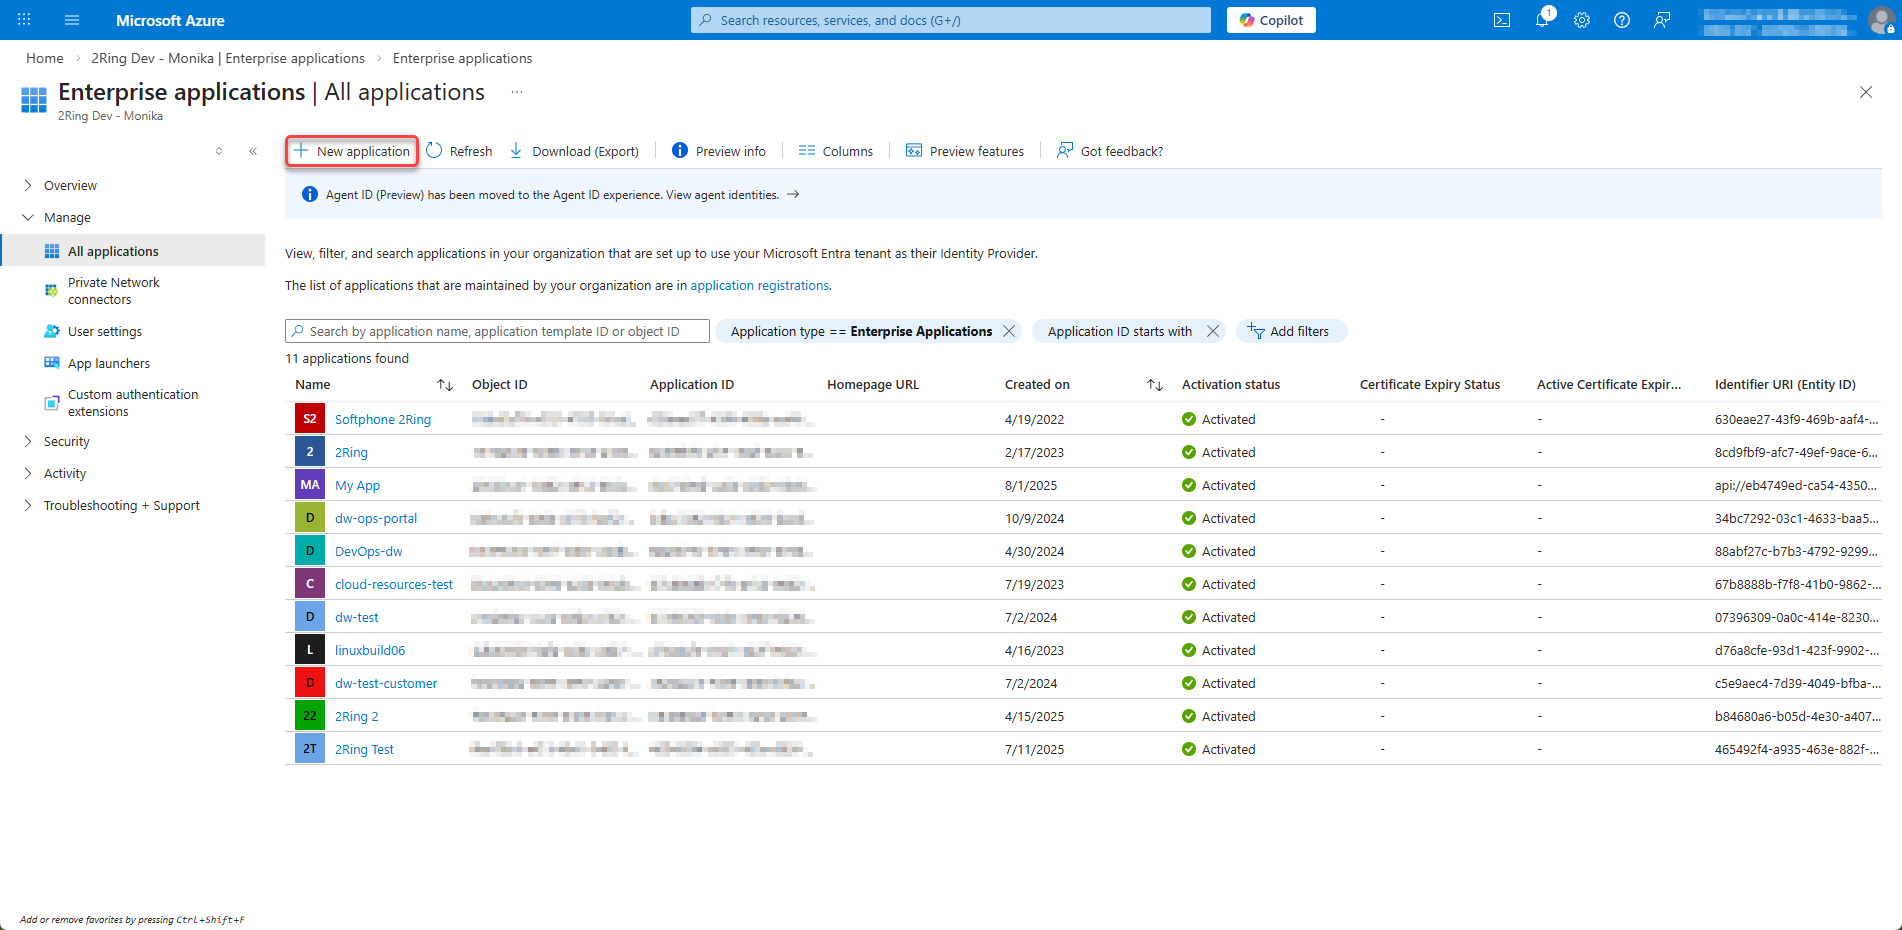
Click on Enterprise applications in the left menu
Figure 17: Create an Enterprise Application 2

Click New application
Figure 18: Create an Enterprise Application 3
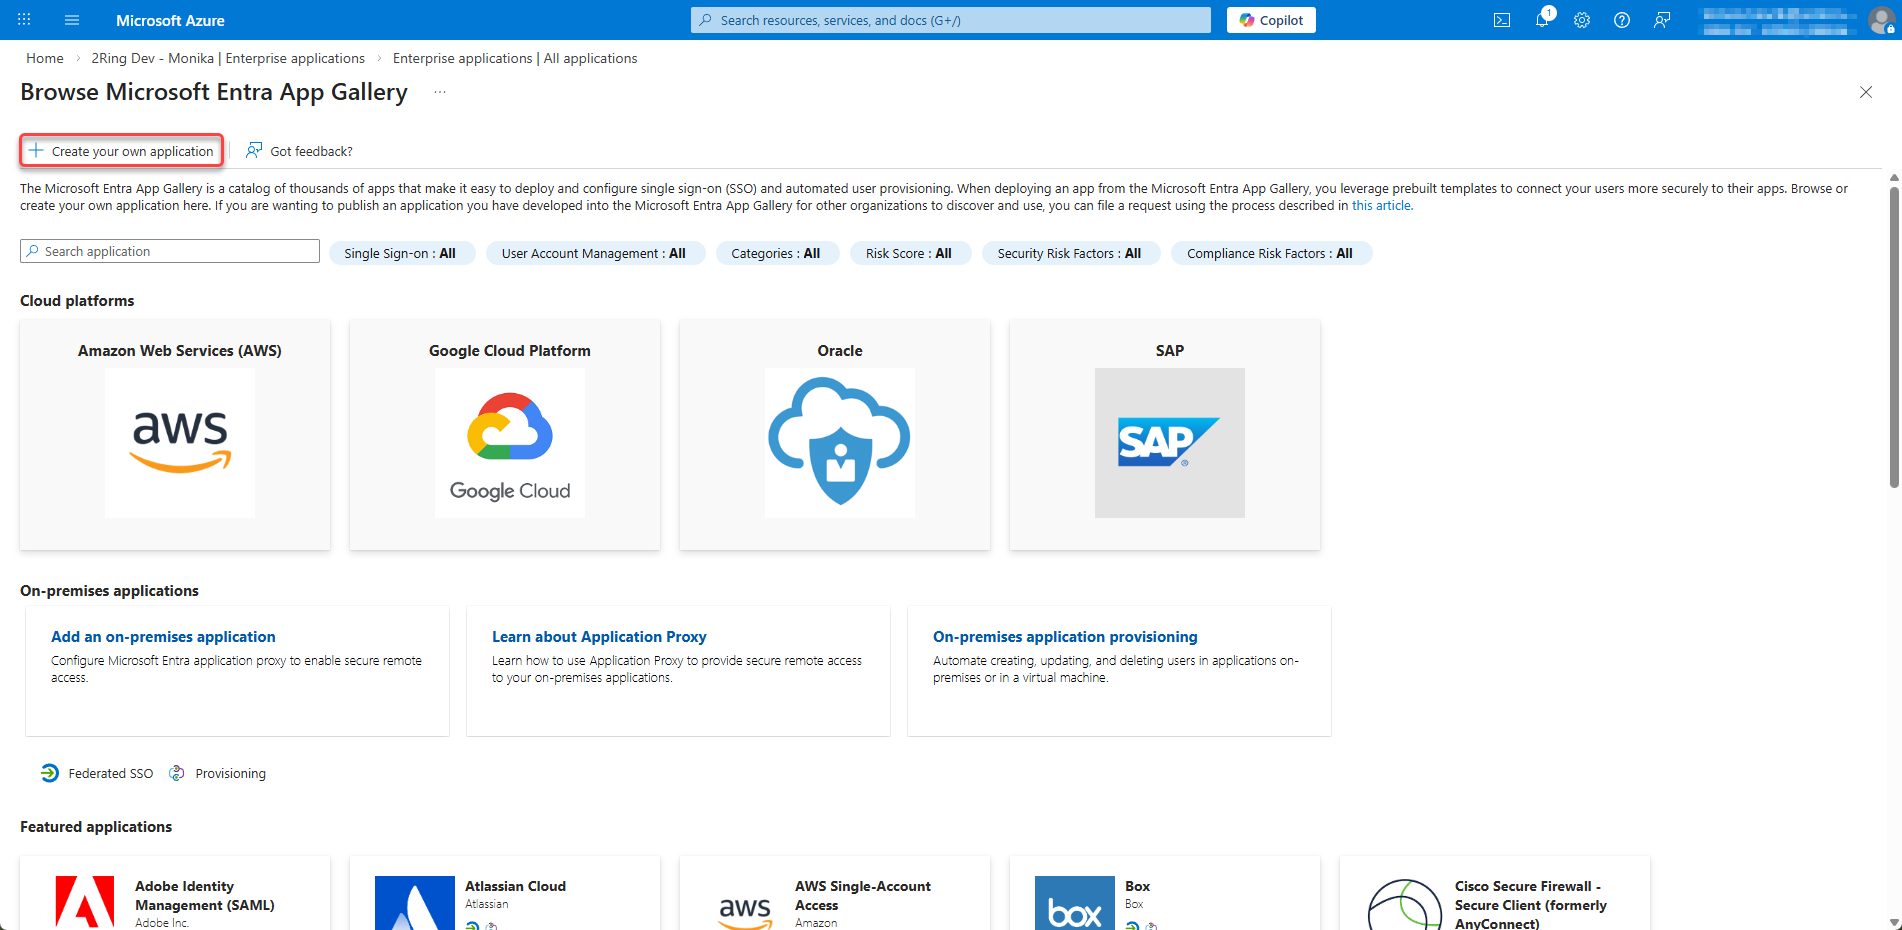
Click Create your own application
Figure 19: Create an Enterprise Application 4
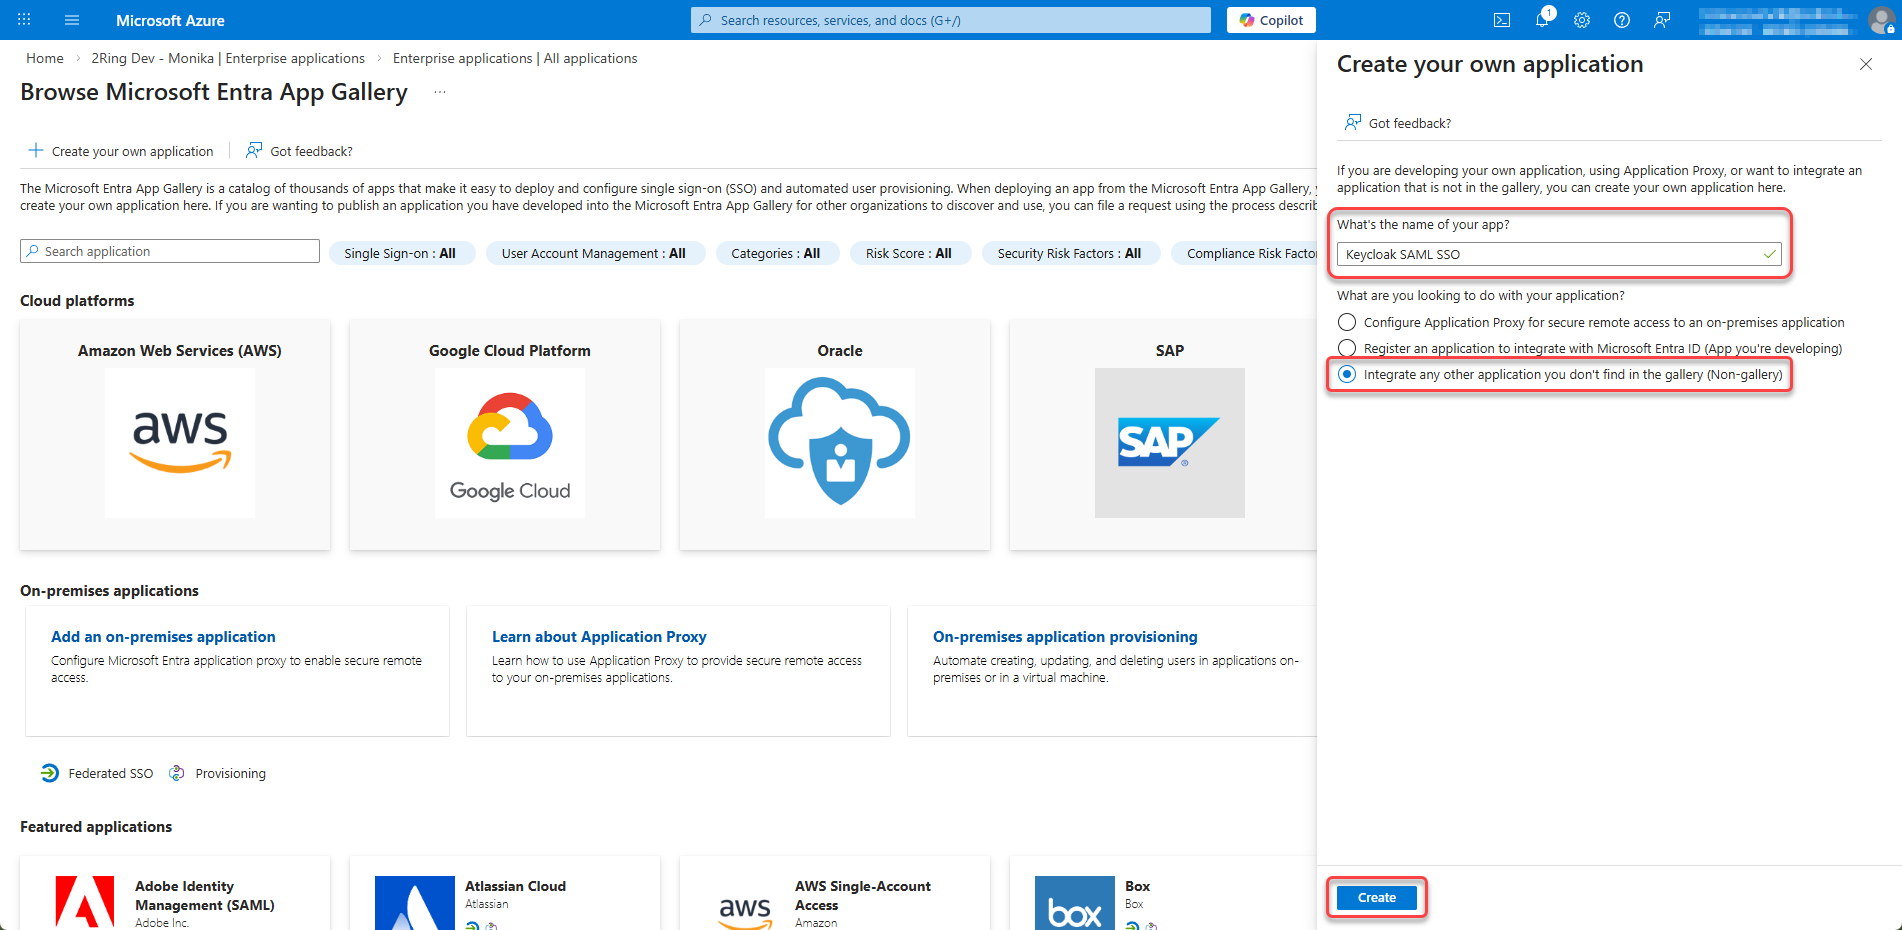
Enter a Name (e.g., “Keycloak SAML SSO”), select Integrate any other application you don’t find in the gallery (Non-gallery) and click Create
Figure 20: Create an Enterprise Application 5
Step 2: Configure SAML Single Sign-On
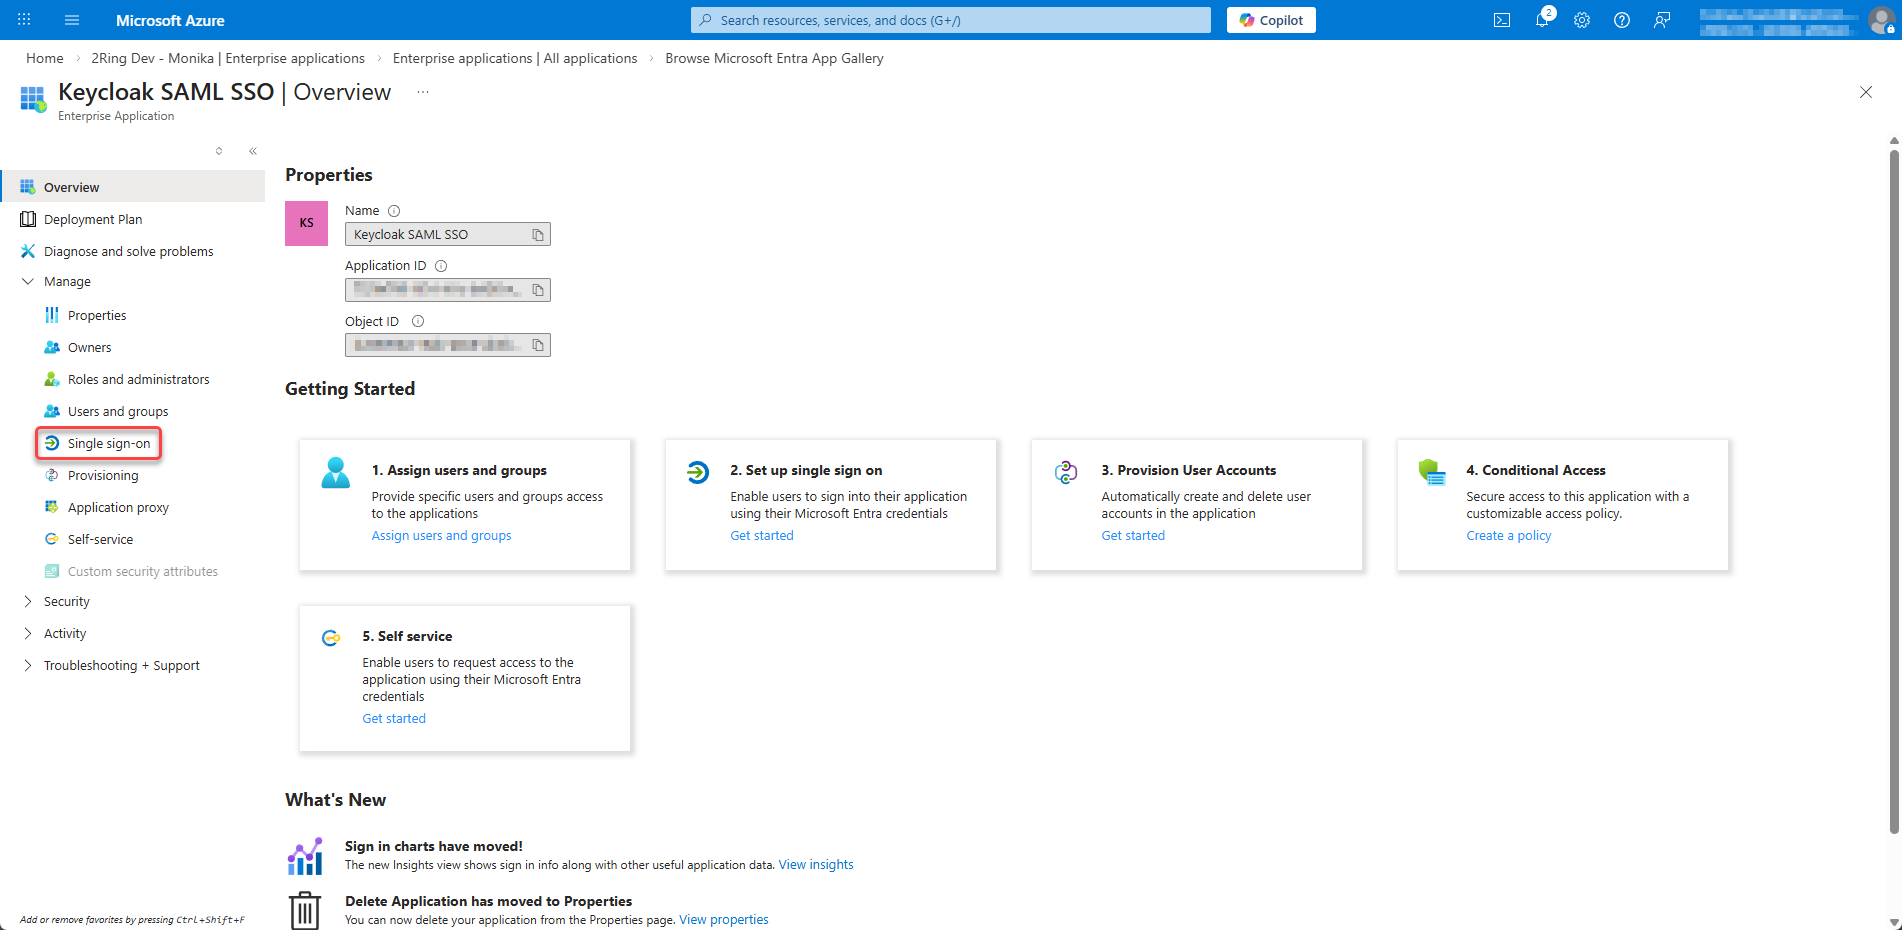
In your new Enterprise Application, go to Single sign-on from the left menu
Figure 21: Configure SAML Single Sign-On 1
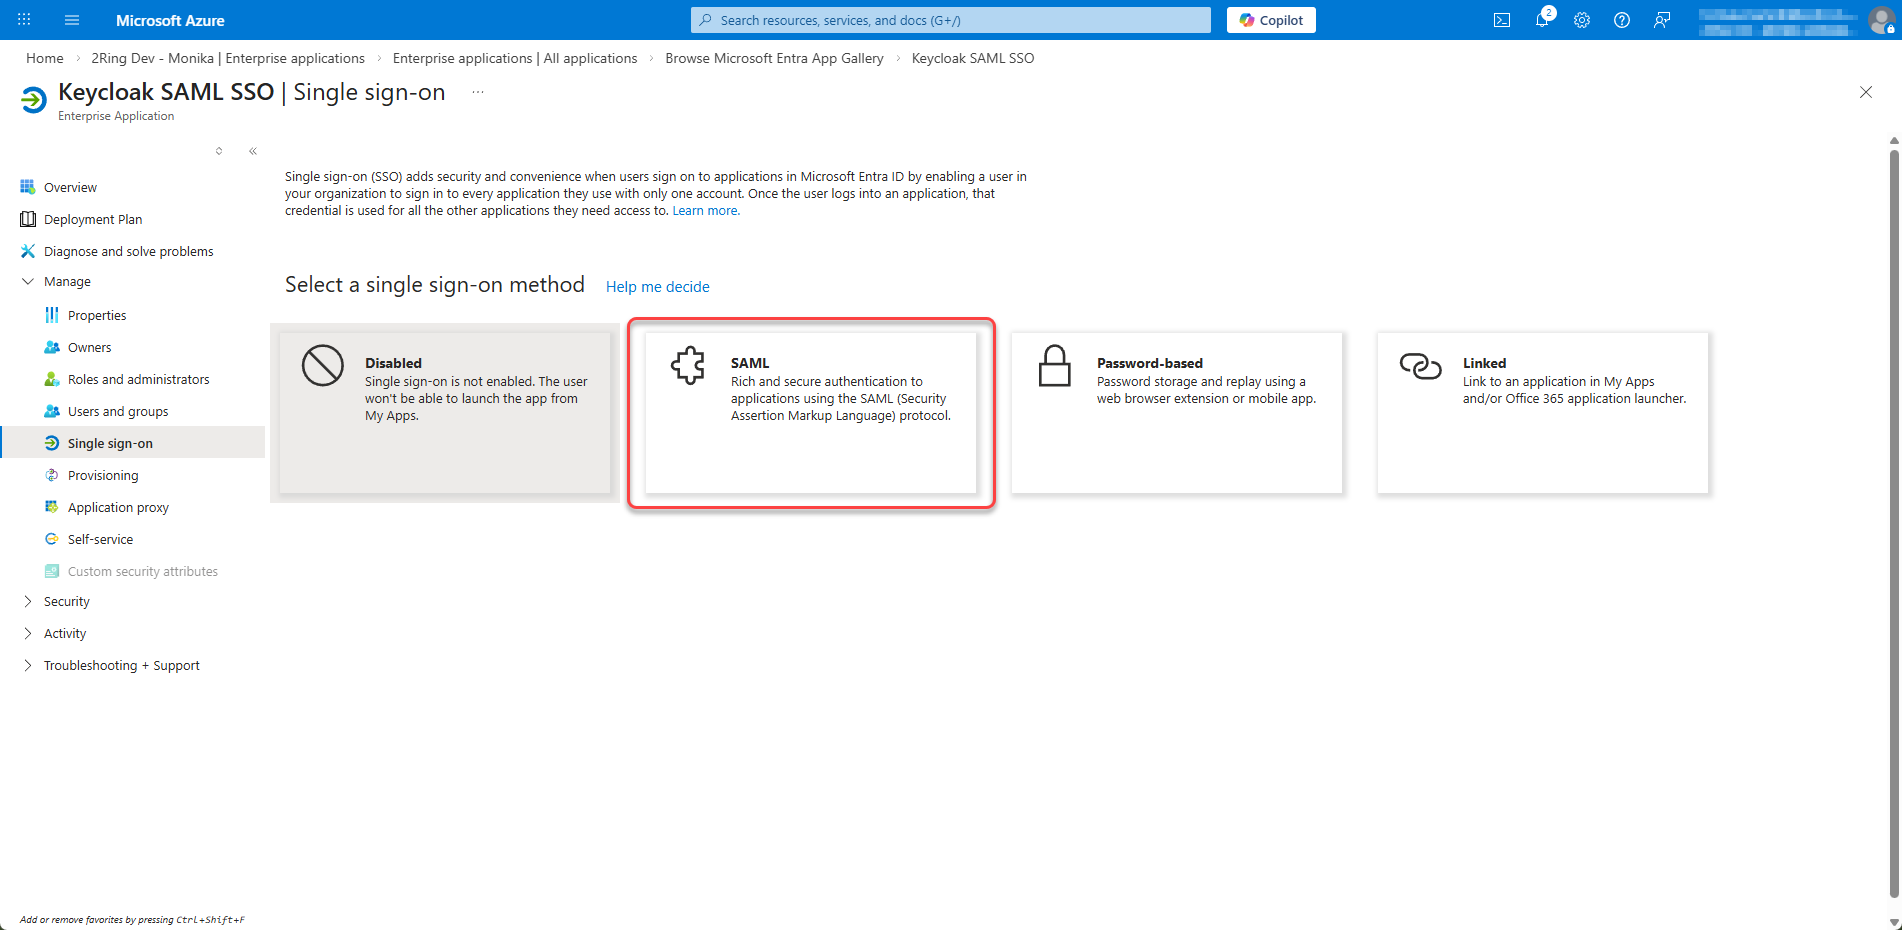
Select SAML as the single sign-on method
Figure 22: Configure SAML Single Sign-On 2
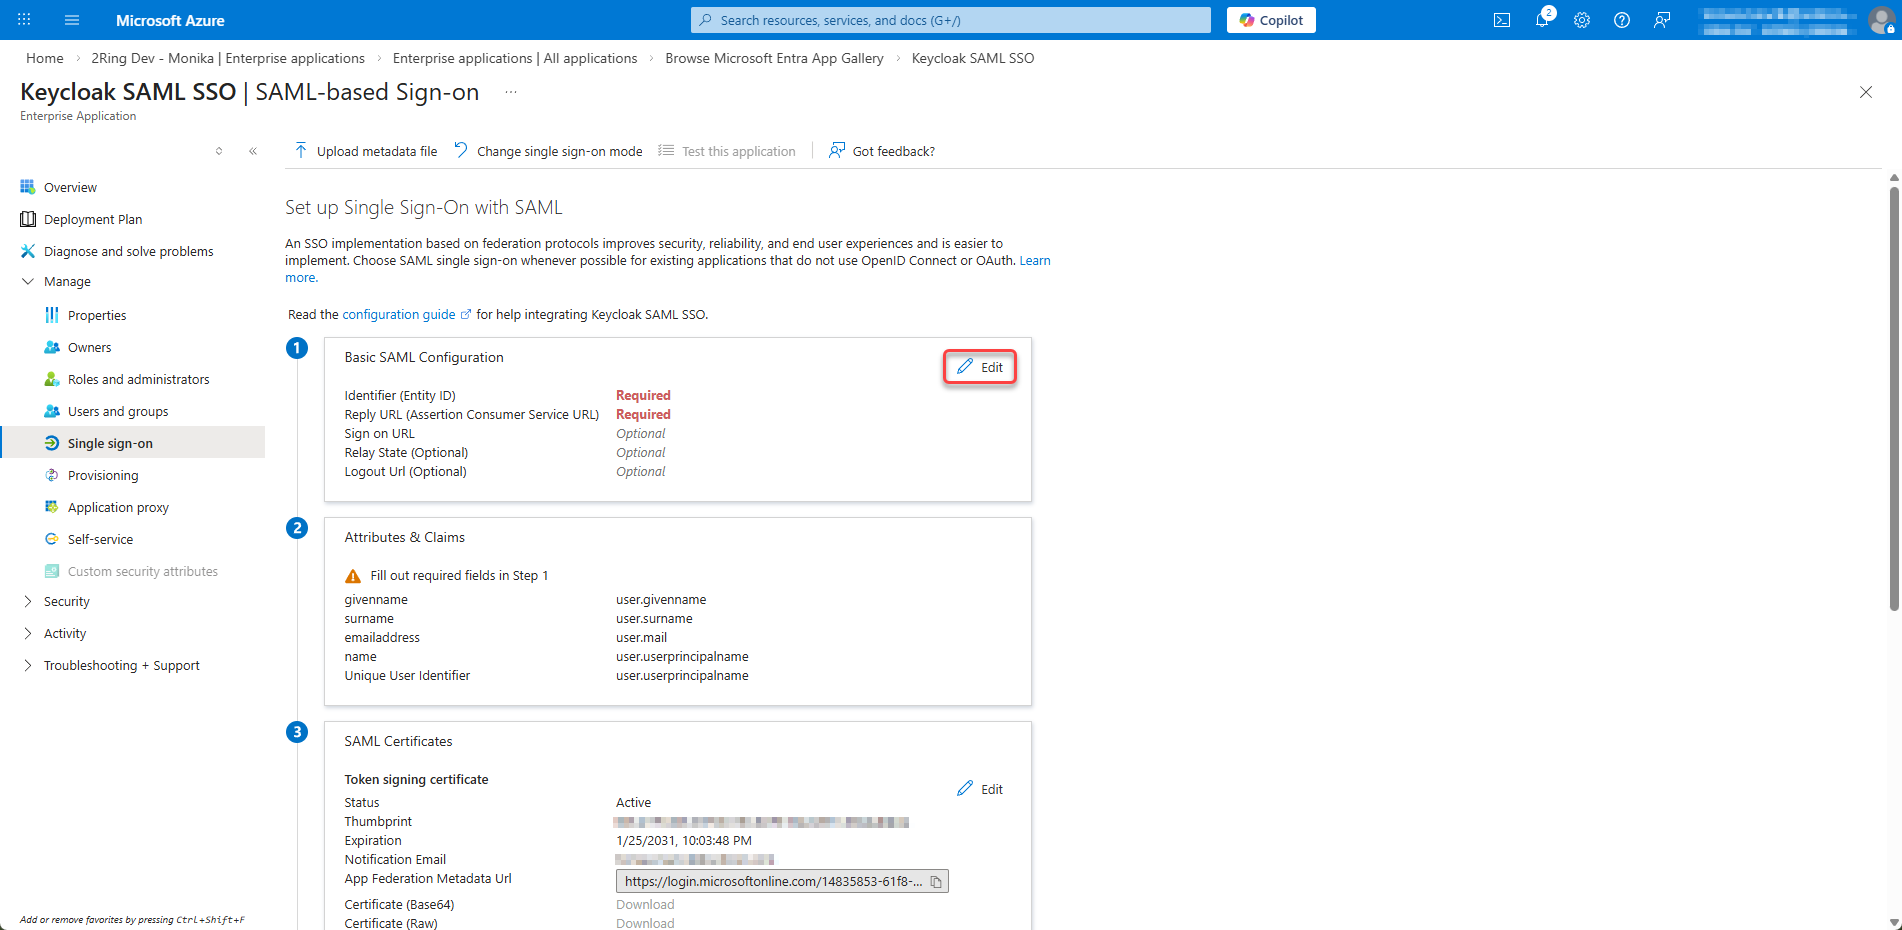
Click Edit on section 1. Basic SAML Configuration
Figure 23: Configure SAML Single Sign-On 3
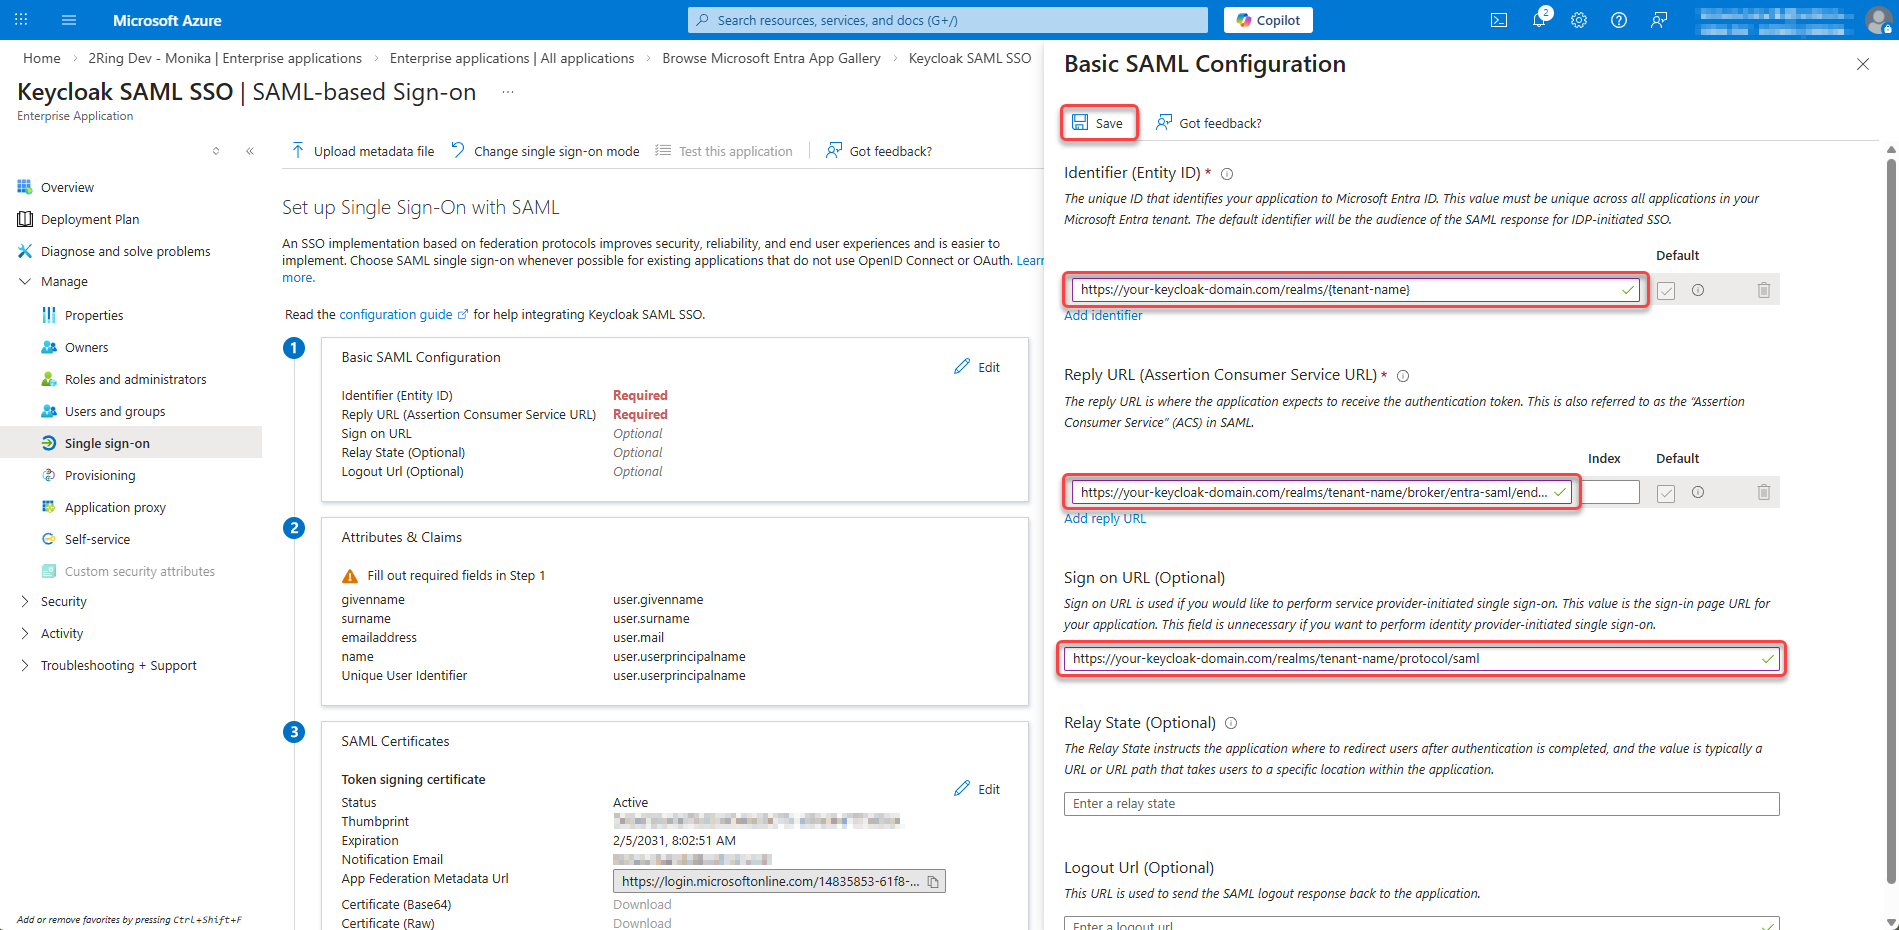
Configure Basic SAML Settings:
Identifier (Entity ID):
Click on Add indentifier and enter the following URL as the Entity ID:
https://{tenant_name}.2ring.cloud/realms/{tenant-name}
Replace
{tenant-name}with your actual tenant nameReply URL (Assertion Consumer Service URL):
Click on Add reply URL and enter the following URL as the Reply URL:
https://{tenant_name}.2ring.cloud/realms/{tenant-name}/broker/entra-saml/endpoint
Replace
{tenant-name}with your actual tenant name andentra-samlwith your IdP alias in KeycloakSign on URL (Optional):
https://{tenant_name}.2ring.cloud/realms/{tenant-name}/protocol/saml
Click Save
Figure 24: Configure Basic SAML Settings
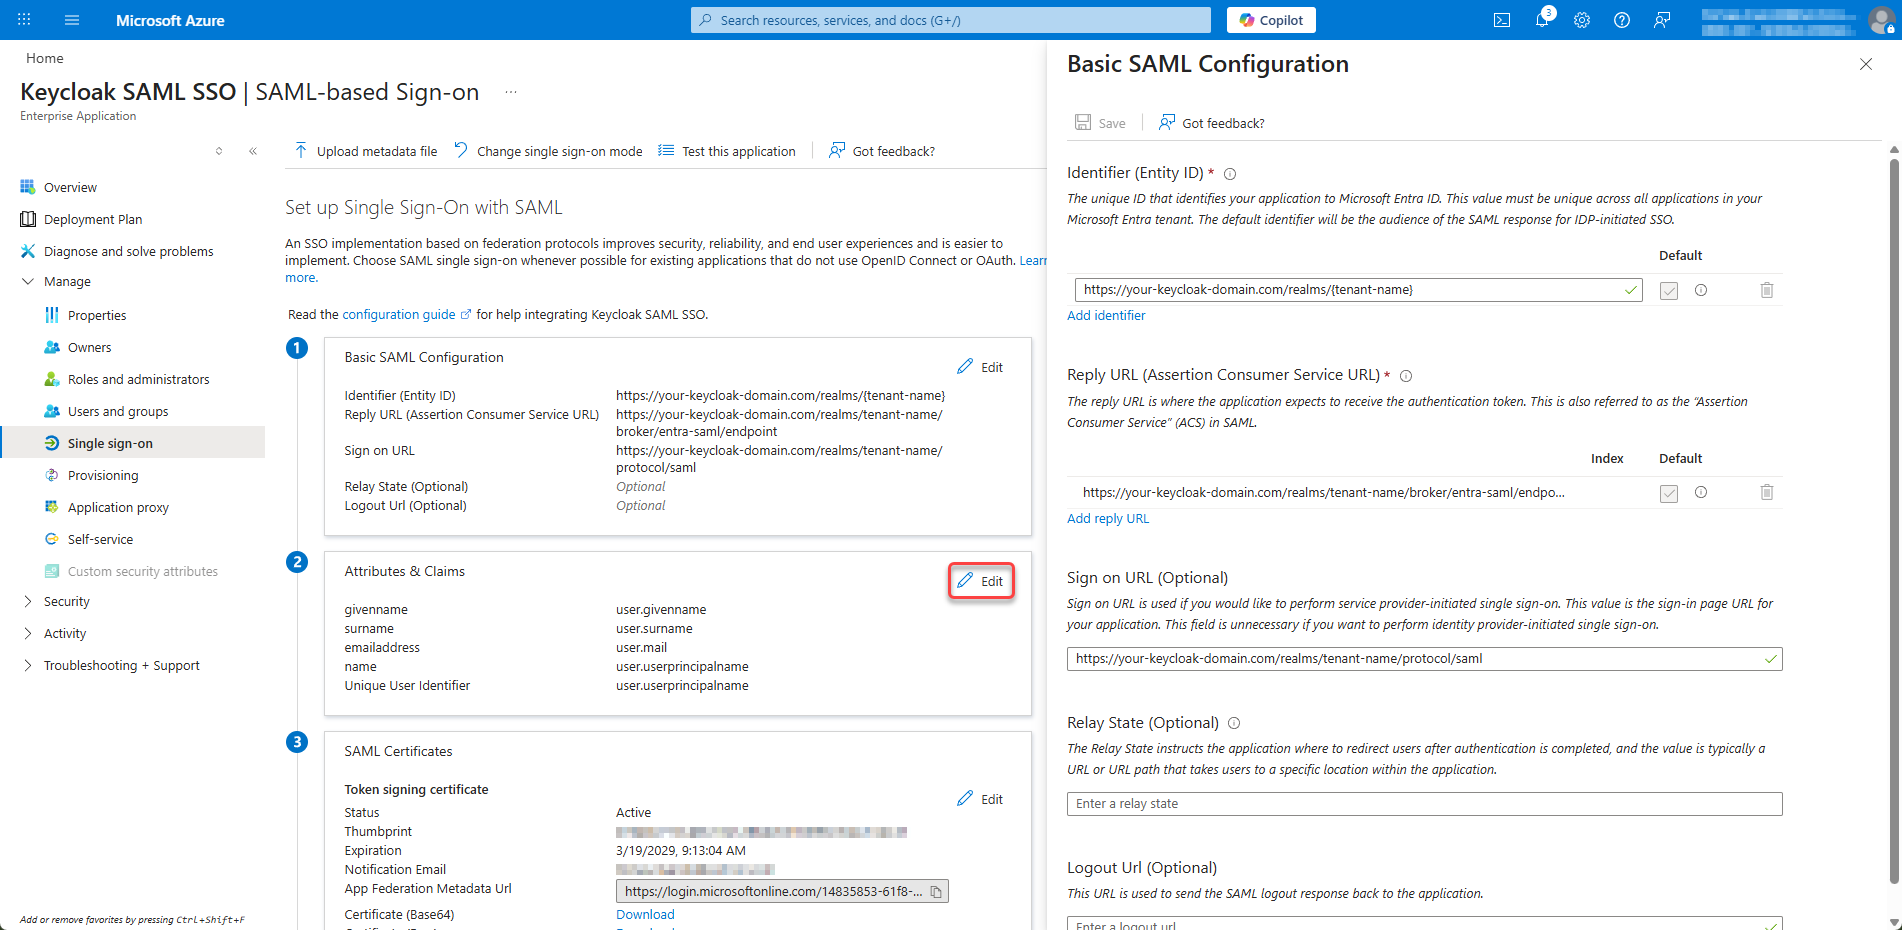
Step 3: Configure User Attributes & Claims
Click Edit on section 2. Attributes & Claims
Figure 25: Configure User Attributes & Claims
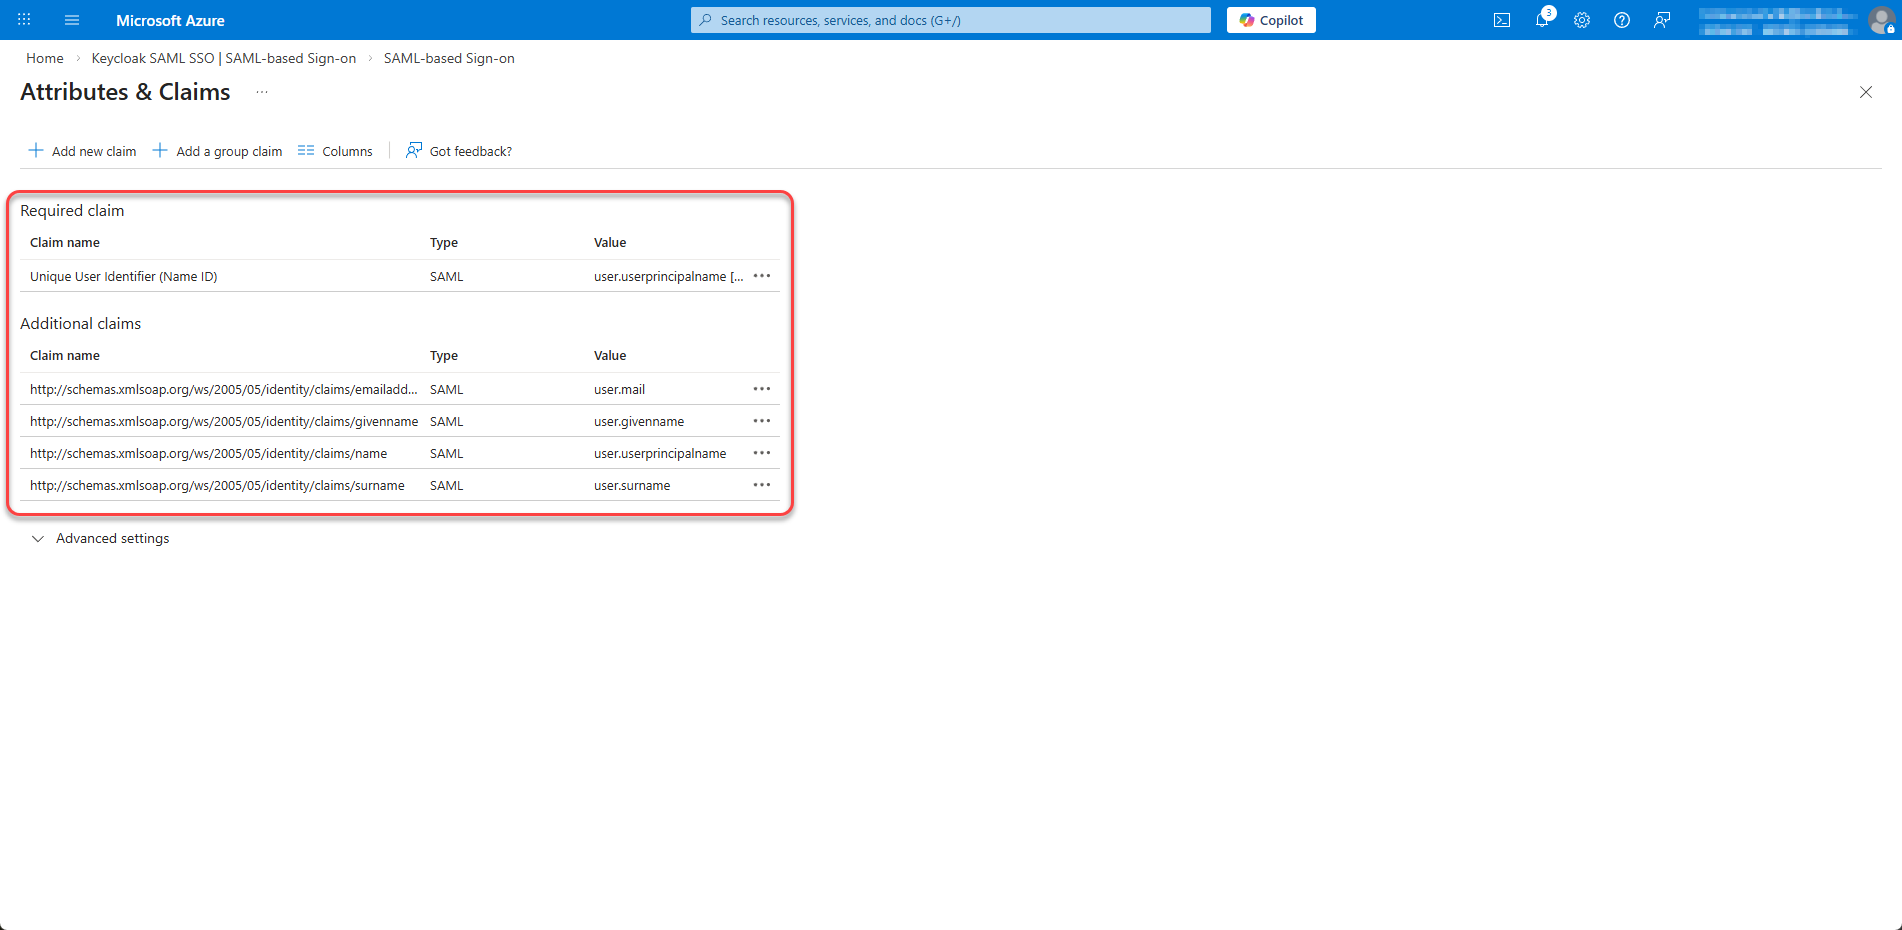
Ensure the following claims are present (add if missing):
Claim Name
Source Attribute
nameuser.userprincipalname
emailaddressuser.mail
givennameuser.givenname
surnameuser.surname
Figure 26: Configure User Attributes & Claims 2
Set permissions
Navigate to Microsoft Entra ID -> App registrations -> open the app registration and go to API permissions
Figure 27: Set permission
Remove “User.Read” permission by clicking the three dots on the right side and select “Remove permission”
Figure 28: Set permission 2
Click “Add permission”
Figure 29: Set permission 3
Add a permission -> Microsoft Graph -> Application permissions -> User.ReadBasic.All
With the User.ReadBasic.All permission, you can access basic user profile information. However, if you want to access user Office Location, use “User.Read.All” permission instead. With “User.Read.All” permission, you can also search for users by typing their office location in the search box in the import users dialog. Figure 30: Set permission 4
Grant admin consent
Figure 31: Set permission 6
Create client secret
Open the app registration and go to Certificates & secrets
Figure 32: Create client secret
Create new client secret
Figure 33: Create client secret 2
Copy and save the secret value
Figure 34: Create client secret 3
Provide configuration details to 2Ring
After completing the configuration, provide the following information to 2Ring support:
Entra ID (Tenant ID)
Application (Client) ID
Client Secret