Embedding DW layouts in Genesys Cloud “Desktop”
Prerequisites
By default, 2Ring DW (Dashboards & Wallboards) does not allow layouts to be embedded in other pages due to security restrictions. To enable embedding within Genesys Cloud, please prepare the following items:
Identify the Parent URL
Determine the URL from which the DW layout will be embedded within the Genesys Cloud interface. This is typically based on your Genesys Cloud region.
Example parent URL: https://apps.mypurecloud.de
Collect Public IP Addresses
To enable Anonymous Access, you must also configure IP Whitelisting for your DW instance.
Gather the list of public IP addresses from which the layouts should be accessible within the Genesys Cloud environment.
These IPs will be used to allow unauthenticated access to the layouts.
Once you have both items mentioned above, please create a Service Request with 2Ring Support (https://www.2ring.com/support/contact-support) to enable these features.
After confirmation from 2Ring that the URL has been whitelisted and Anonymous Access is enabled, you can proceed with embedding DW layouts into your Genesys Cloud environment by following the steps below.
Genesys Cloud Update
DW layouts can be embedded in Genesys Cloud using three on-demand options. They require Integration Management permissions. Applications can be set up through these methods:
Use Client Application Integration to have a DW layout available while not interacting with a customer. This can be configured either with a Widget (Option 1) or a Standalone (Option 2) type. More details are available at https://help.mypurecloud.com/articles/set-custom-client-application-integration/
Use Interaction Widget Integration (Option 3) to have a DW layout visible while handling an interaction. More details are available at https://help.mypurecloud.com/articles/set-up-an-interaction-widget-integration/
The following steps outline the setup process for adding a new Integration (a Client Application or an Interaction Widget).
Option 1: Client Application – Widget
Recommended for smaller, vertically oriented layouts.
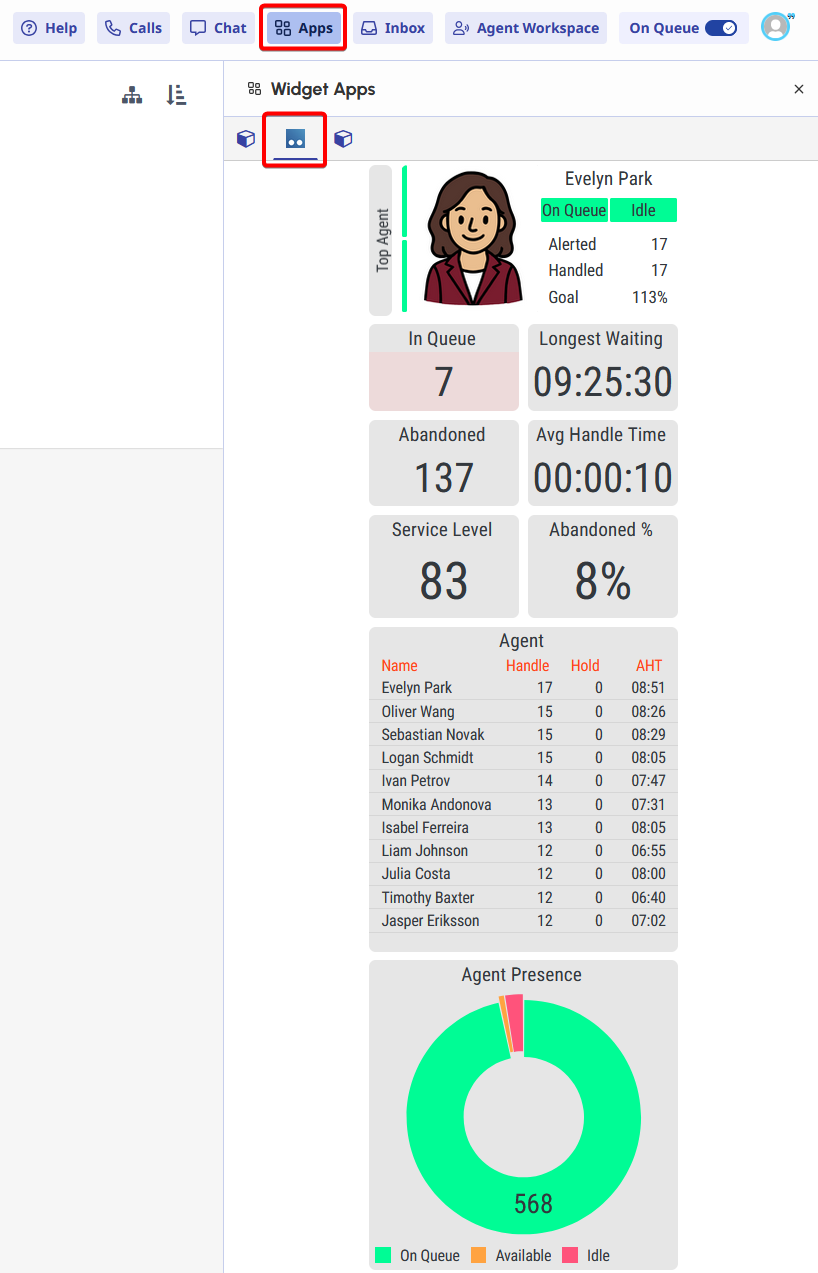
To set this up, the “Client Application” Integration can be set up with the following settings:

Configuration Settings:
Application URL: Use the “Short URL” of the DW layout from your tenant.
Application Type: widget
Iframe Sandbox Options: allow-scripts, allow-same-origin, allow-forms, allow-modals, allow-popups
Group Filtering: Restrict access to specific user groups (configured via GC Admin > Directory > Groups)
Advanced Configuration (Optional Icon):
{
  "icon": {
    "vector": "https://demo.2ring.cloud/viewer/assets/icons/favicon.ico",
    "72x72": "https://demo.2ring.cloud/viewer/assets/icons/favicon.ico"
  }
}
Option 2: Client Application – Standalone
Recommended for larger layouts with more detailed information.
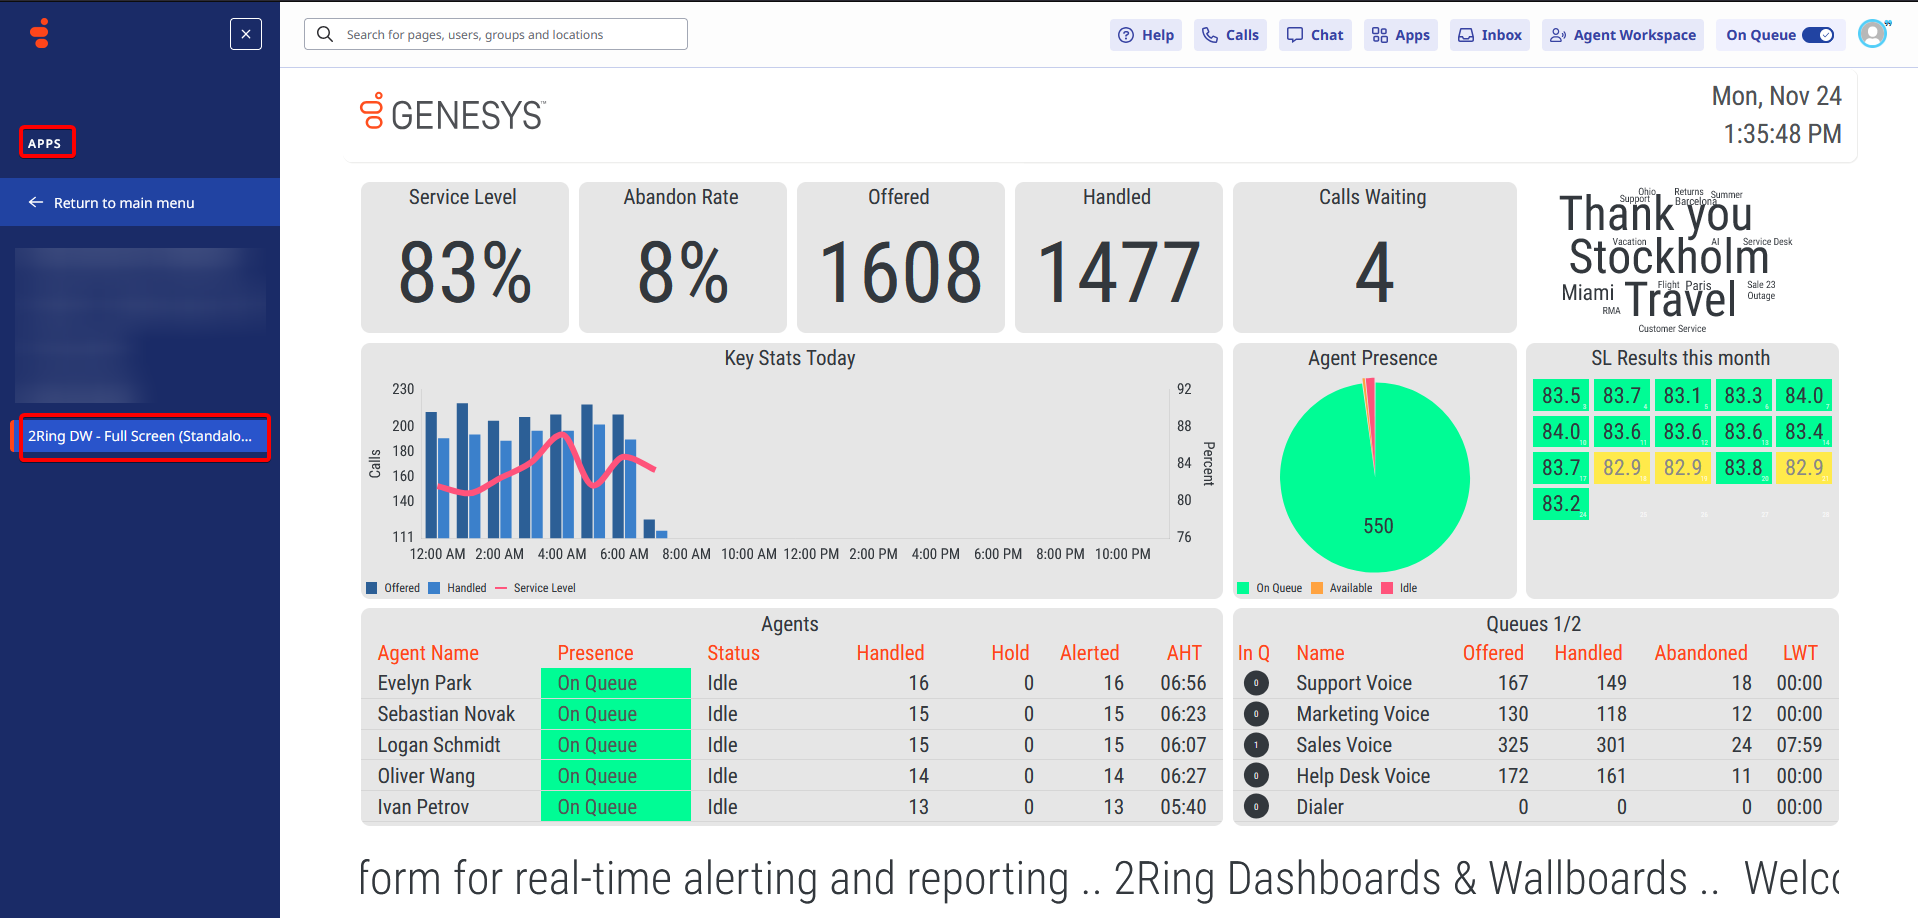
To set this up, the “Client Application” Integration can be set up with the following settings:
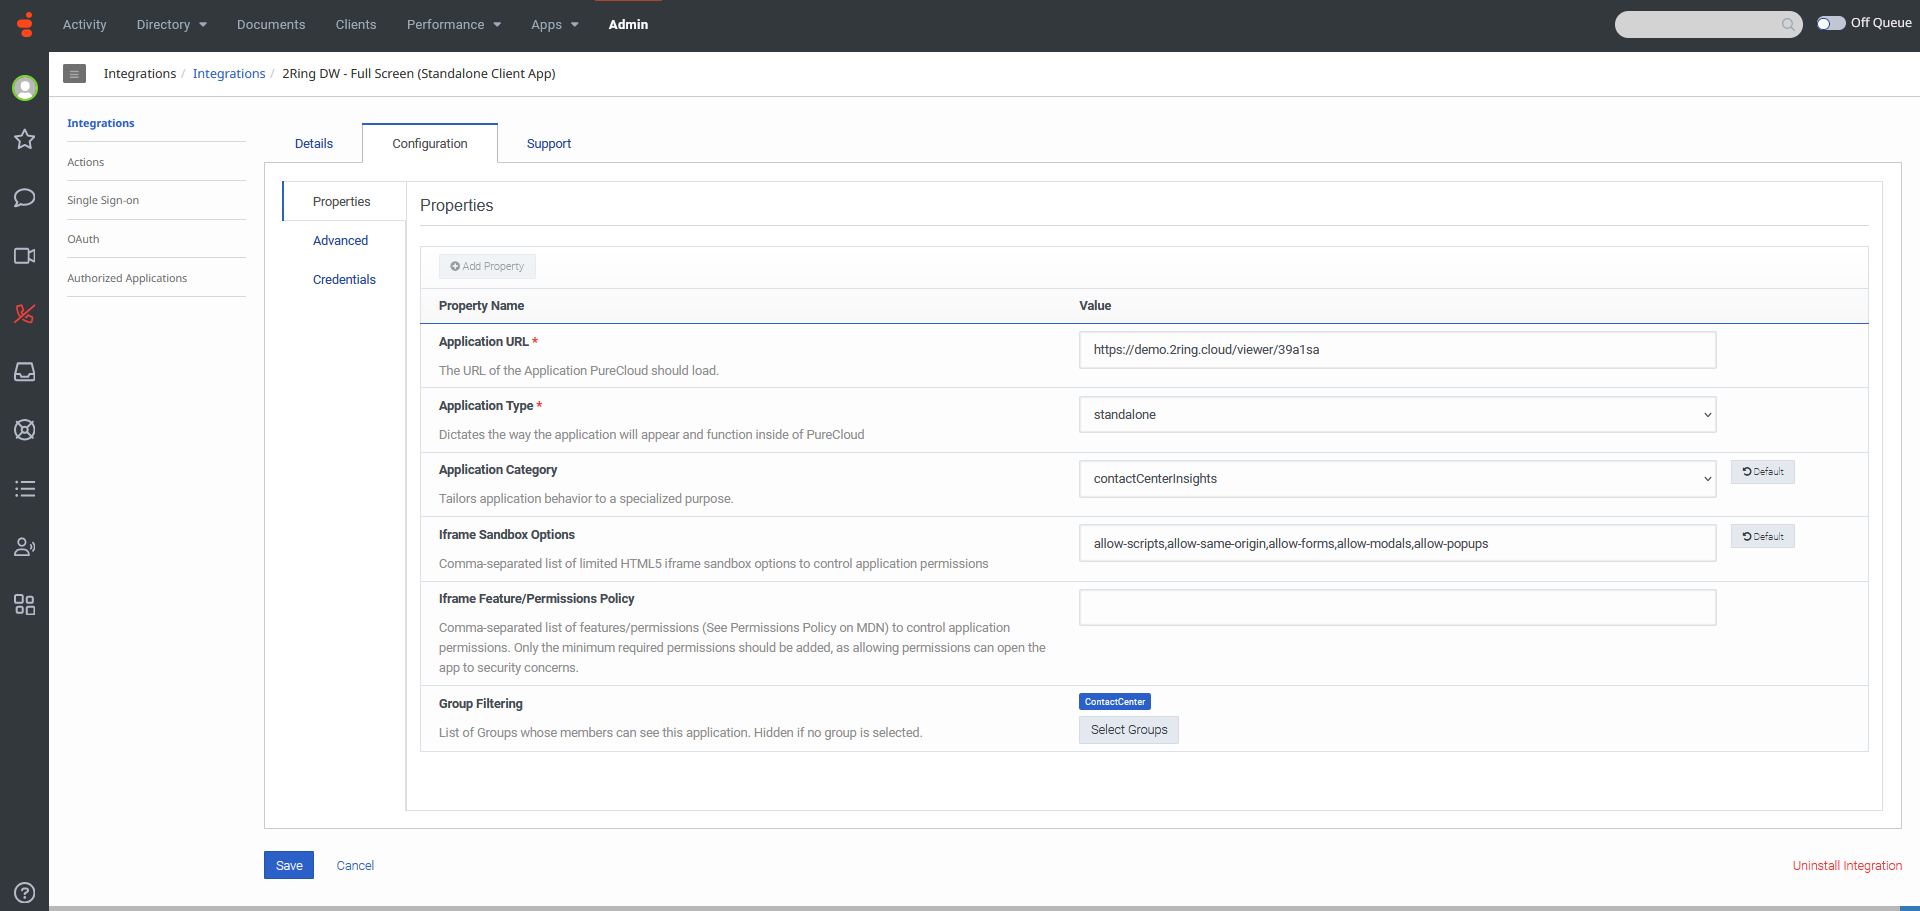
Configuration Settings:
Application URL: Use the “Short URL” of the DW layout from your tenant.
Application Type: standalone
Application Category: Leave blank to show under the Apps tab. To display under Performance, use: contactCenterInsights
Iframe Sandbox Options: allow-scripts, allow-same-origin, allow-forms, allow-modals, allow-popups
Group Filtering: Restrict access to specific user groups (configured via GC Admin > Directory > Groups)
Option 3: Interaction Widget
Recommended for smaller, vertically oriented layouts.
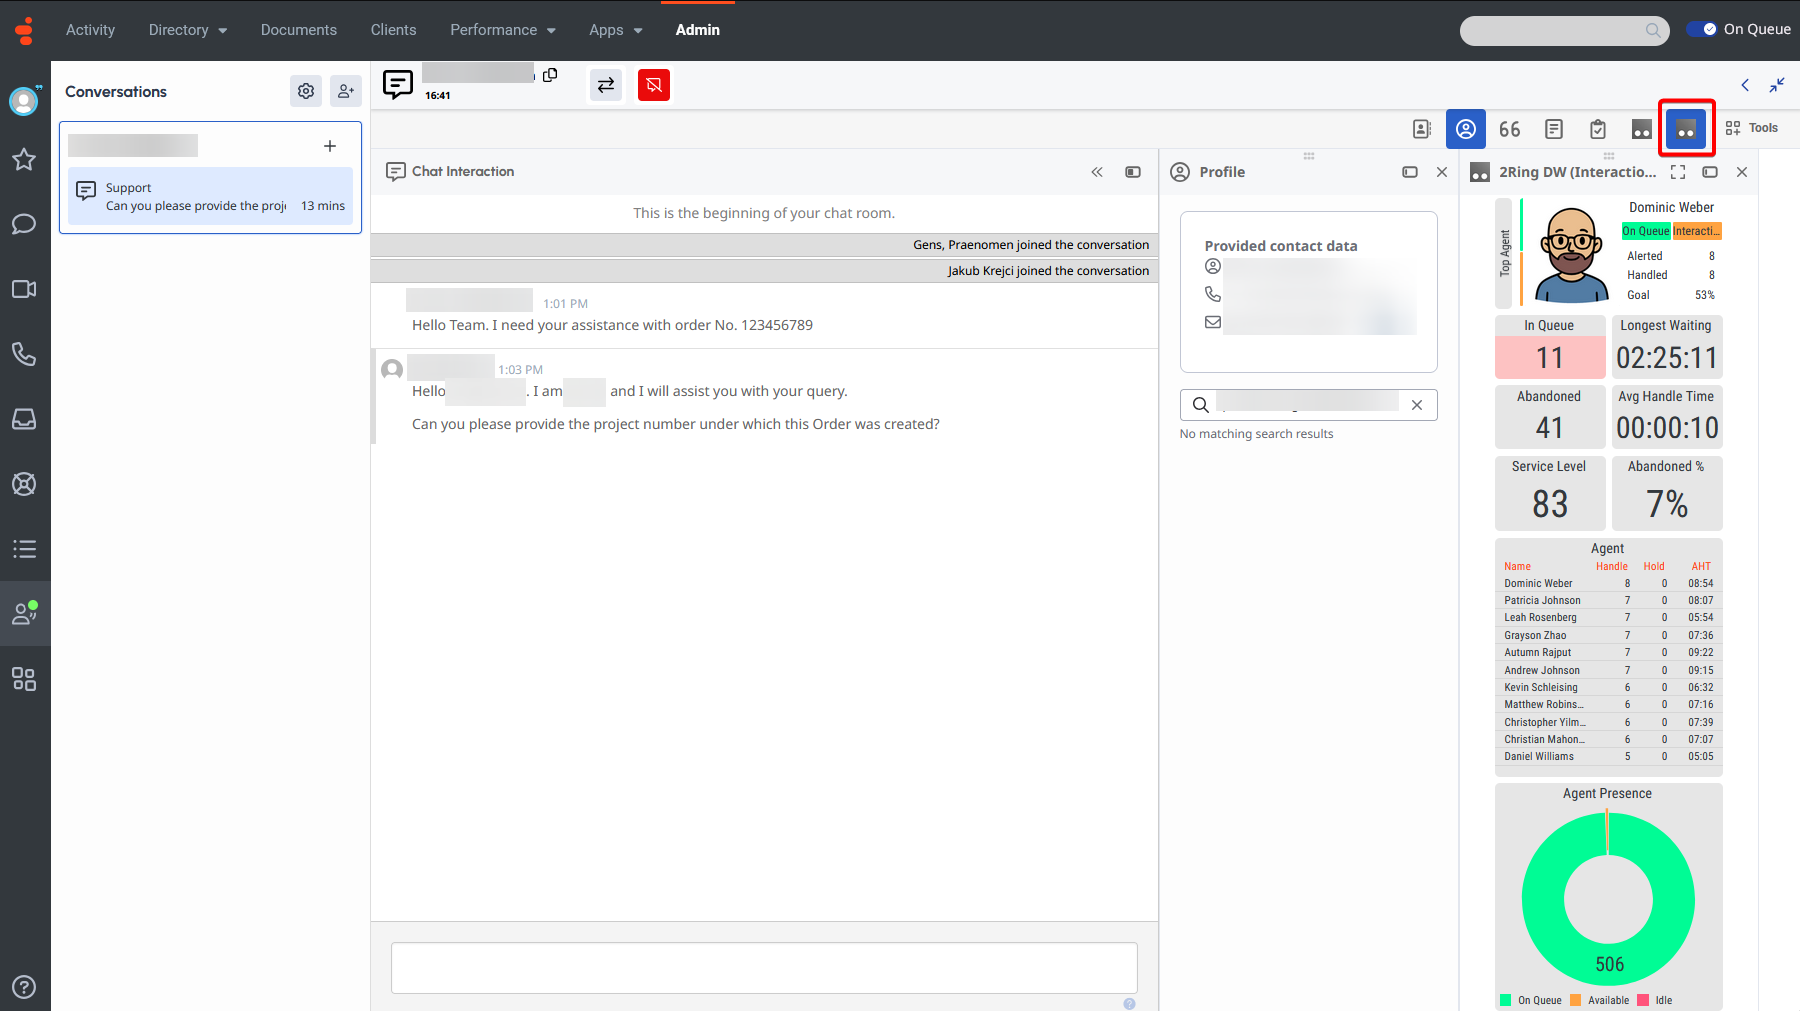
To set this up, the “Interaction Widget” Integration can be set up with the following settings:
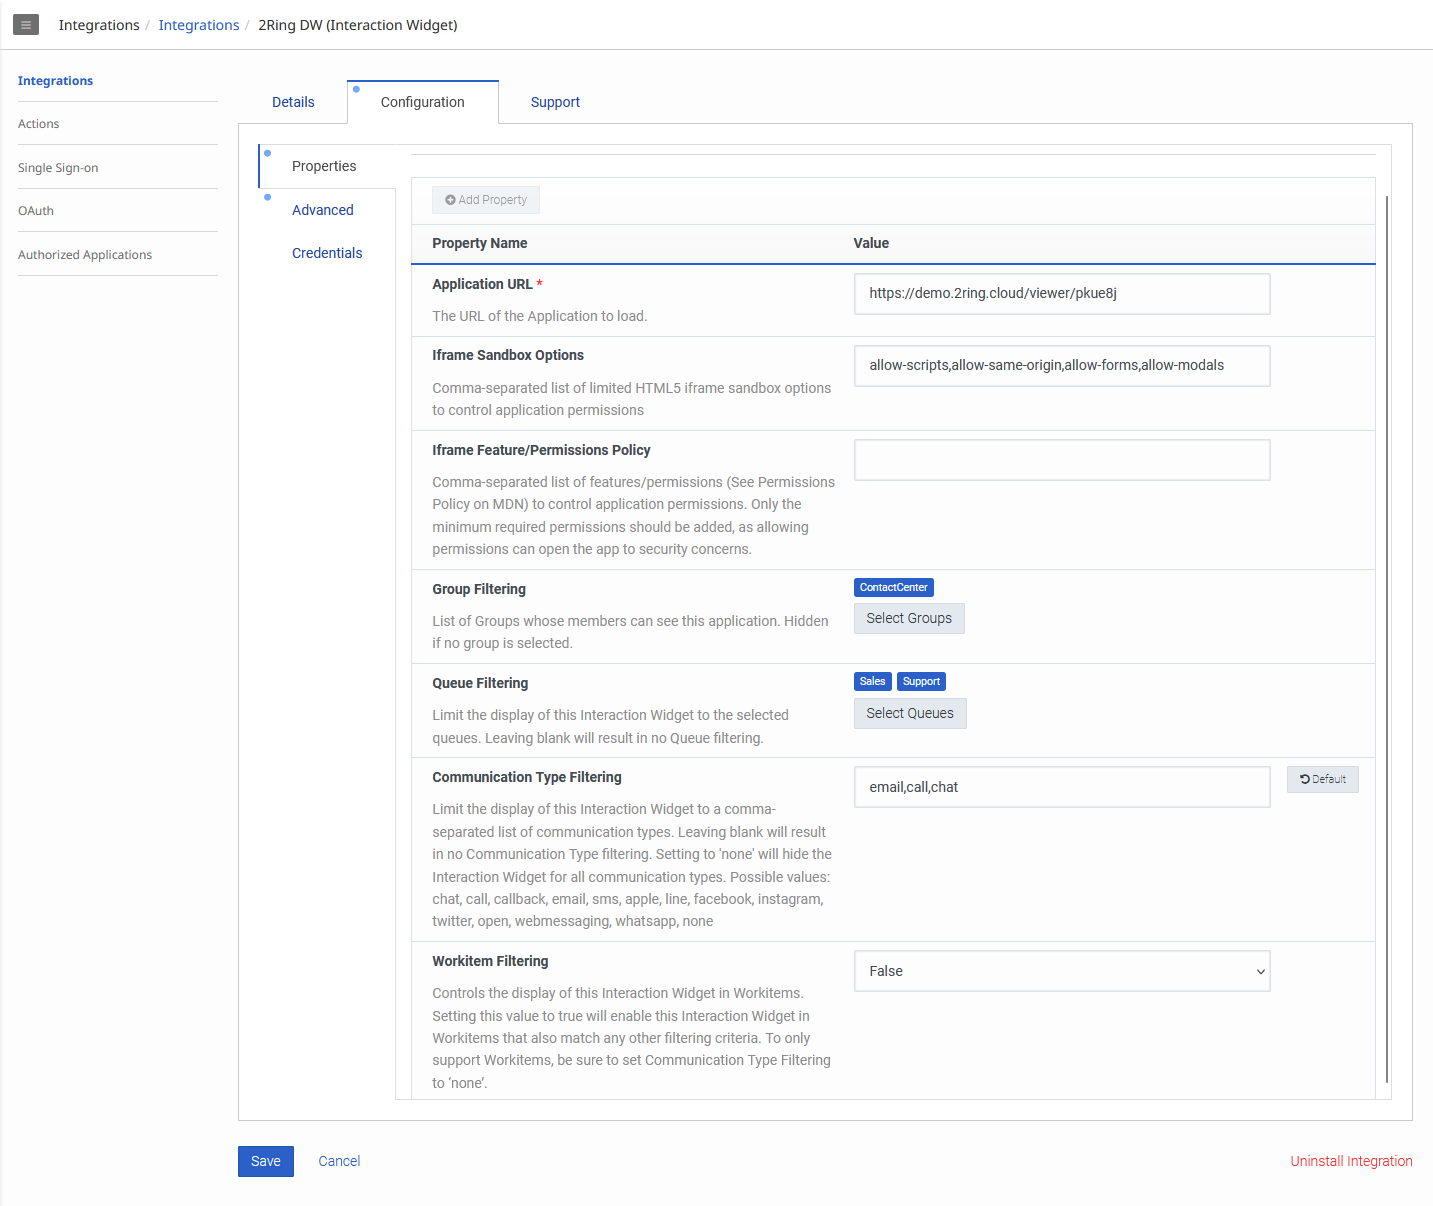
Configuration Settings:
Application URL: Use the “Short URL” of the DW layout from your tenant.
Iframe Sandbox Options: allow-scripts, allow-same-origin, allow-forms, allow-modals, allow-popups
Group Filtering: Restrict access to specific user groups (configured via GC Admin > Directory > Groups)
Queue Filtering: Limit displaying this Interaction Widget only for interactions from specific Queues
Communication Type Filtering: Limit displaying this Interaction Widget only for interactions from specific Communication/Media Types
Advanced Configuration (Optional Icon):
{
  "icon": {
    "vector": "https://demo.2ring.cloud/viewer/assets/icons/favicon.ico",
    "72x72": "https://demo.2ring.cloud/viewer/assets/icons/favicon.ico"
  }
}
Final Steps
Once the integration is configured and set to Active, users must reload their Genesys Cloud page to see the new app.