Entra Authentication
Microsoft Entra authentication enables the DW application to be connected with the Microsoft Entra ID app. Users configured in the Microsoft Entra ID app can then be used to access the DW application.
Create app registration
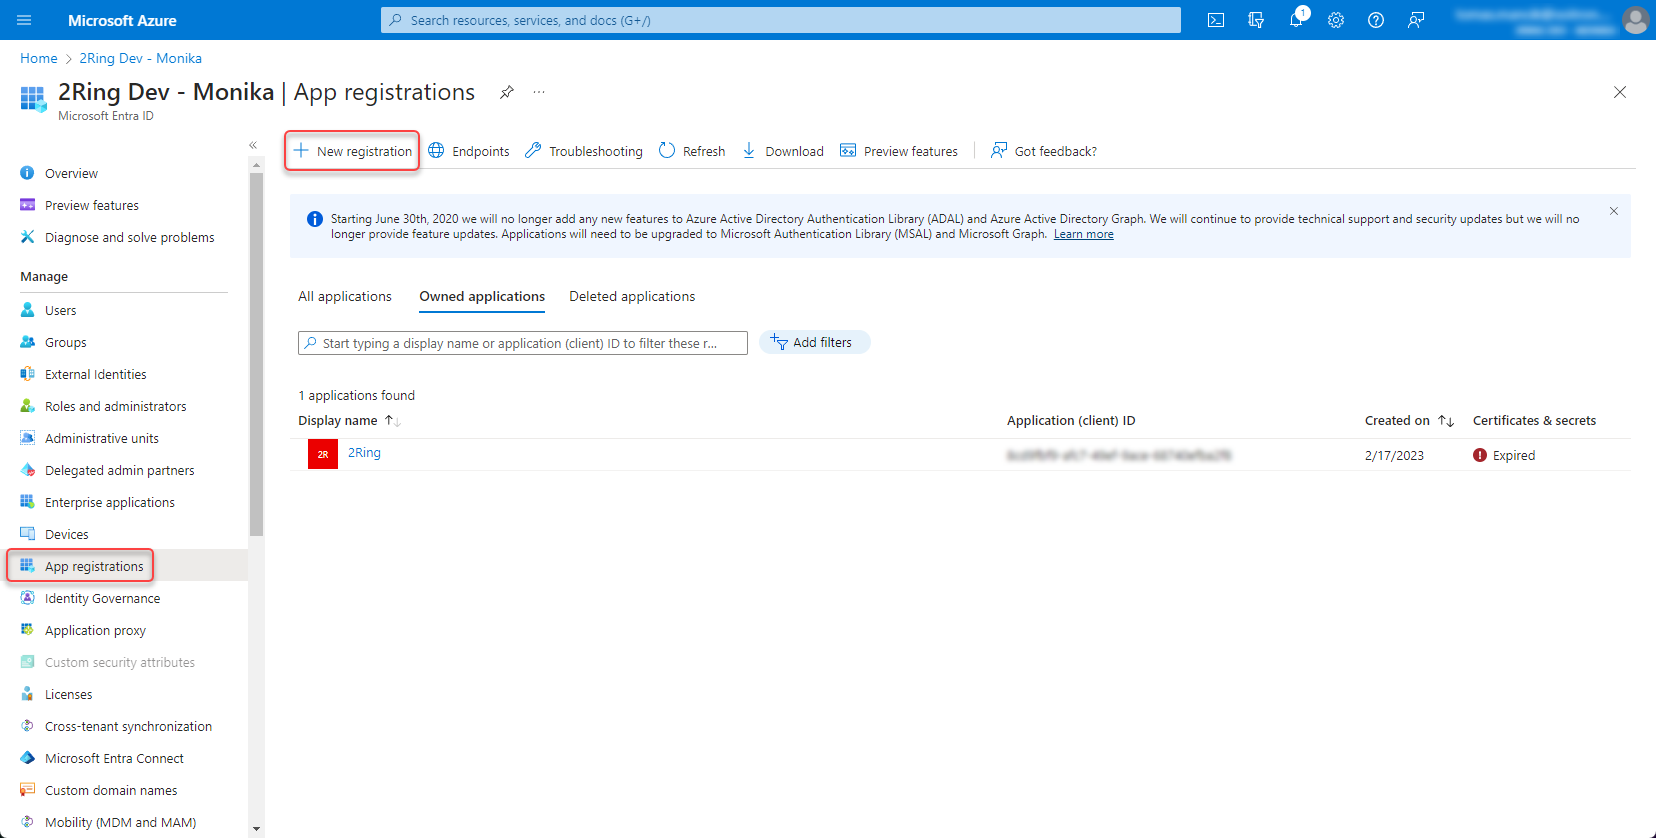
Go to Microsoft Entra ID -> App registrations -> New registration
Figure 1: App registration
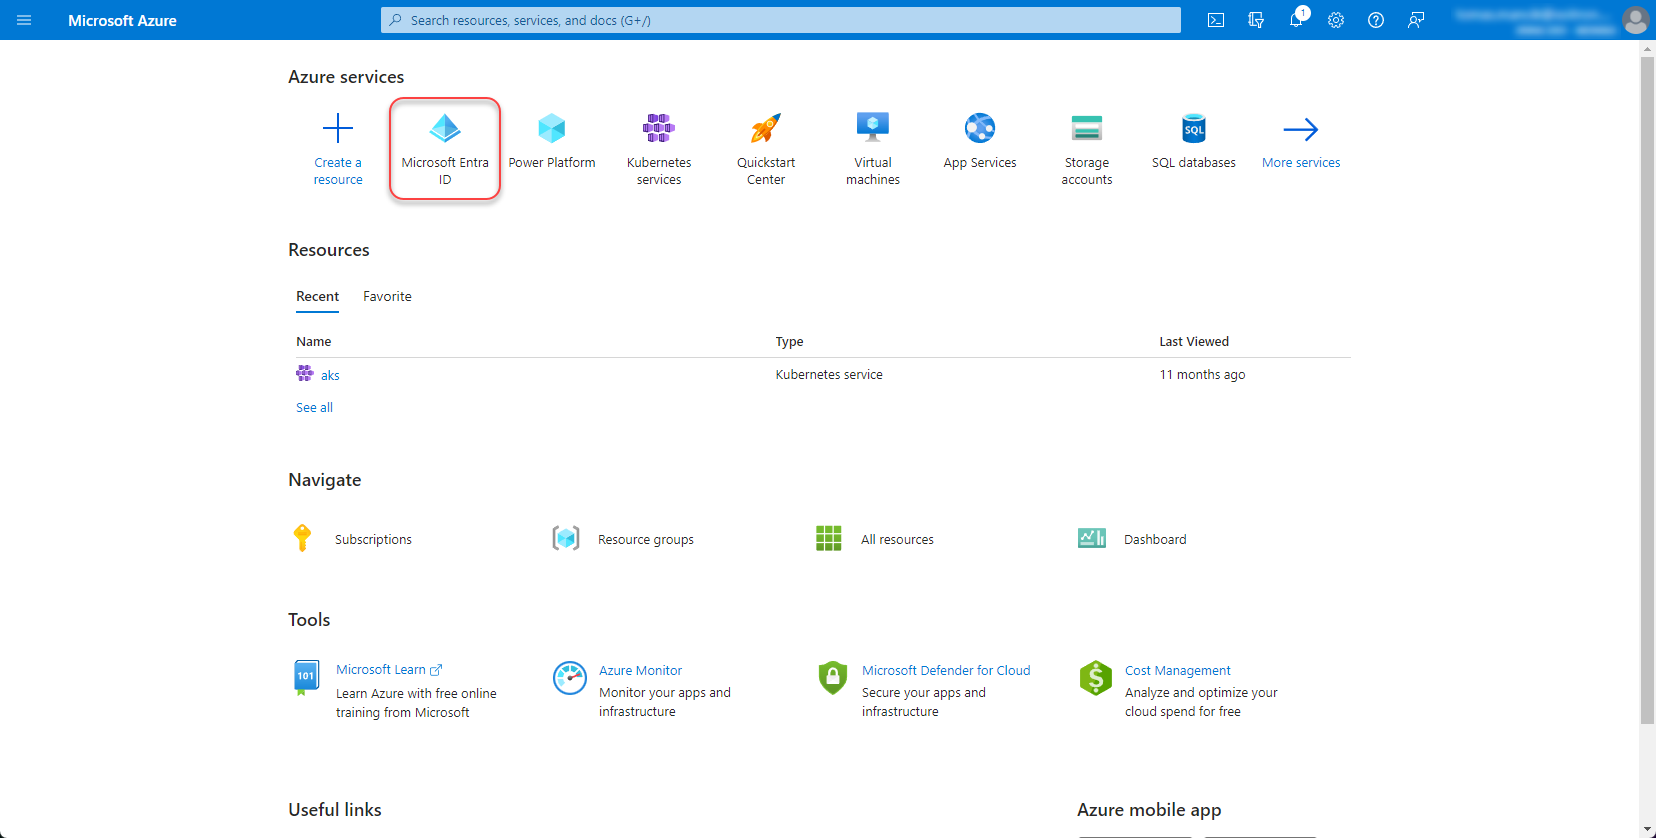
Figure 2: App registration 2
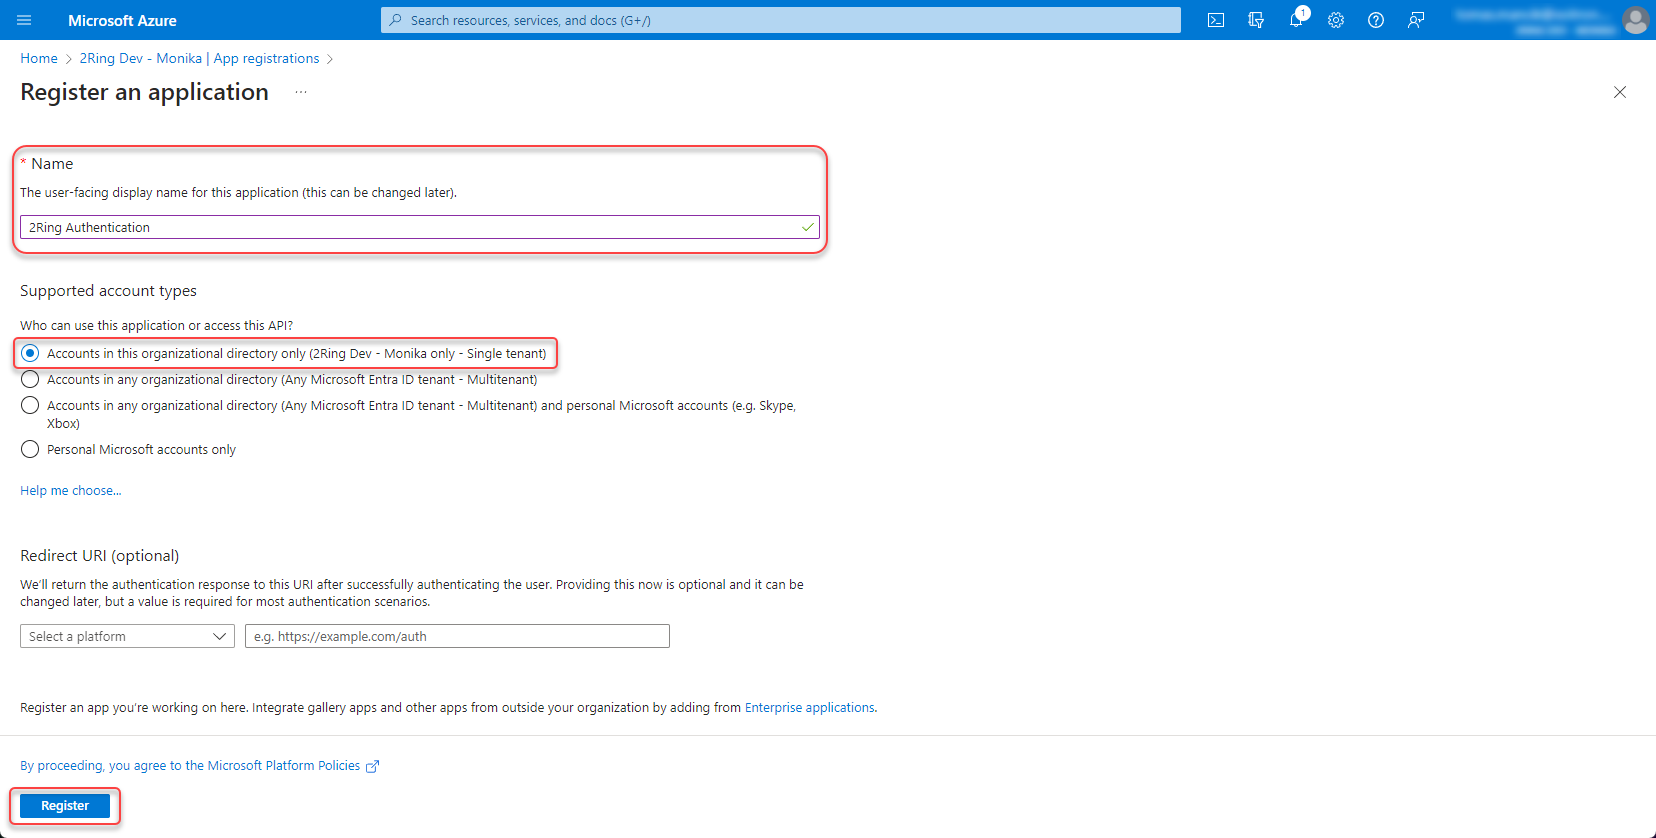
Fill the name of the application, select “Accounts in this organizational directory only (Single tenant)” and click “Register”.
Figure 3: App registration 3
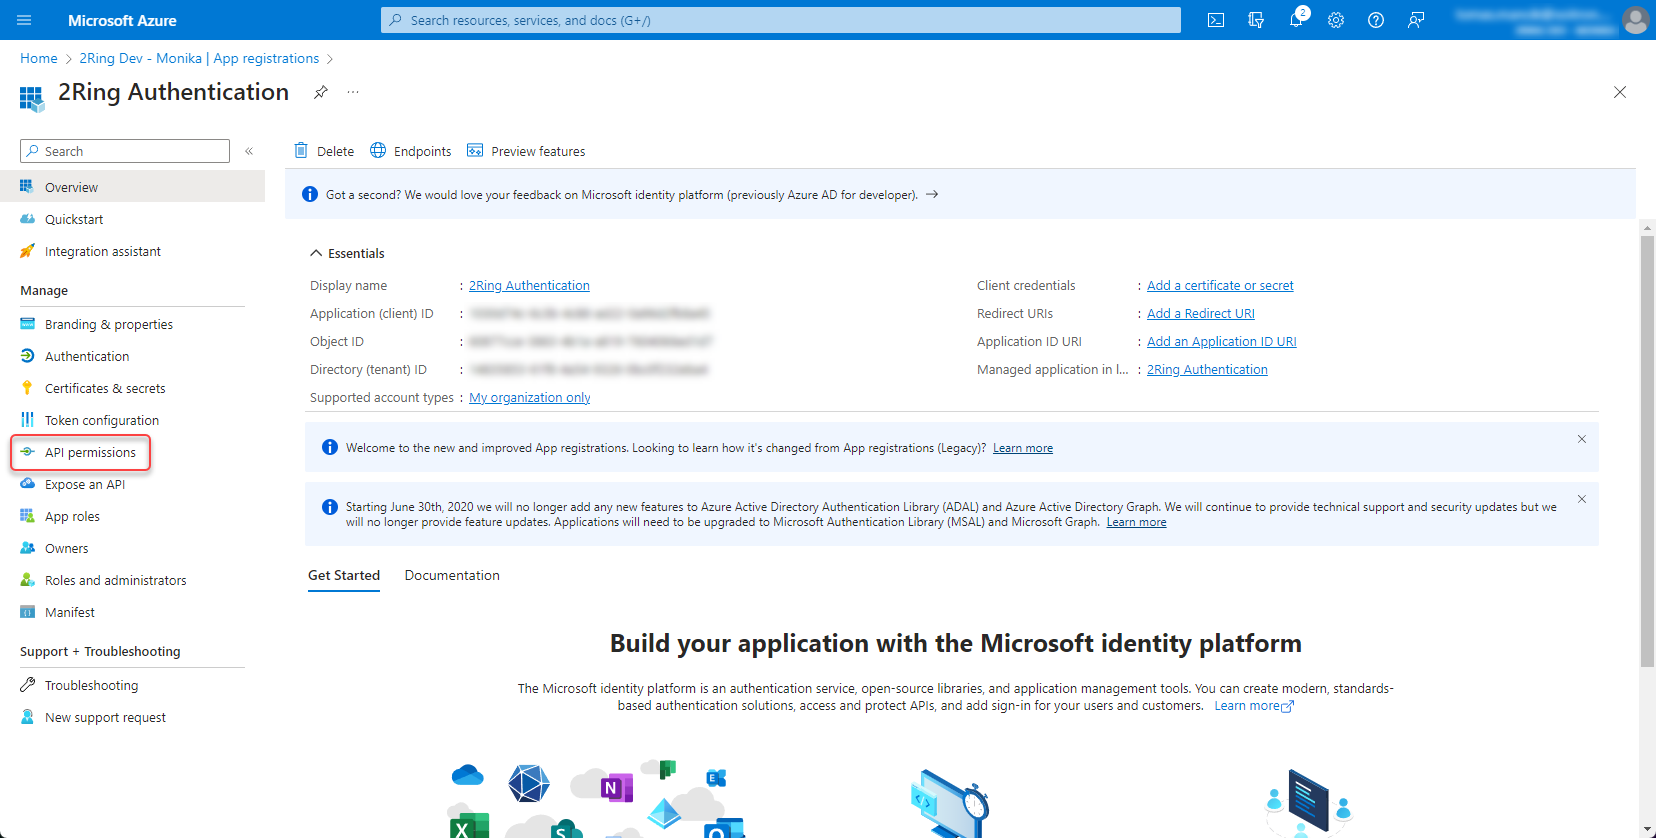
Set permissions
Open the app registration and go to API permissions
Figure 4: Set permission
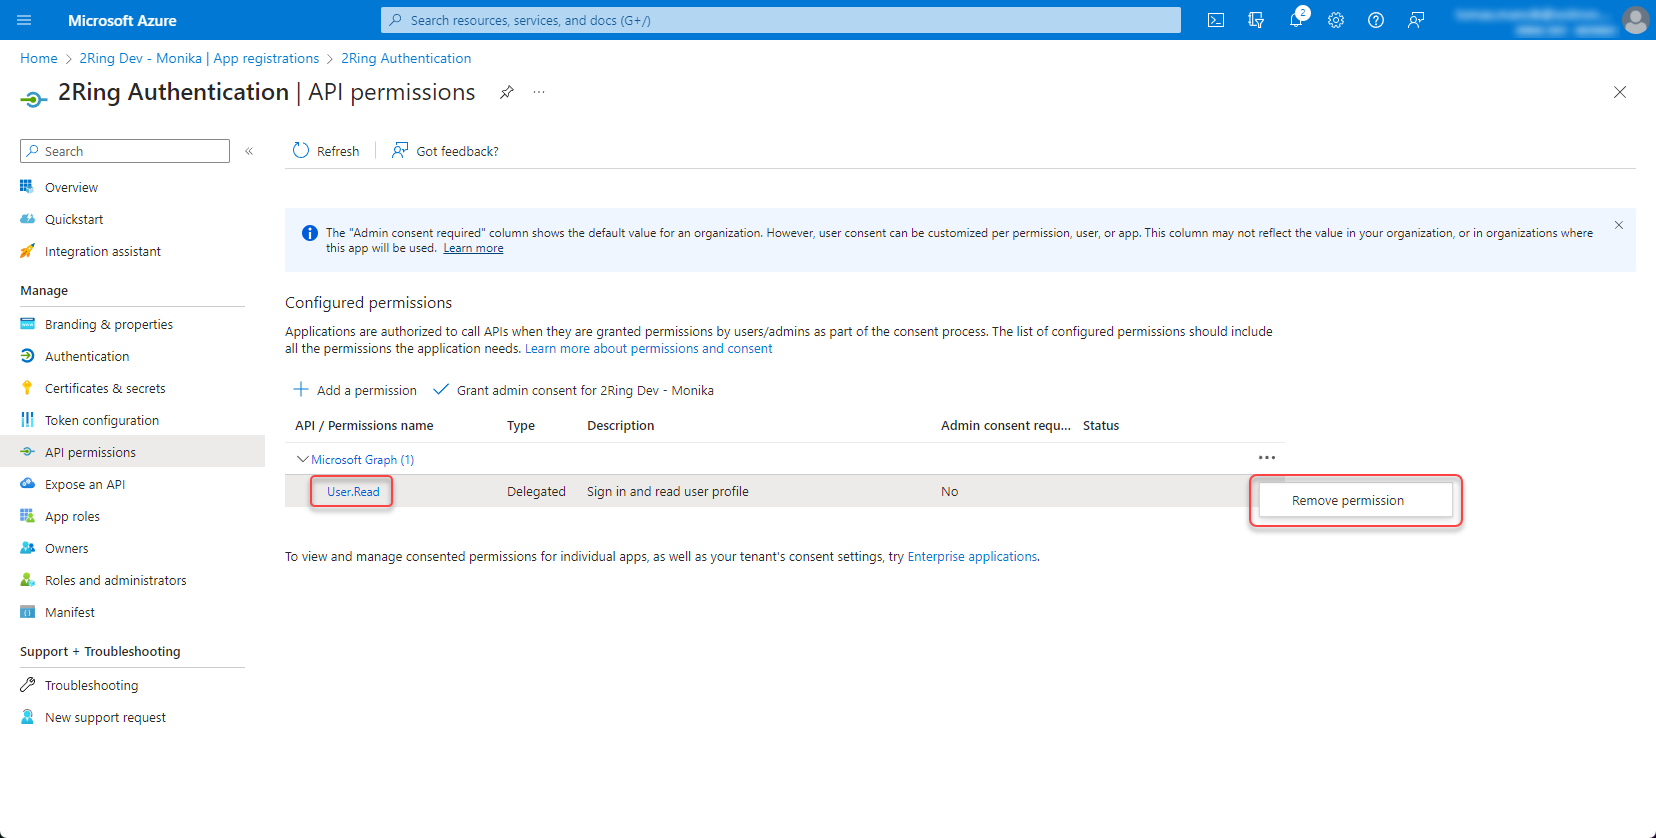
Remove “User.Read” permission by clicking the three dots on the right side and select “Remove permission”
Figure 5: Set permission 2
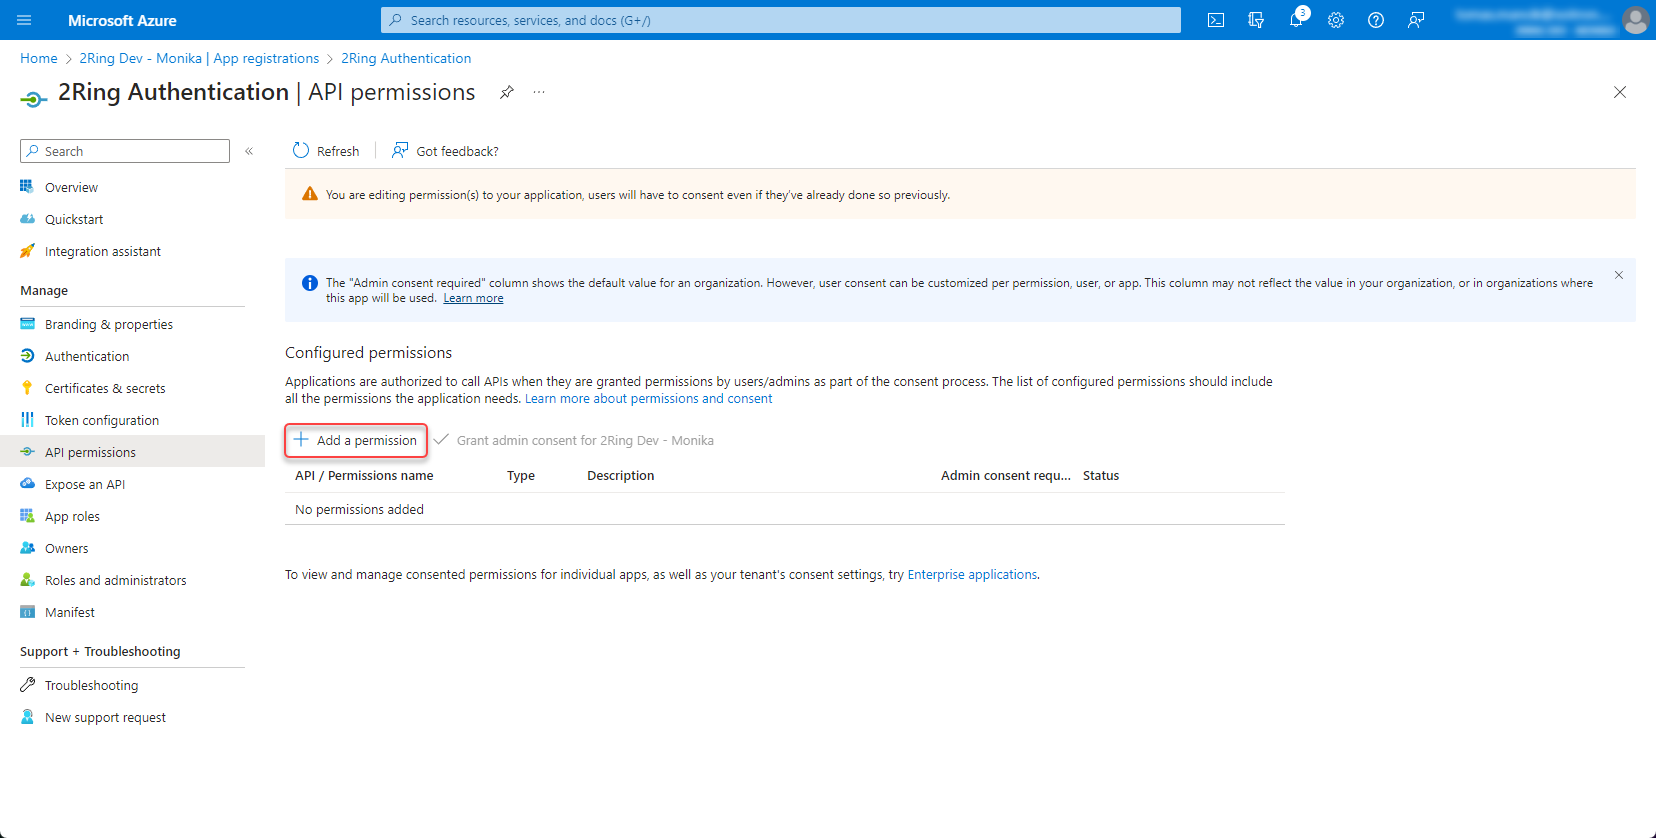
Click “Add permission”
Figure 7: Set permission 3
Add a permission -> Microsoft Graph -> Application permissions -> User.ReadBasic.All
With the User.ReadBasic.All permission, you can access basic user profile information. However, if you want to access user Office Location, use “User.Read.All” permission instead. With “User.Read.All” permission, you can also search for users by typing their office location in the search box in the import users dialog. Figure 7: Set permission 4

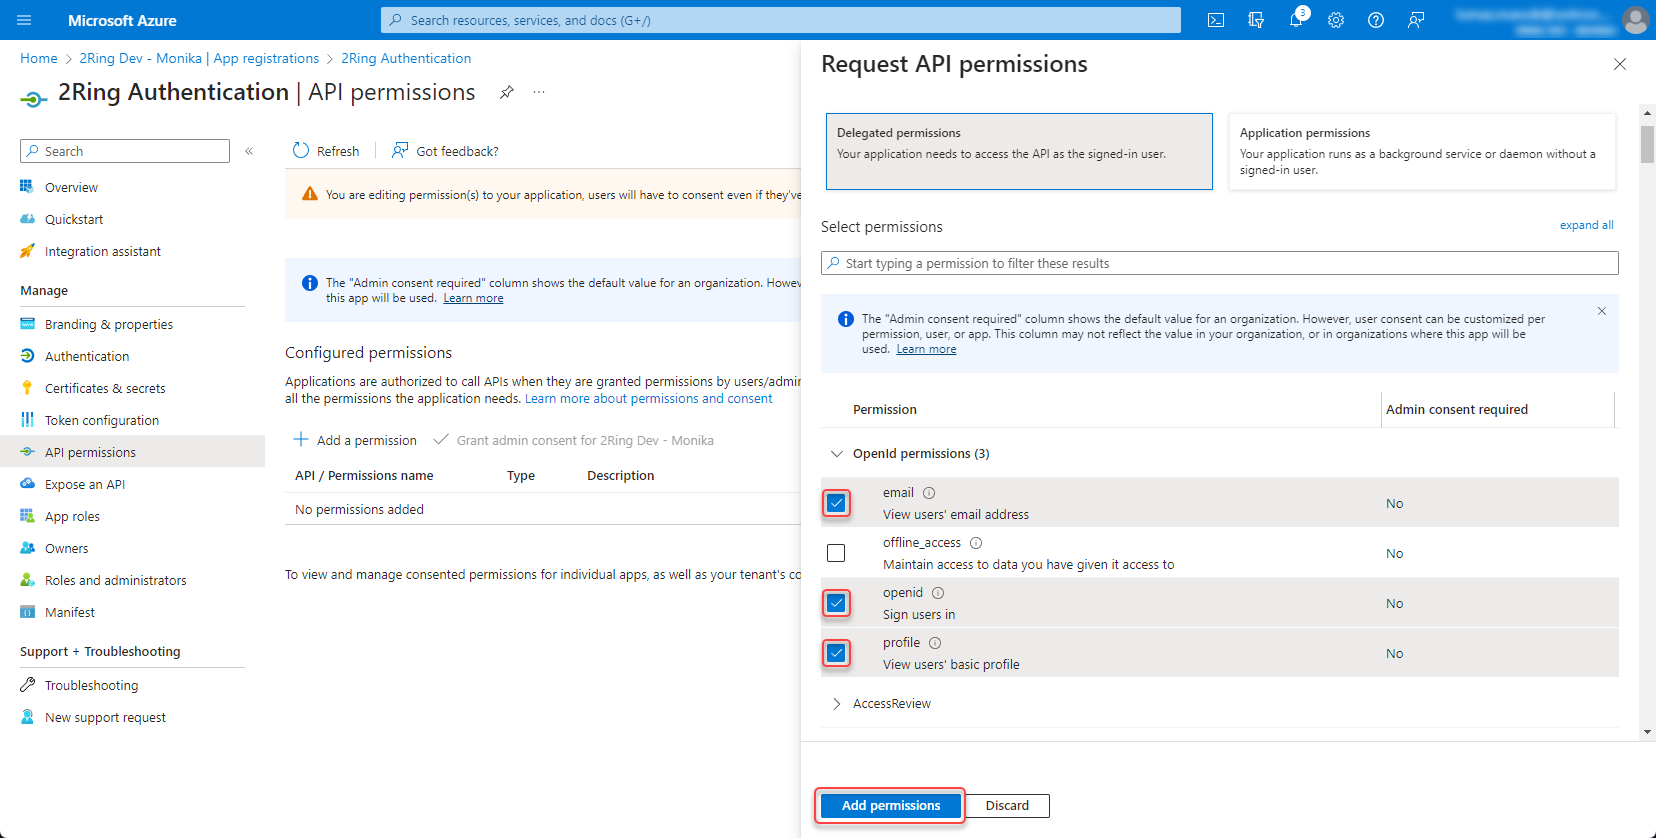
Add following permissions -> Microsoft Graph -> Delegated permissions -> openid, profile and email
Figure 8: Set permission 5
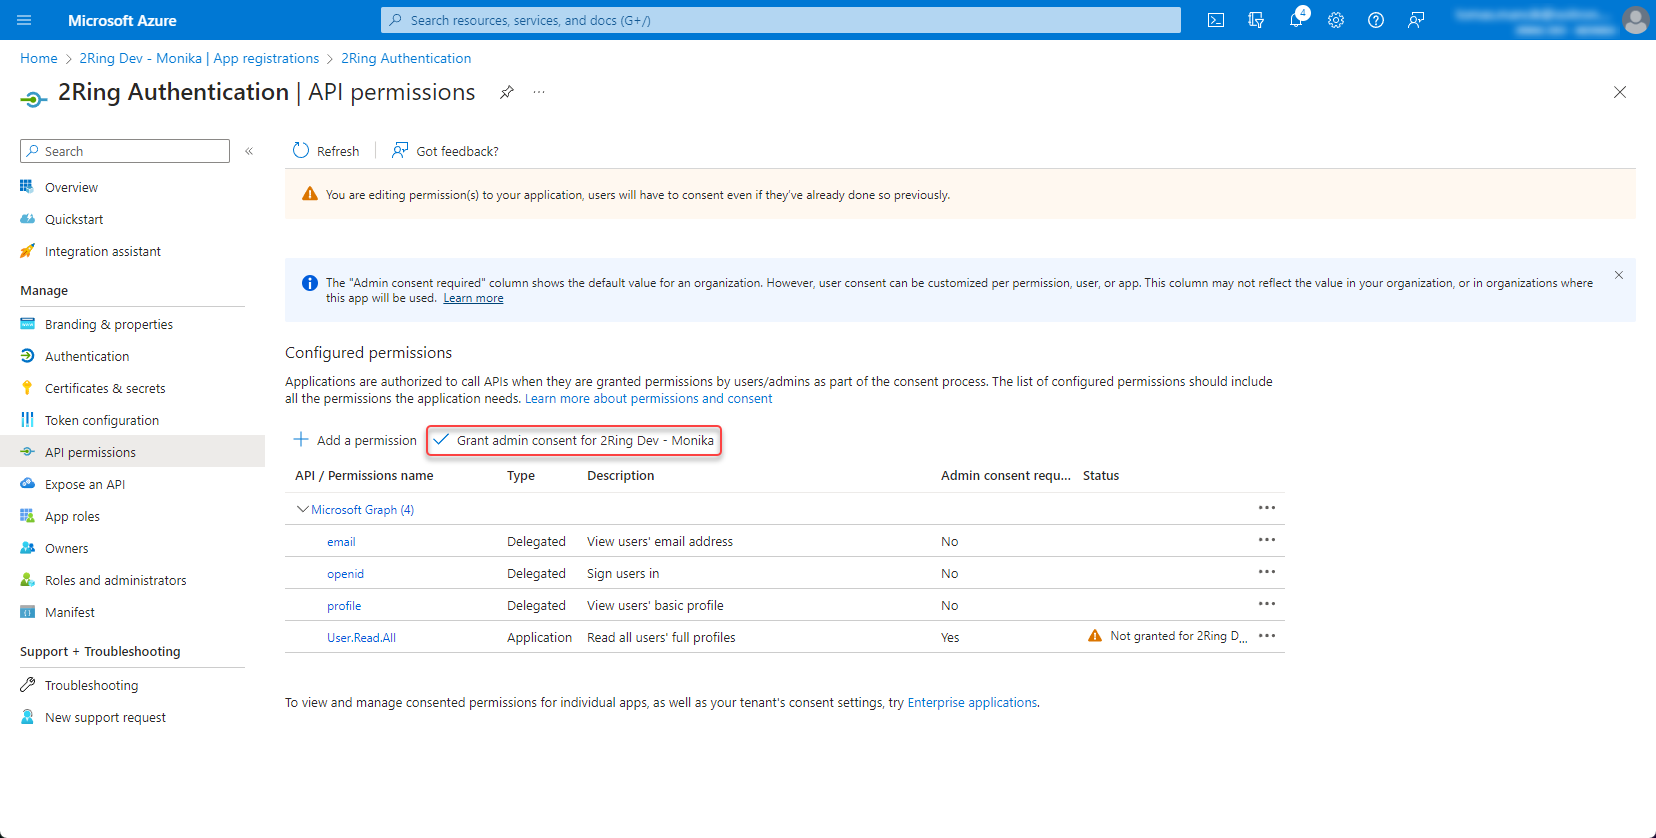
Grant admin consent
Figure 9: Set permission 6
Create client secret
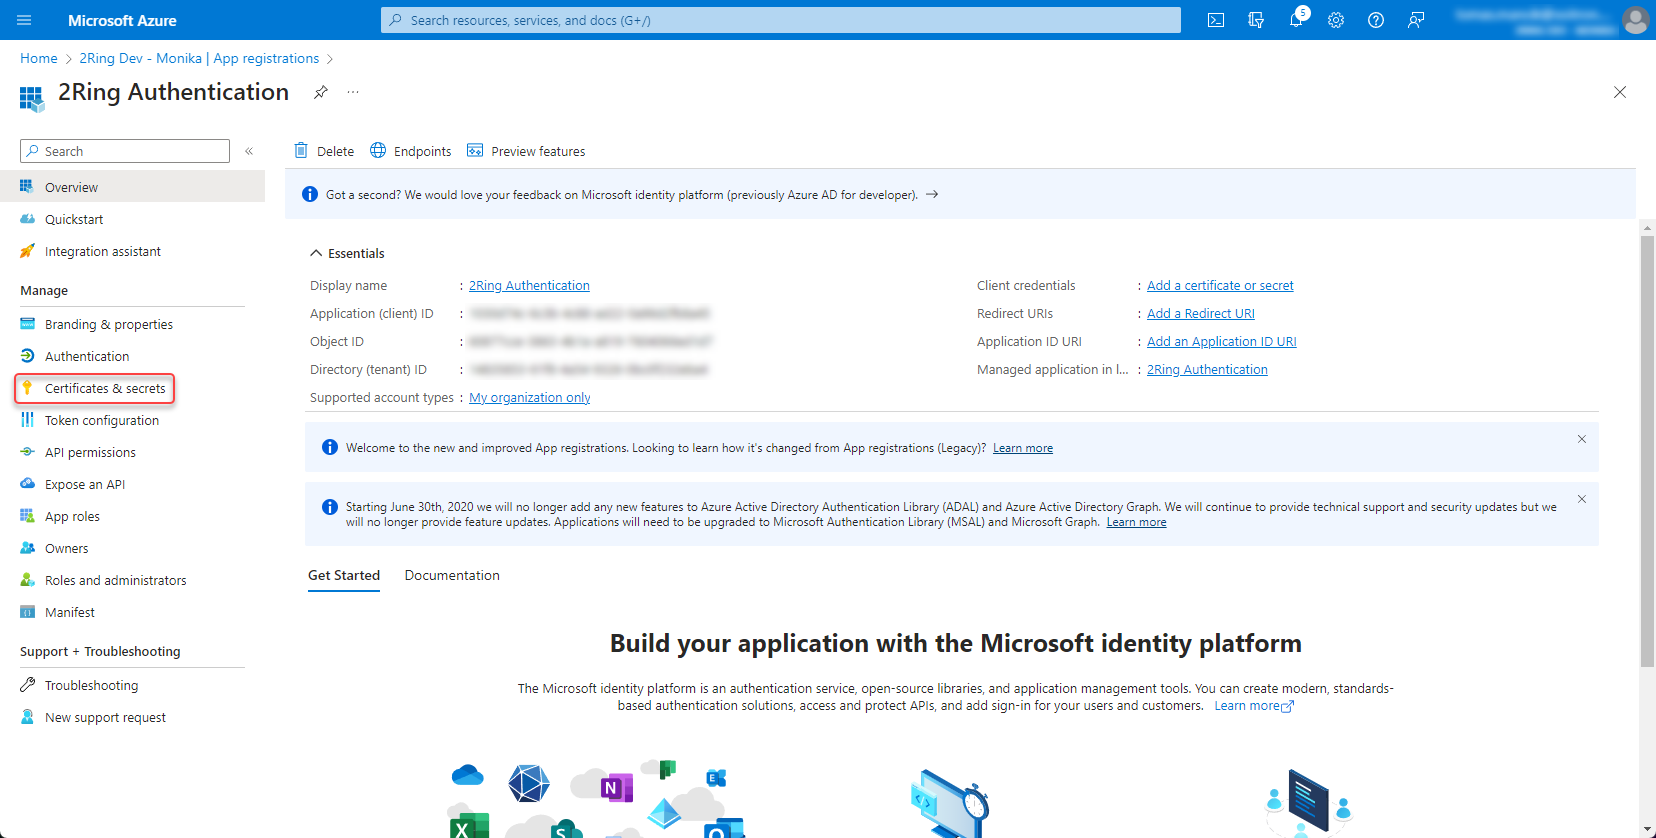
Open the app registration and go to Certificates & secrets
Figure 10: Create client secret
Create new client secret
Figure 11: Create client secret 2

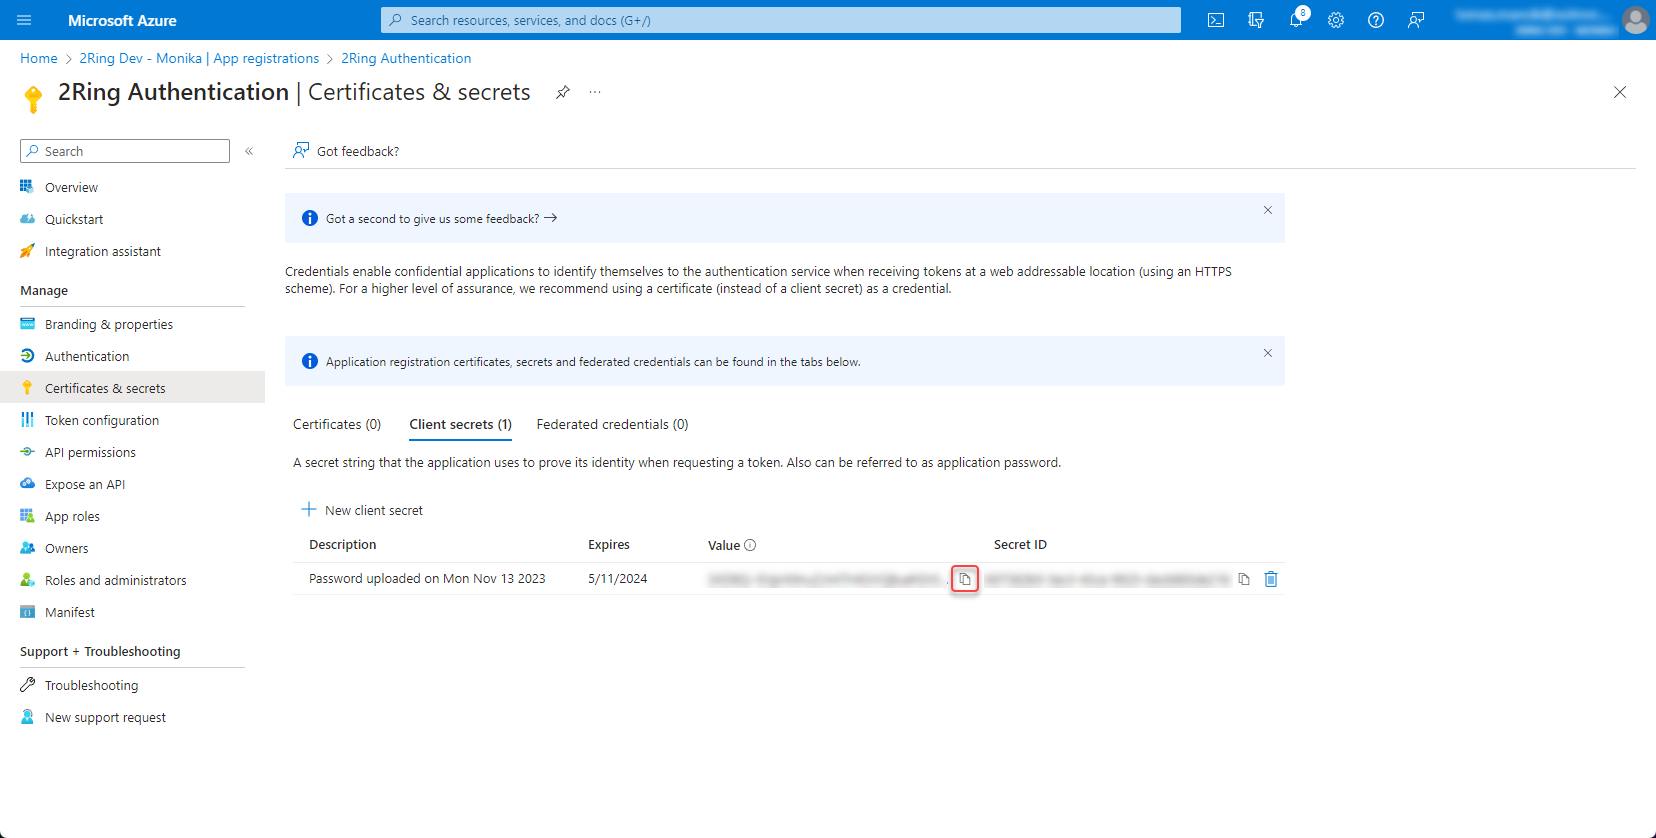
Copy and save the secret value
Figure 12: Create client secret 3
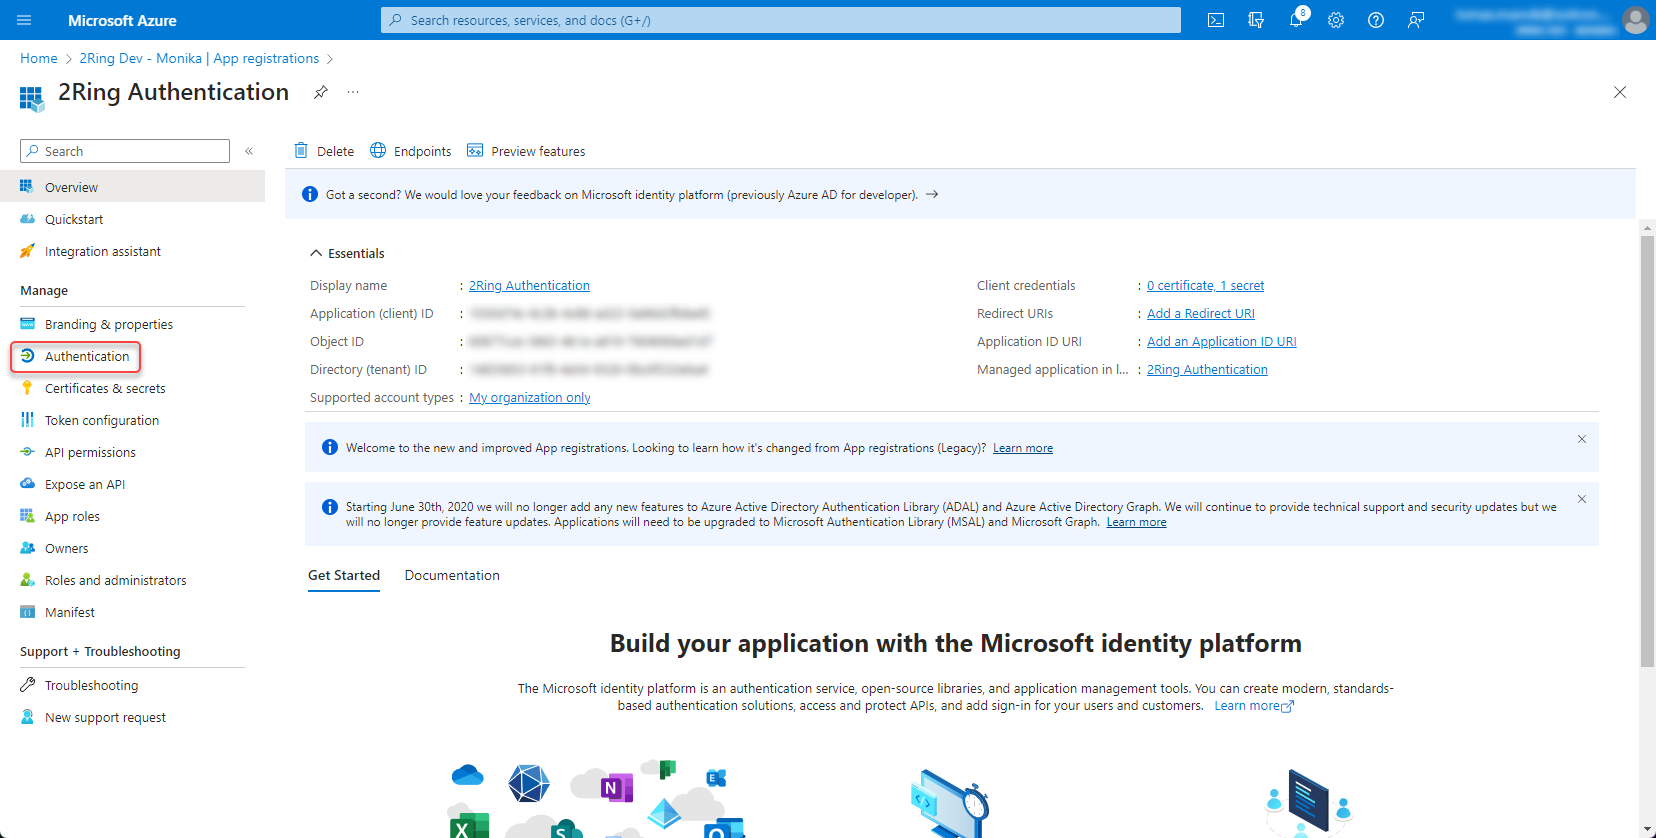
Add redirect URI
Open the app registration and go to Authentication
Figure 13: Add redirect URI
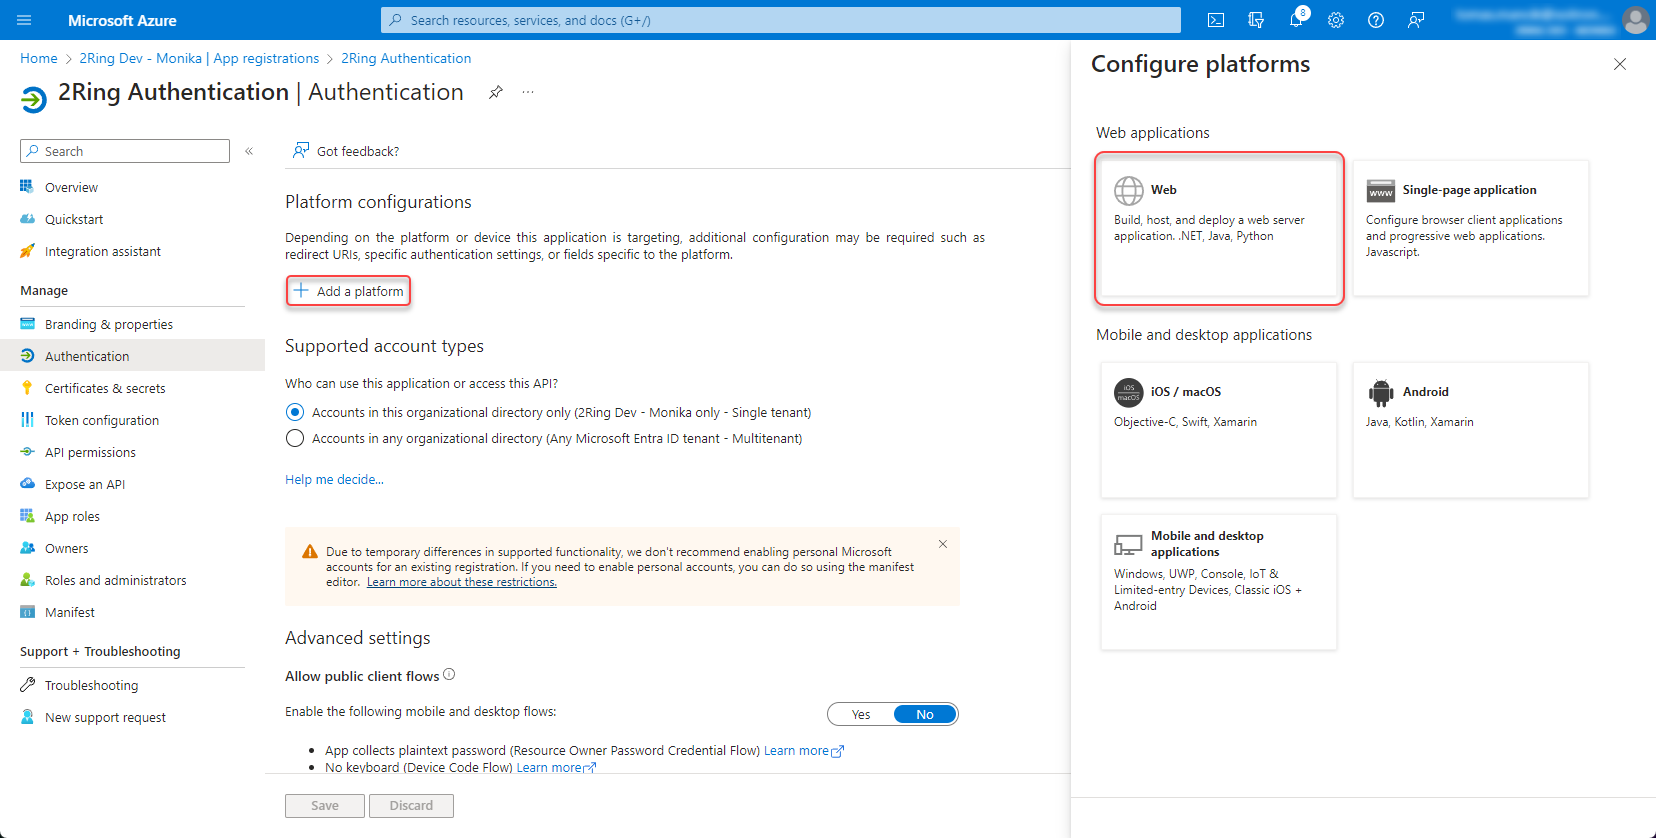
Platform configurations -> Add a platform -> Web
Figure 14: Add redirect URI 2
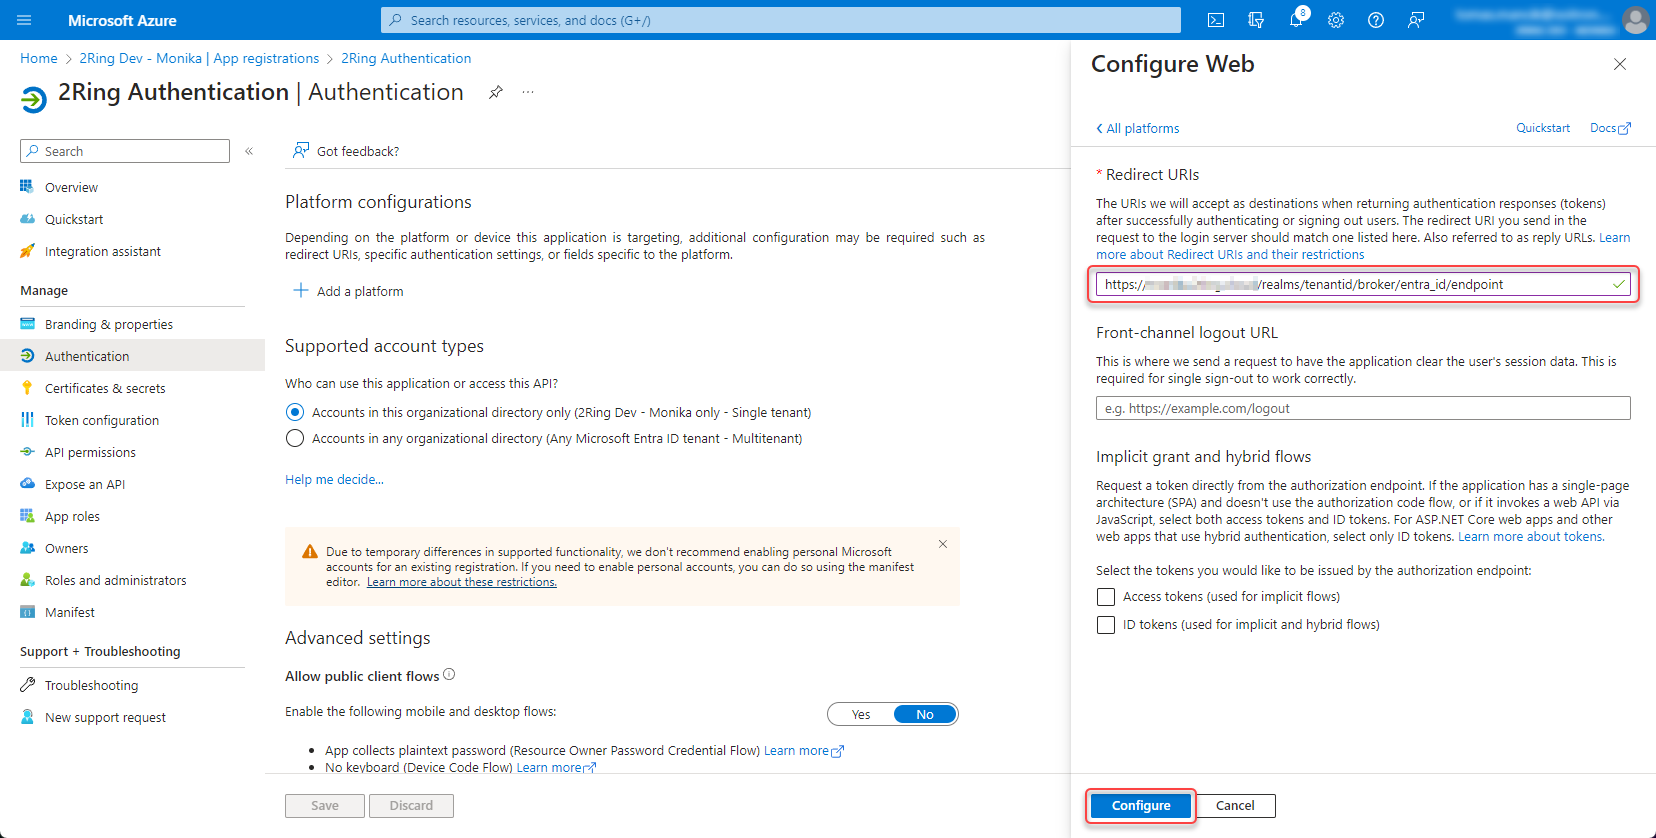
Add Web redirect URI for tenant in following format https://{tenant ID}.2ring.cloud/realms/{tenant ID}/broker/entra_id/endpoint
Figure 15: Add redirect URI 3
Contact 2Ring support and provide tenant id, client id and configured client secret.