Webex Authentication
Webex authentication enables the DW application to be connected with Webex. Users configured in Webex can then be used to access the DW application.
In order to integrate Webex with DW, two steps need to be completed:
Authorize the 2Ring Service App in the Webex Control Hub
Create an Integration App in the Webex Developer Portal
Authorize 2Ring Service App
The 2Ring Service App must be authorized in your Webex Control Hub to allow DW to communicate with Webex on behalf of your organization.
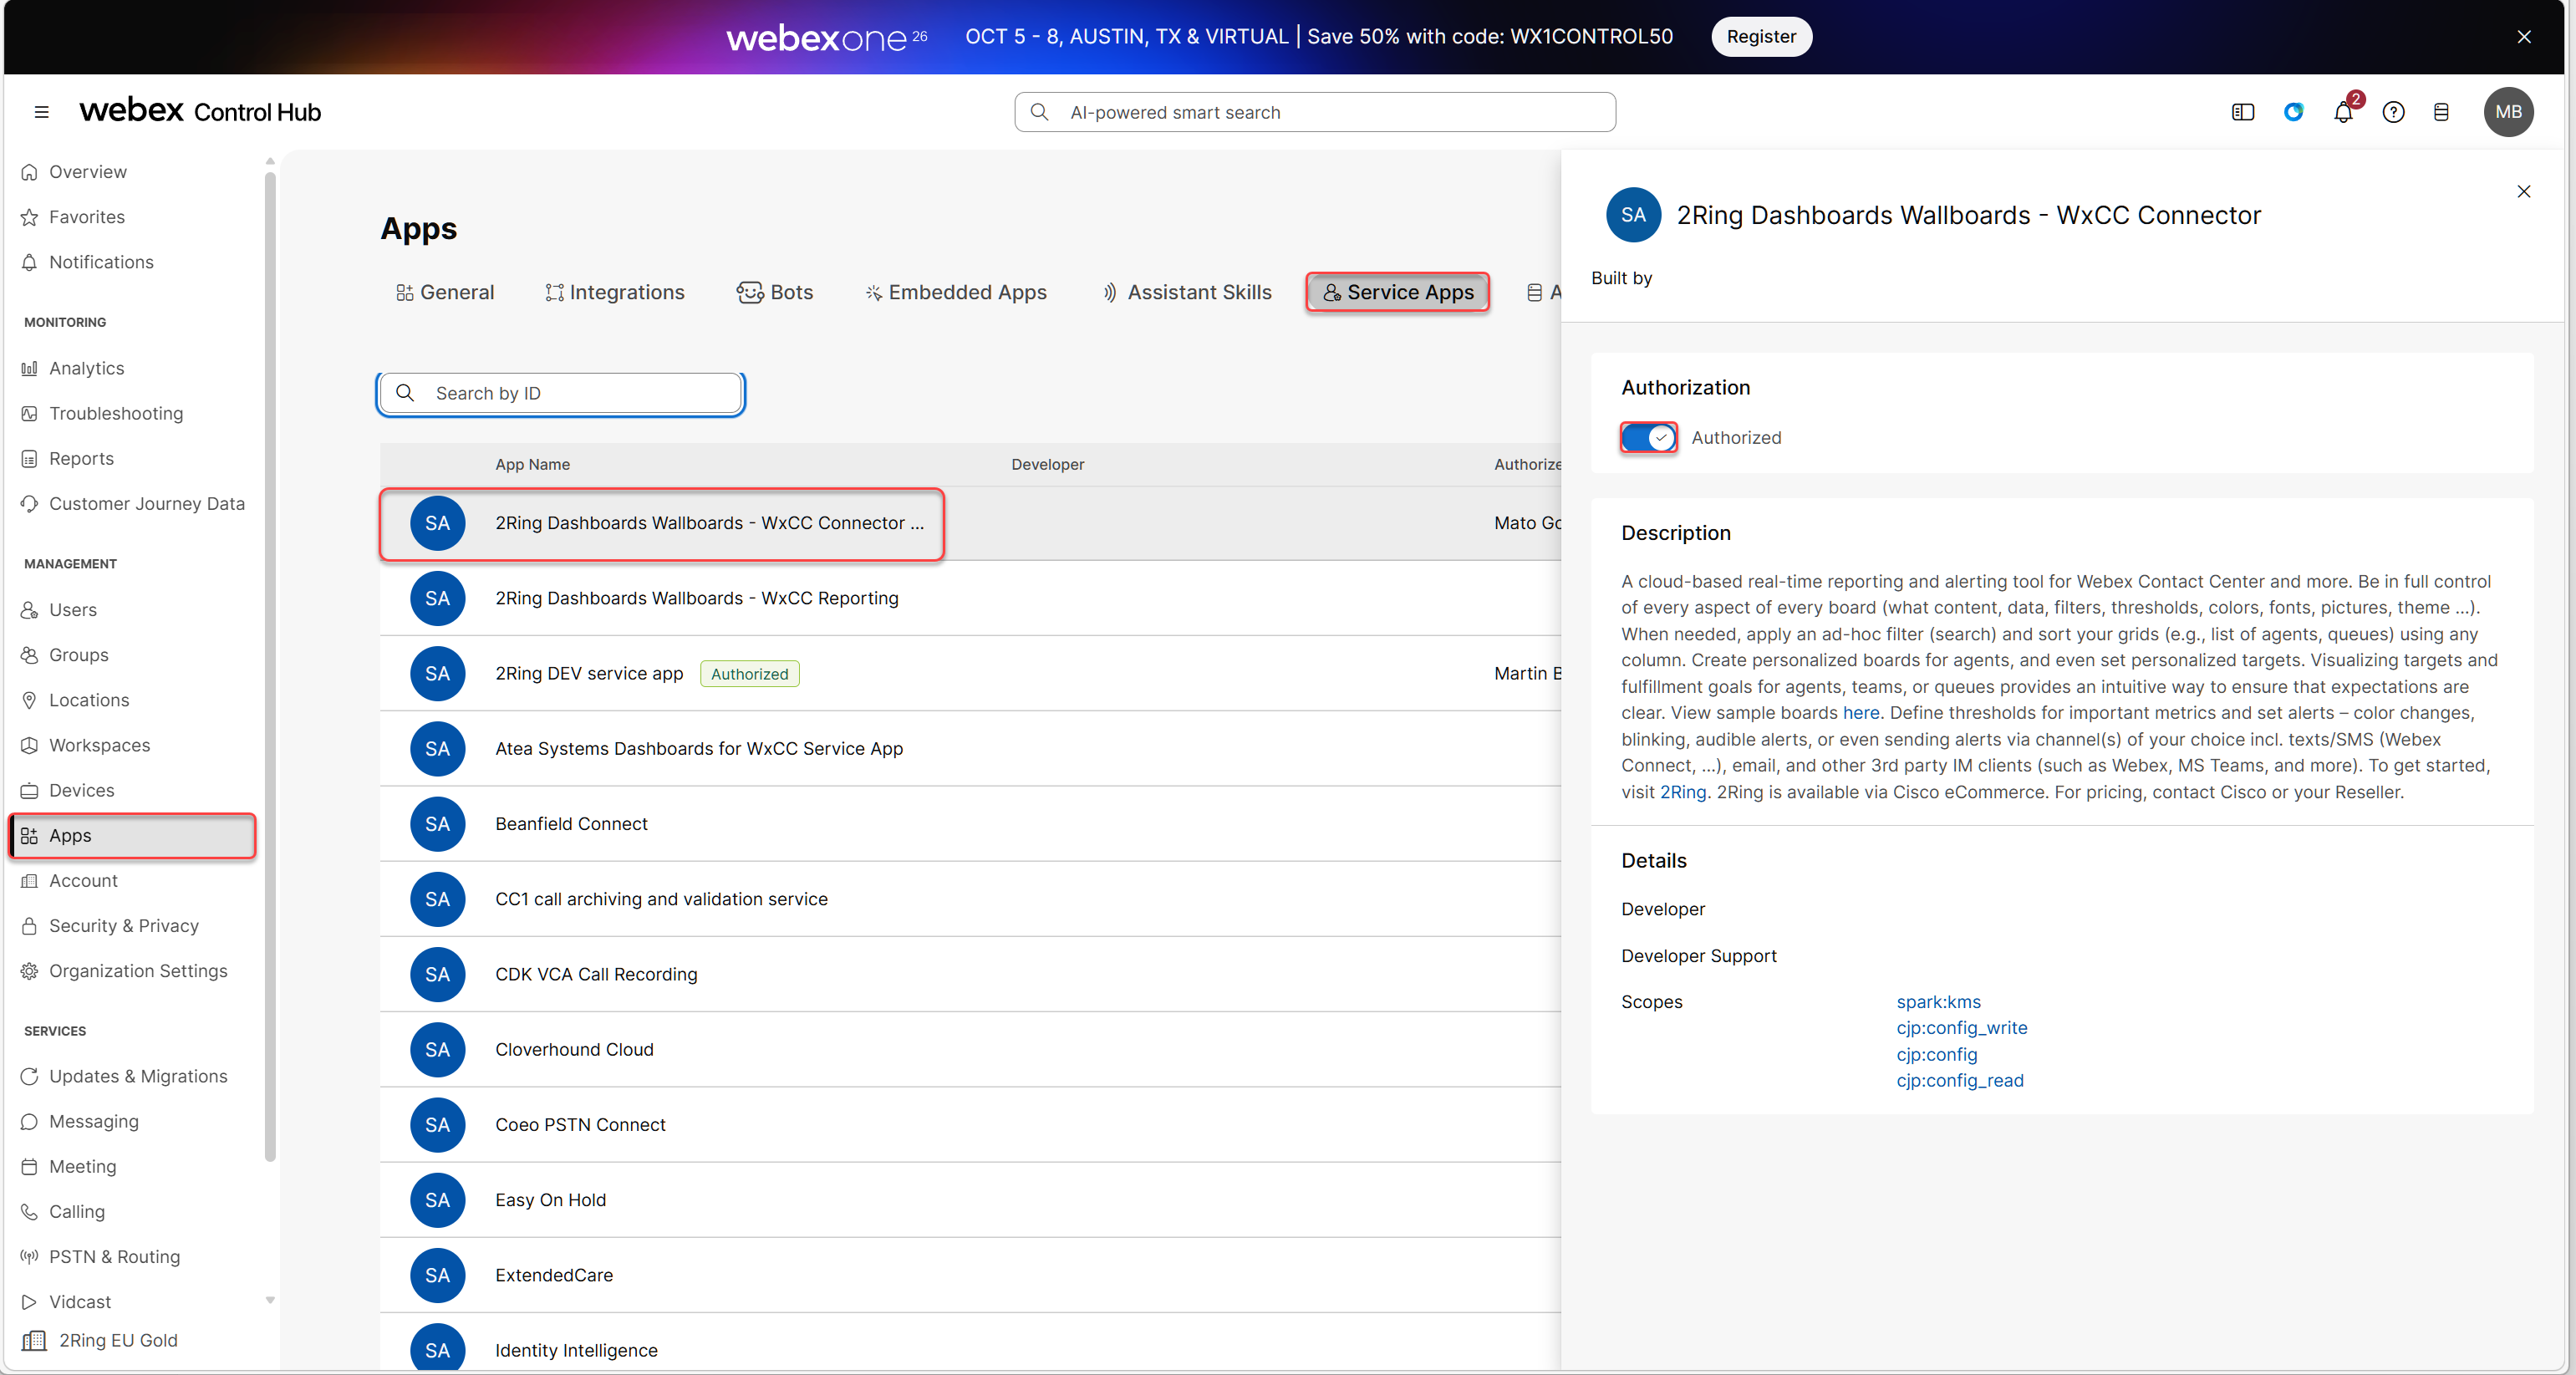
Log in to the Webex Control Hub.
In the left-hand menu, navigate to Apps, switch to the Service Apps tab, look for the 2Ring Dashboards Wallboards - WxCC Connector application and authorize it.
Y2lzY29zcGFyazovL3VzL0FQUExJQ0FUSU9OL0M5ZDI2YjljODQ1NGE5ZTgwY2NjYjExYmIxYWMyYTEzNzE0ZmJiODBhYTU5NzVmODEwMjdjMDBmZGE4MGQwYjIy via the searchbar.
Create an Integration App
An Integration App must be created in the Webex Developer Portal to provide the necessary credentials for authentication.
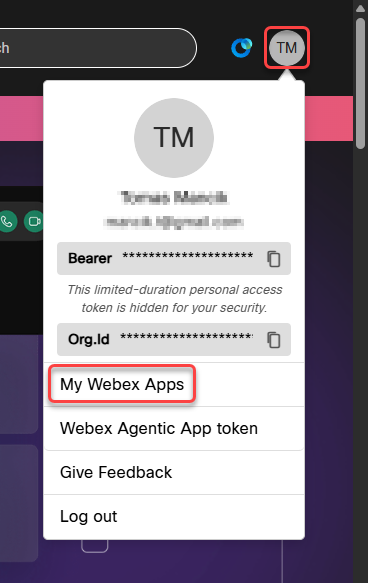
Log in to the Webex Developer Portal.
Click on the initials icon in the top-right corner and select My Webex Apps from the dropdown menu.
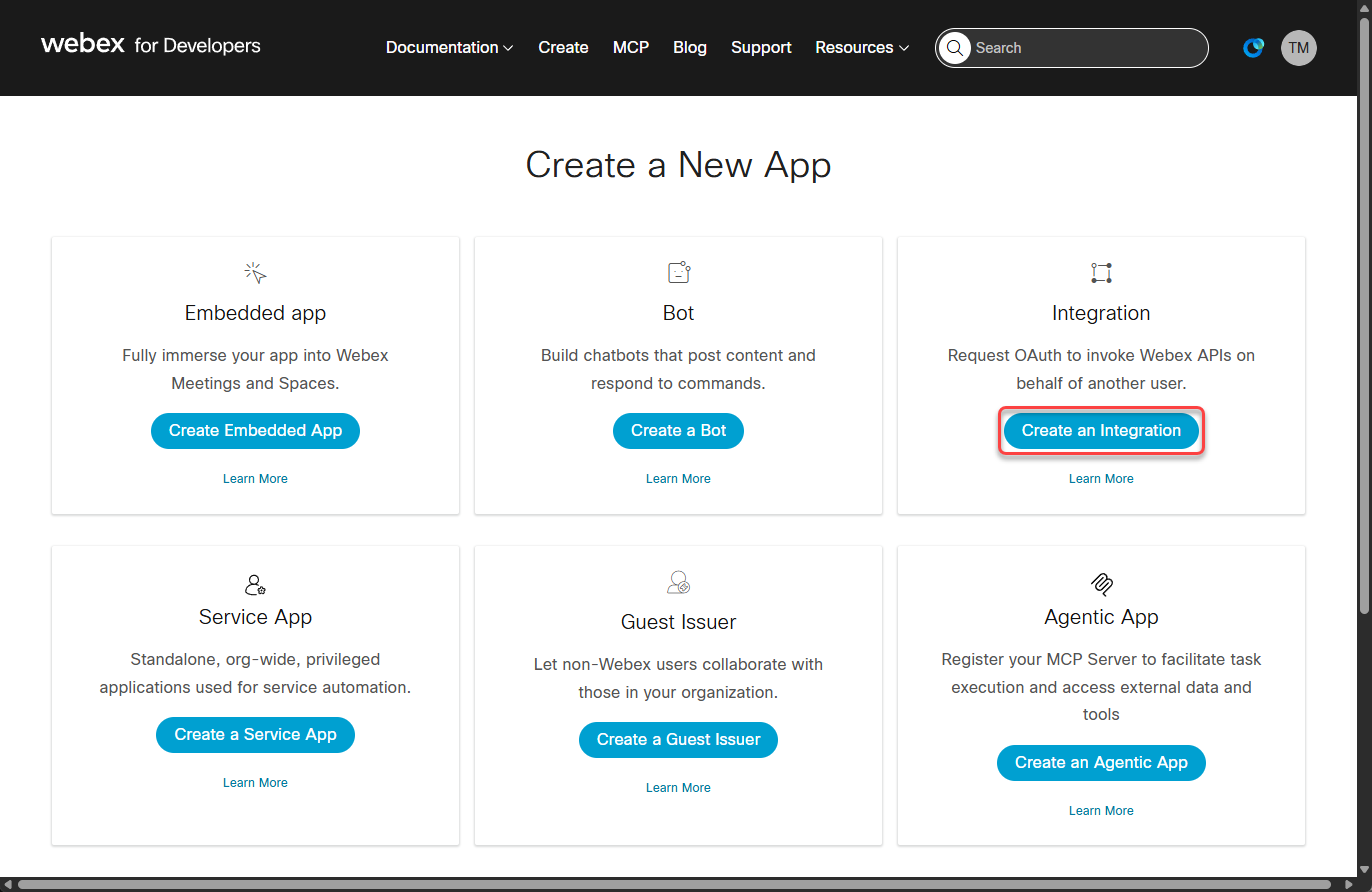
Click on the Create an integration button.
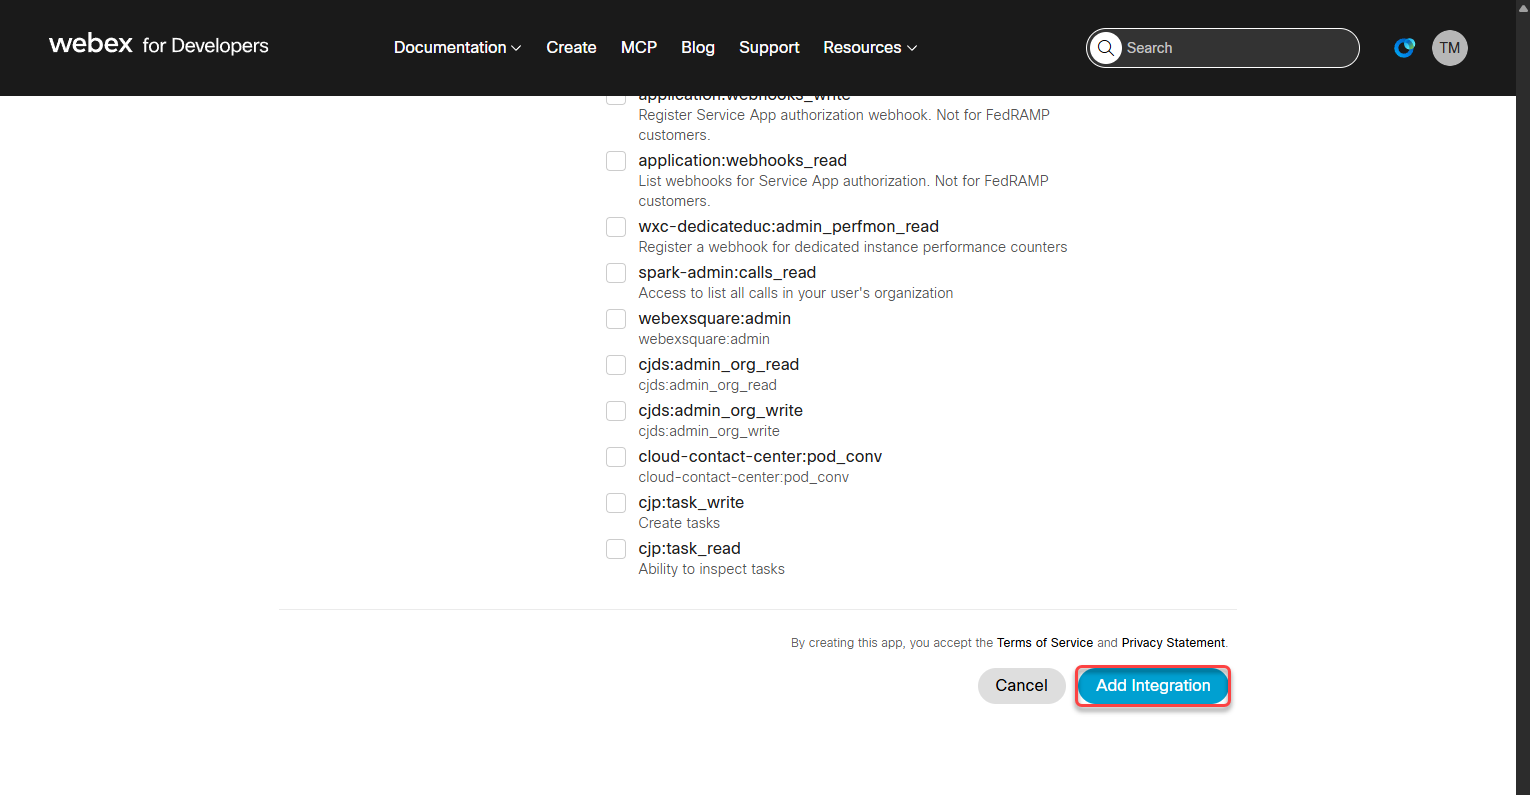
Fill in the required fields:
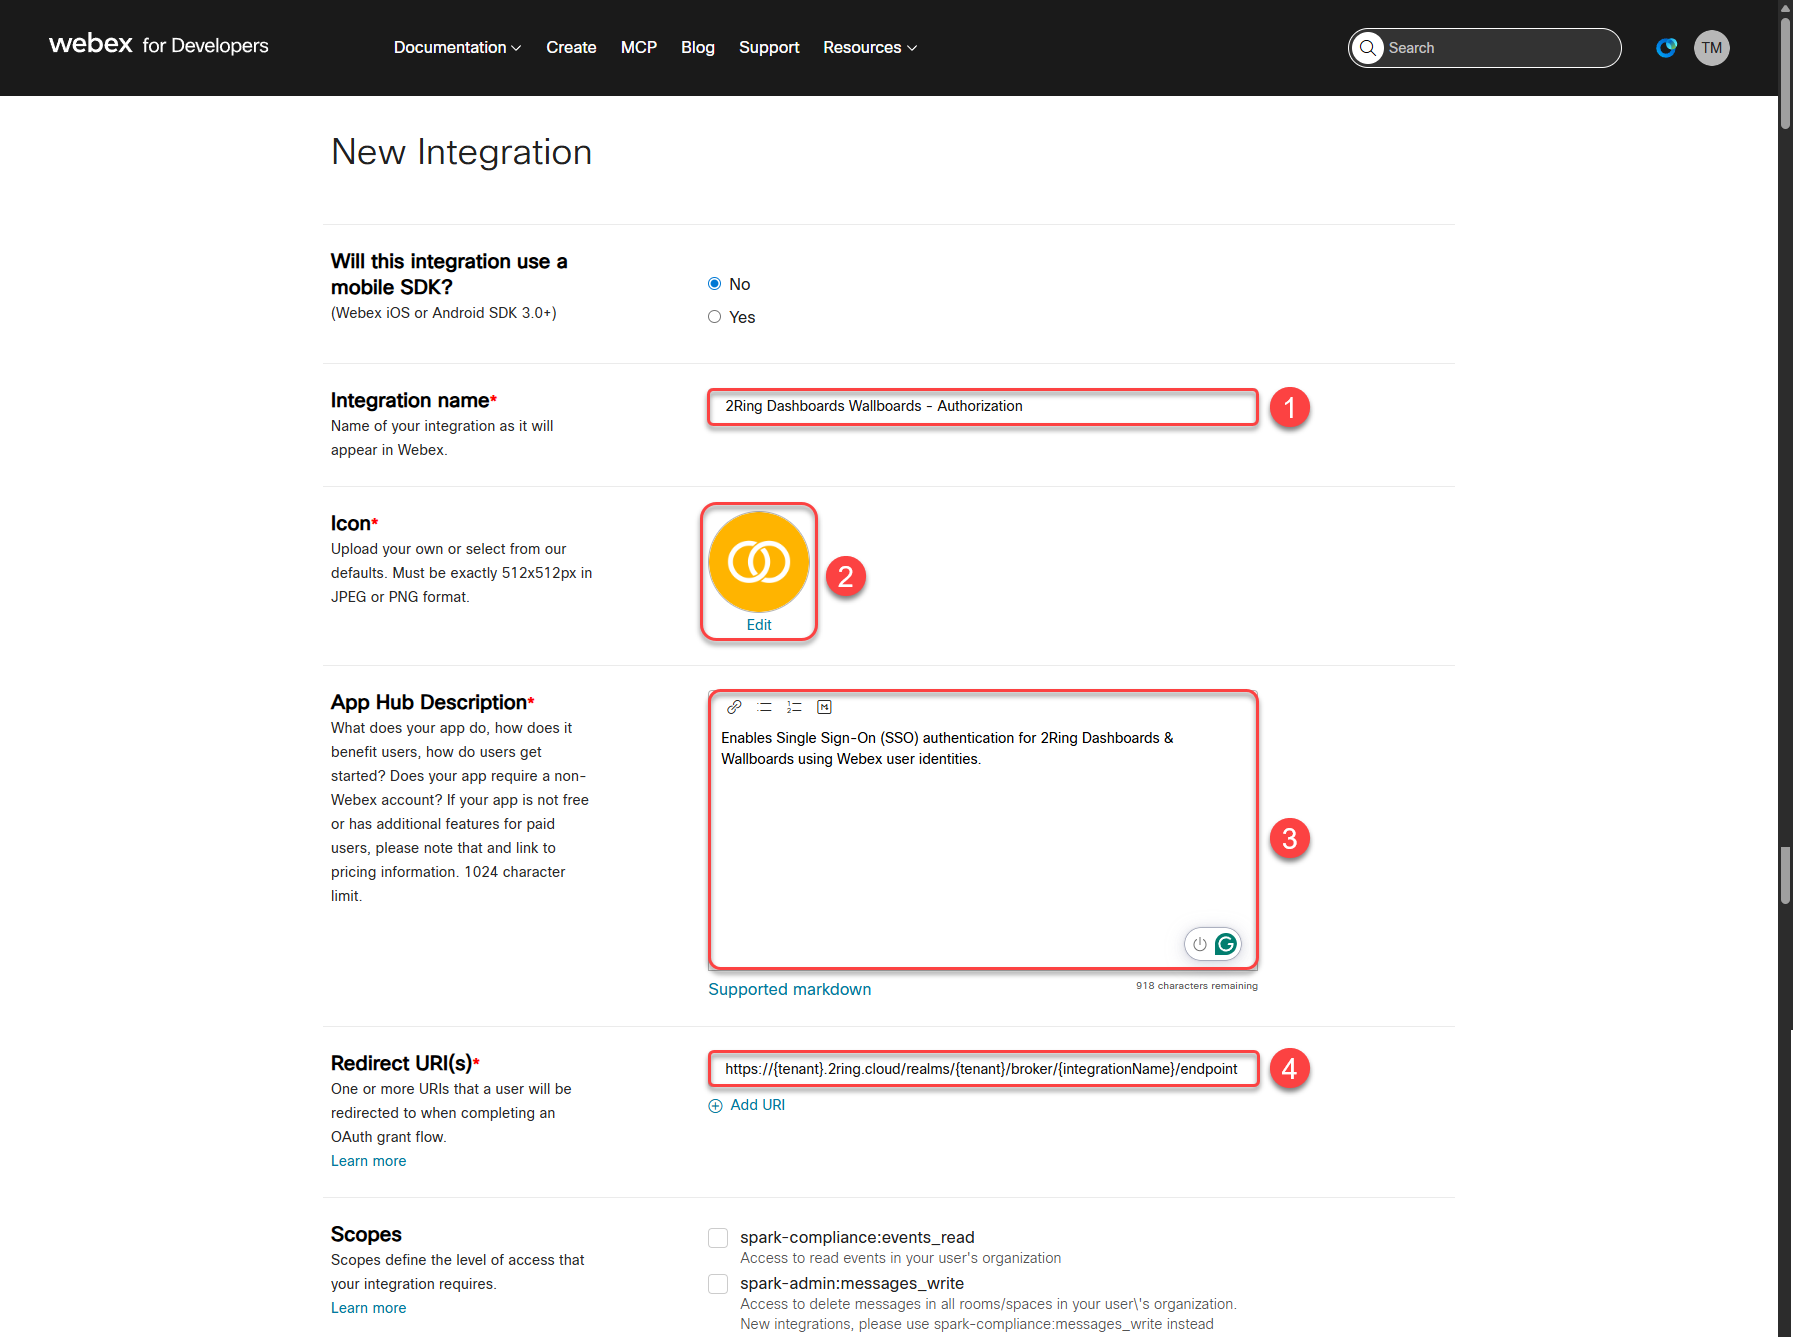
Integration Name: Enter a name for your integration (e.g., “2Ring Dashboards Wallboards - Authentication”).
Icon: Upload, or choose an icon that represents your integration.
App Hub Description: Provide a description for your integration (e.g., “Enables Single Sign-On (SSO) authentication for 2Ring Dashboards & Wallboards using Webex user identities”).
Redirect URI(s): Enter the redirect URIs in following format:
https://{tenant}.2ring.cloud/realms/{tenant}/broker/{ssoIntegrationName}/endpoint{tenant} should be replaced with your tenant name
{ssoIntegrationName} should be replaced with the name you want to use for the SSO integration in DW (e.g., “webex-sso”). This value can be any name of your choosing.
There is no need to specify any scopes. The integration name used here must be provided to 2Ring support. An SSO integration with the same name will be created in DW as part of the setup process.
After filling in the details, scroll down and click the Add Integration button.
Once the integration is created, you will be provided with a Client ID and Client Secret. Copy these credentials, as you will need to provide them to 2Ring support later in the configuration process.

Provide Credentials to 2Ring Support
Once the integration is created, contact 2Ring support and provide the following information:
SSO Integration Name — The value you chose for the {ssoIntegrationName} placeholder in the Redirect URI. This can be any name of your choosing (e.g., “webex-sso”, “my-org-webex”) and will be used to create a matching SSO integration in DW.
Client ID — The Client ID generated after creating the integration.
Client Secret — The Client Secret generated after creating the integration.